Outseta allows you to use Stripe Tax to automatically collect tax from customers no matter where you sell your products and services. Follow the steps below to setup Stripe Tax.
Set up your tax settings in Stripe
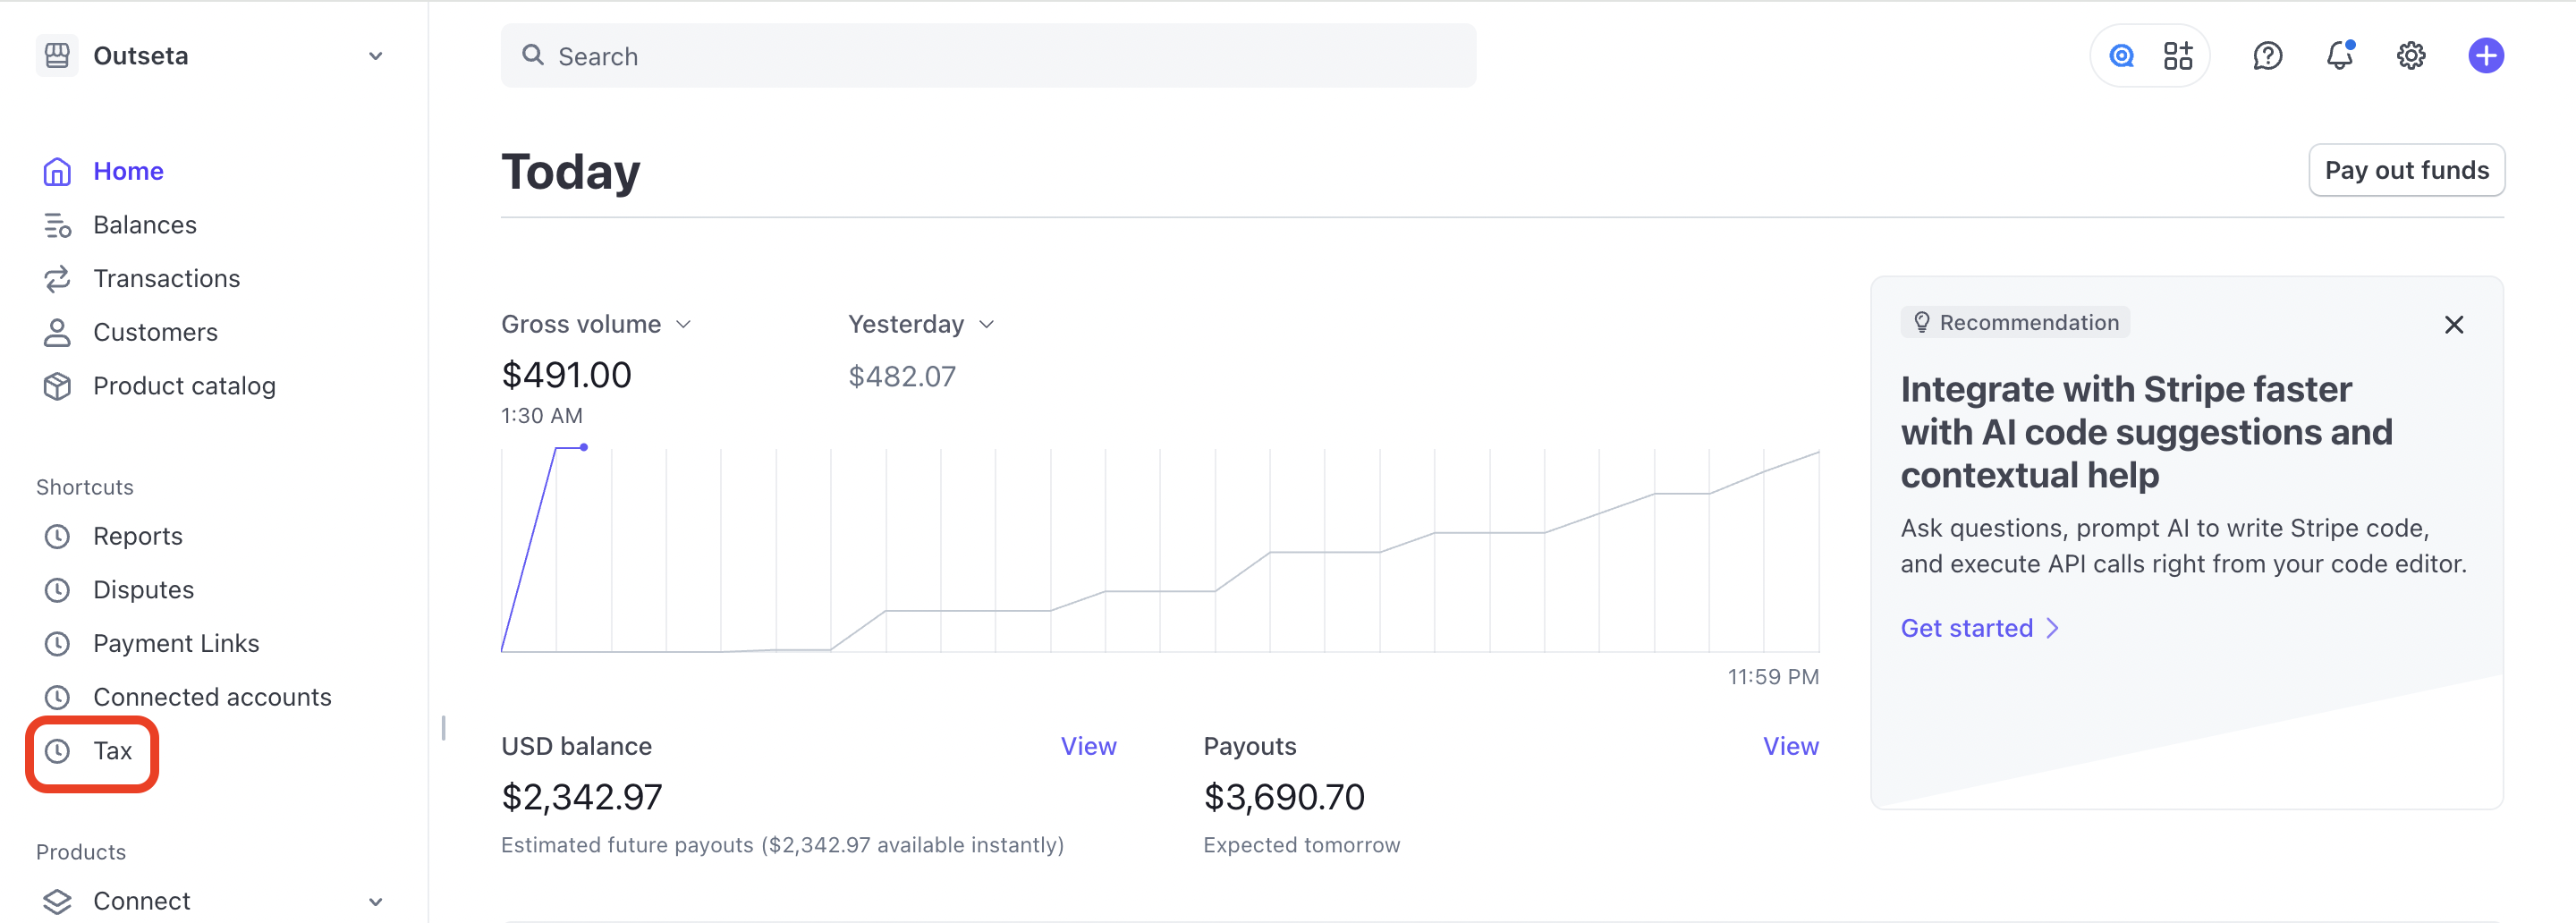
1. Login to your Stripe account and select TAX.
2. Start working through the checklist of items that Stripe provides to start setting up tax—you can always return to this list via this URL: https://dashboard.stripe.com/tax/setup

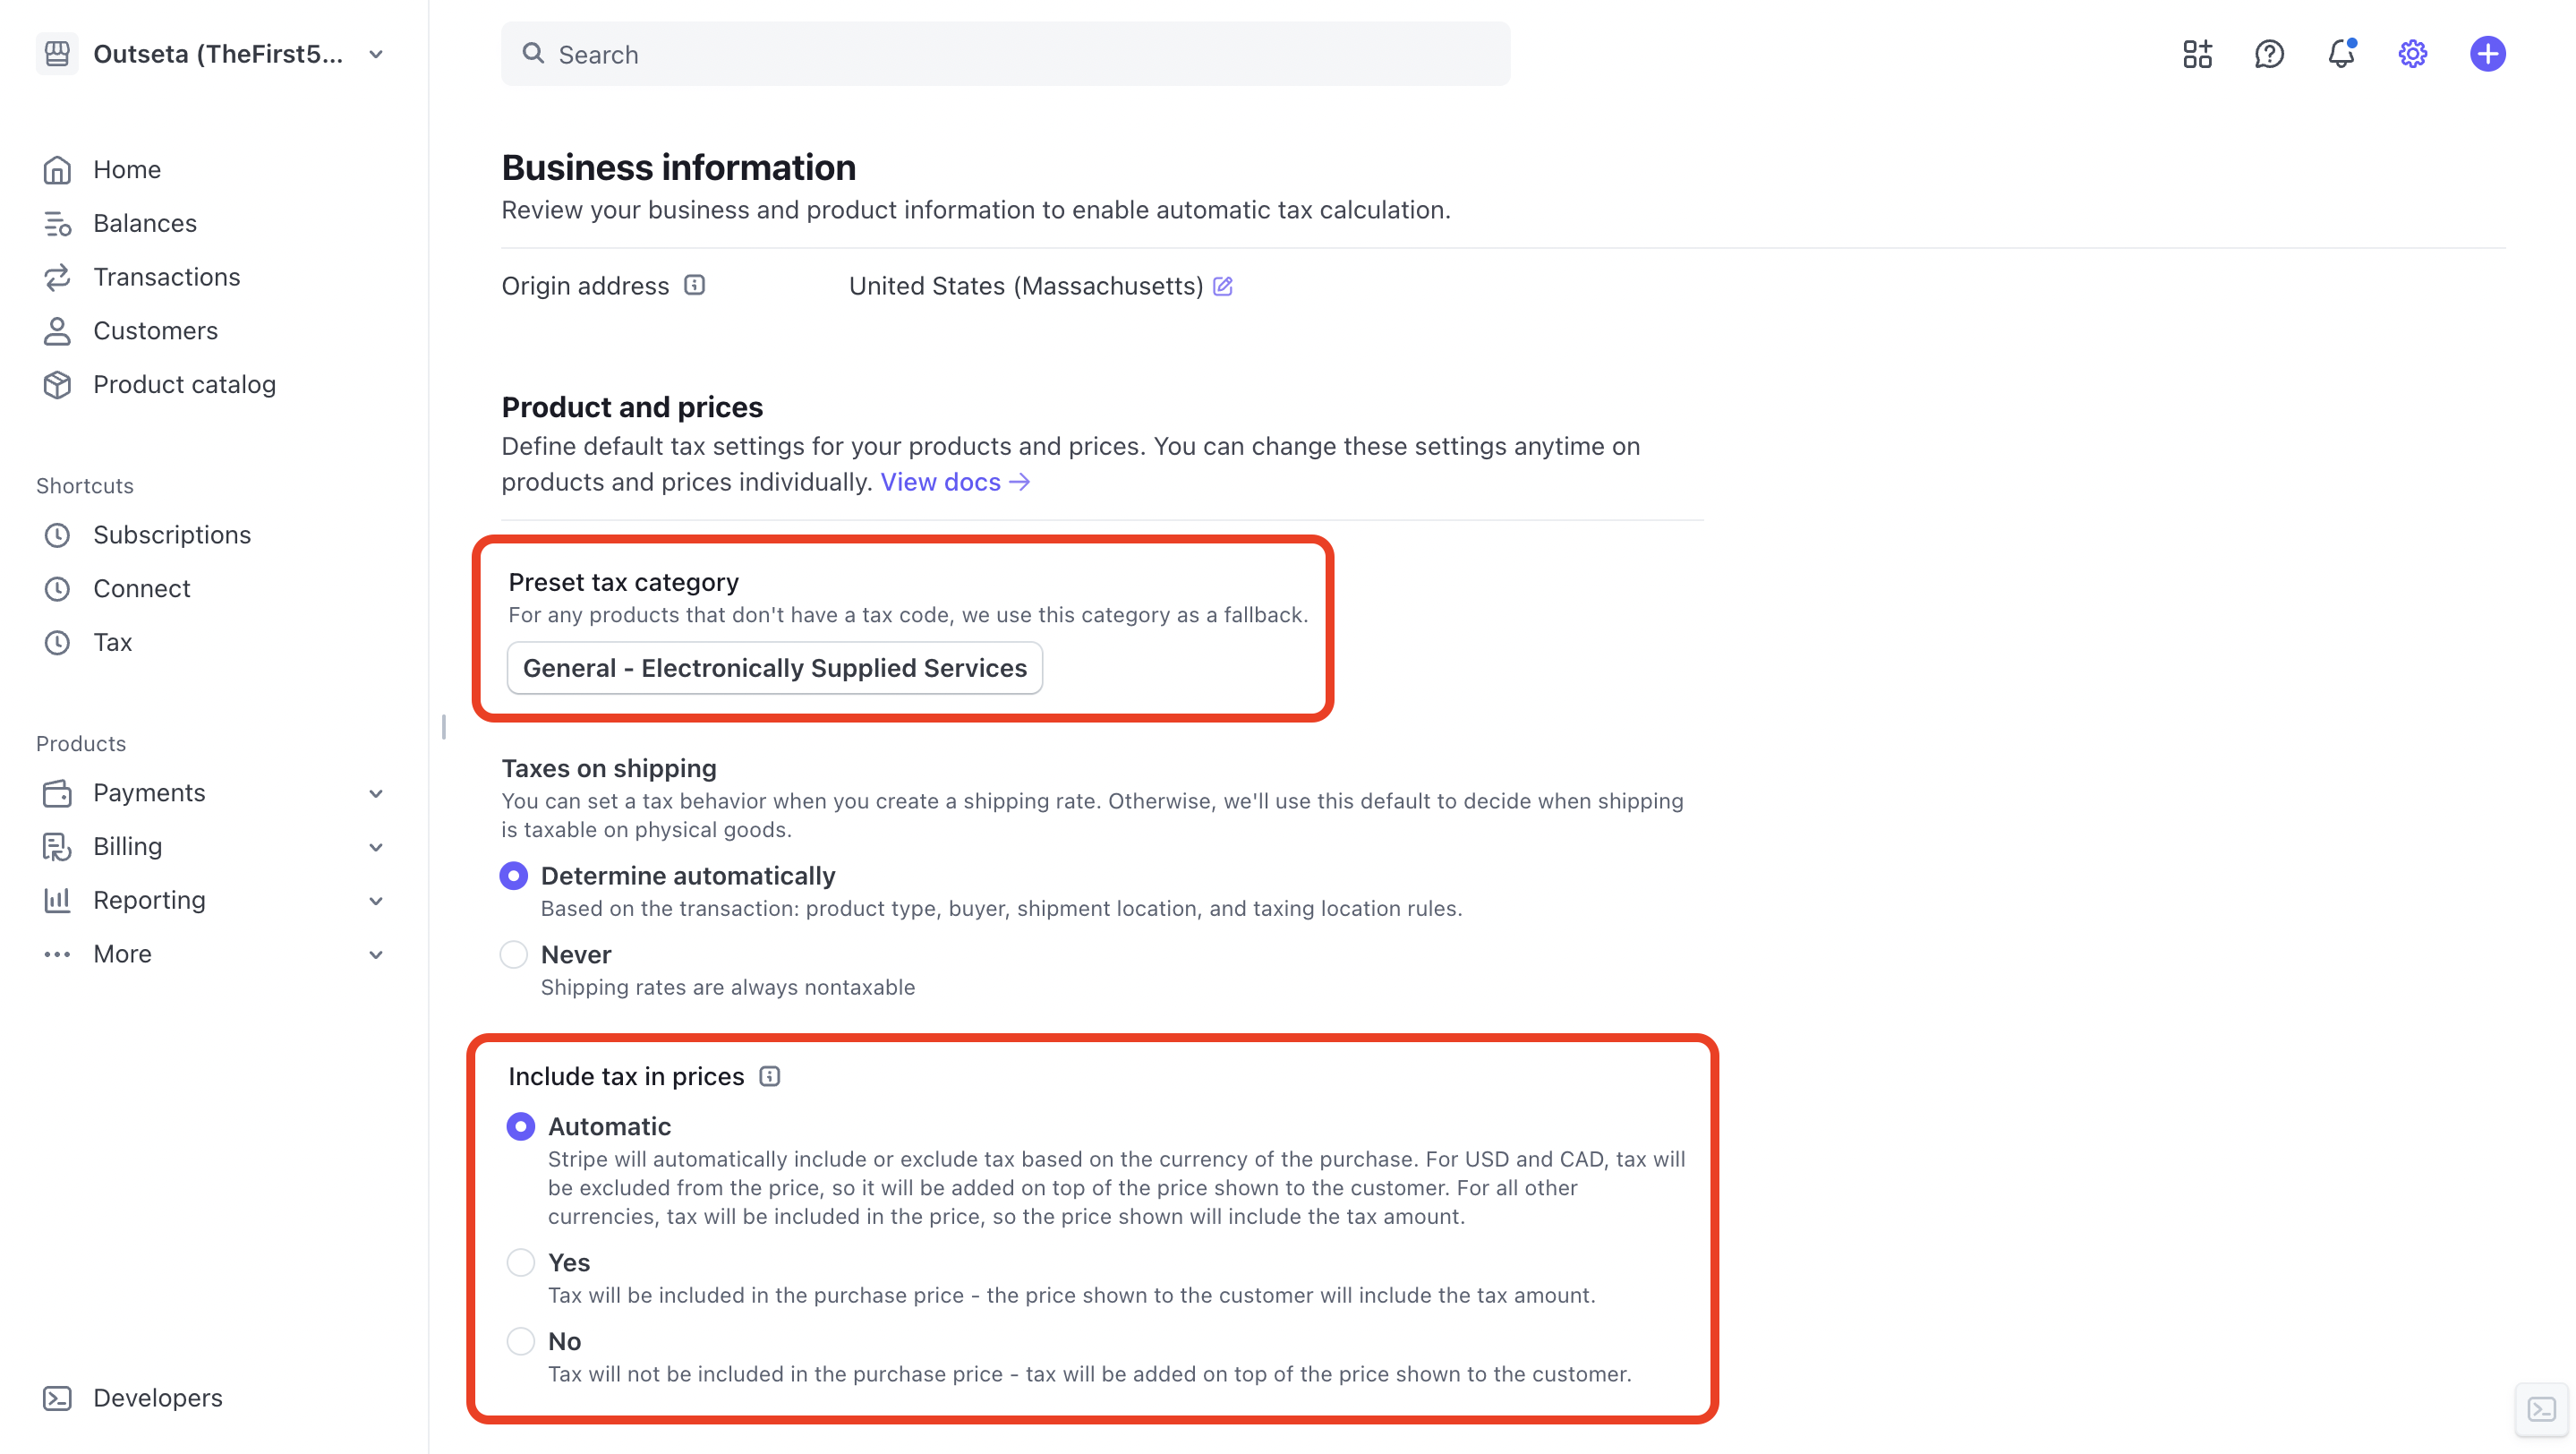
These settings can also be access anytime via the TAX SETTINGS page within Stripe:
https://dashboard.stripe.com/settings/tax
- Include an Origin Address—this is generally where your business is located or incorporated.
- Set a Default Product Tax Category—this identifies what type or product or service you are selling. You can override this setting when setting up specific products in Outseta—if you don't specify a different product tax category this is the default category that Stripe will assume. For most Outseta customers, we recommend using the General - Electronically Supplied Services category.
- Choose whether you want to Include tax in prices. We recommend using the "Automatic" option here, which uses the currency set in your account to determine if taxes are charged inclusive or exclusive of your product's price.
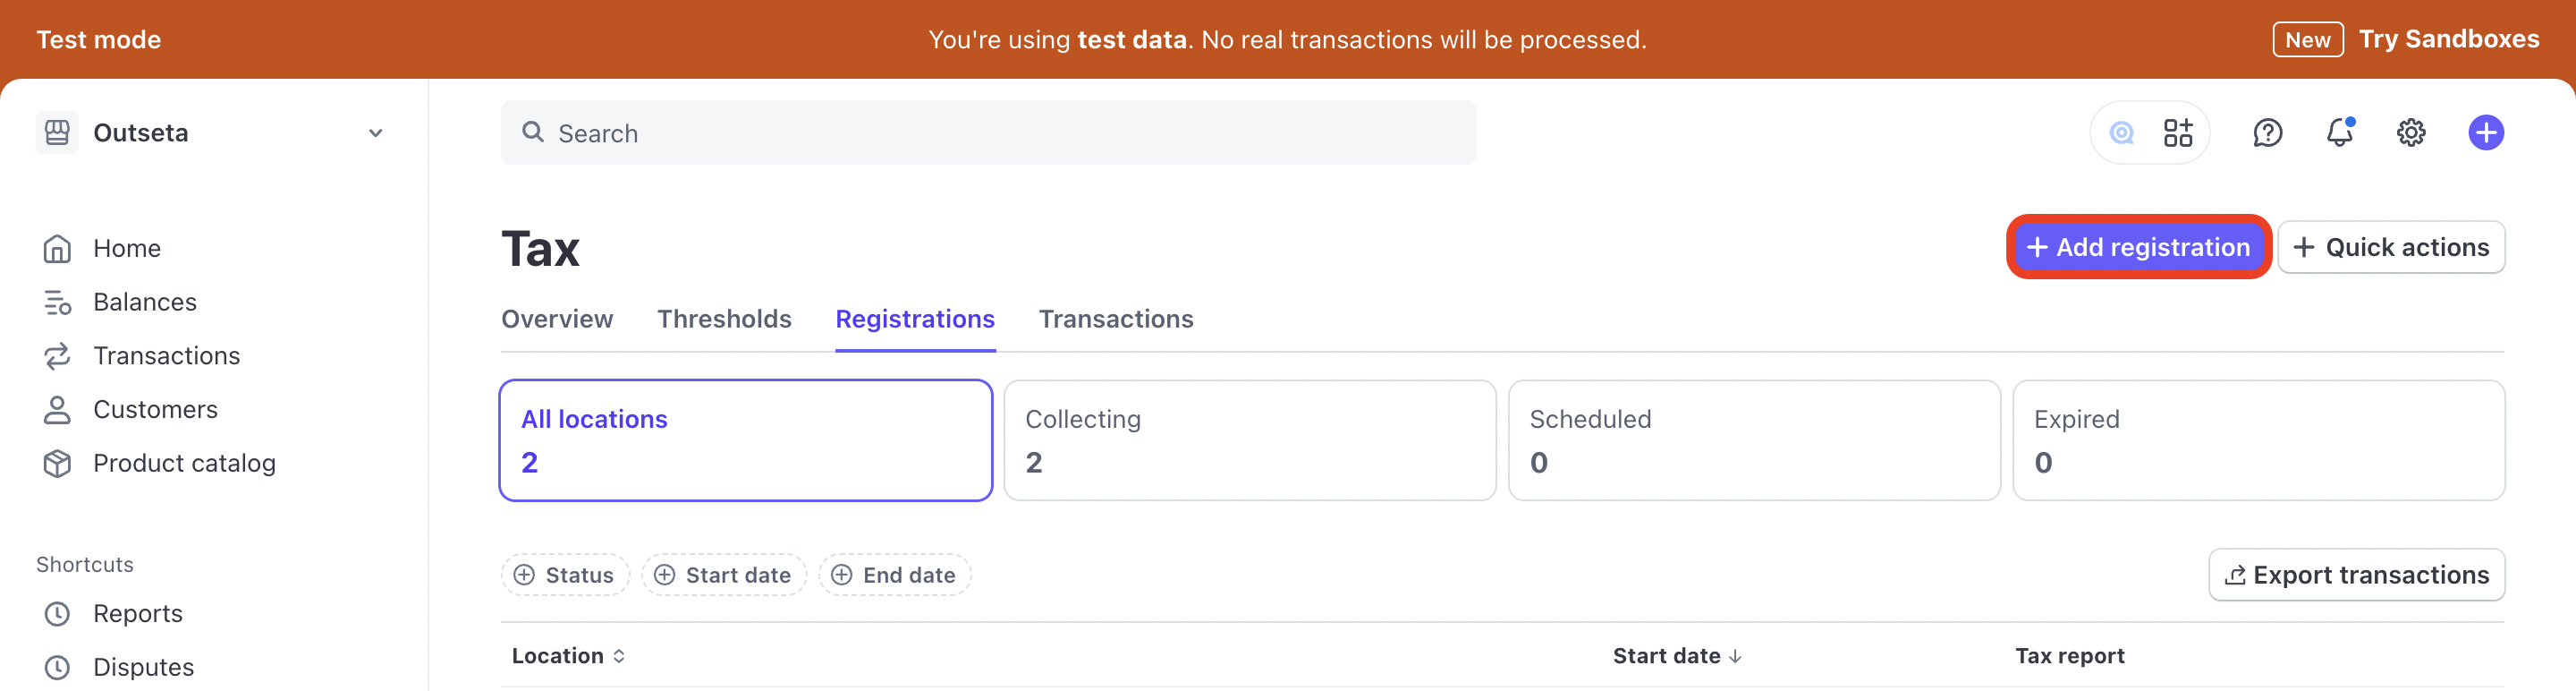
3. Next, click on REGISTRATIONS. On this page you'll create registrations for any geographies where you want to collect tax. Click ADD REGISTRATION.
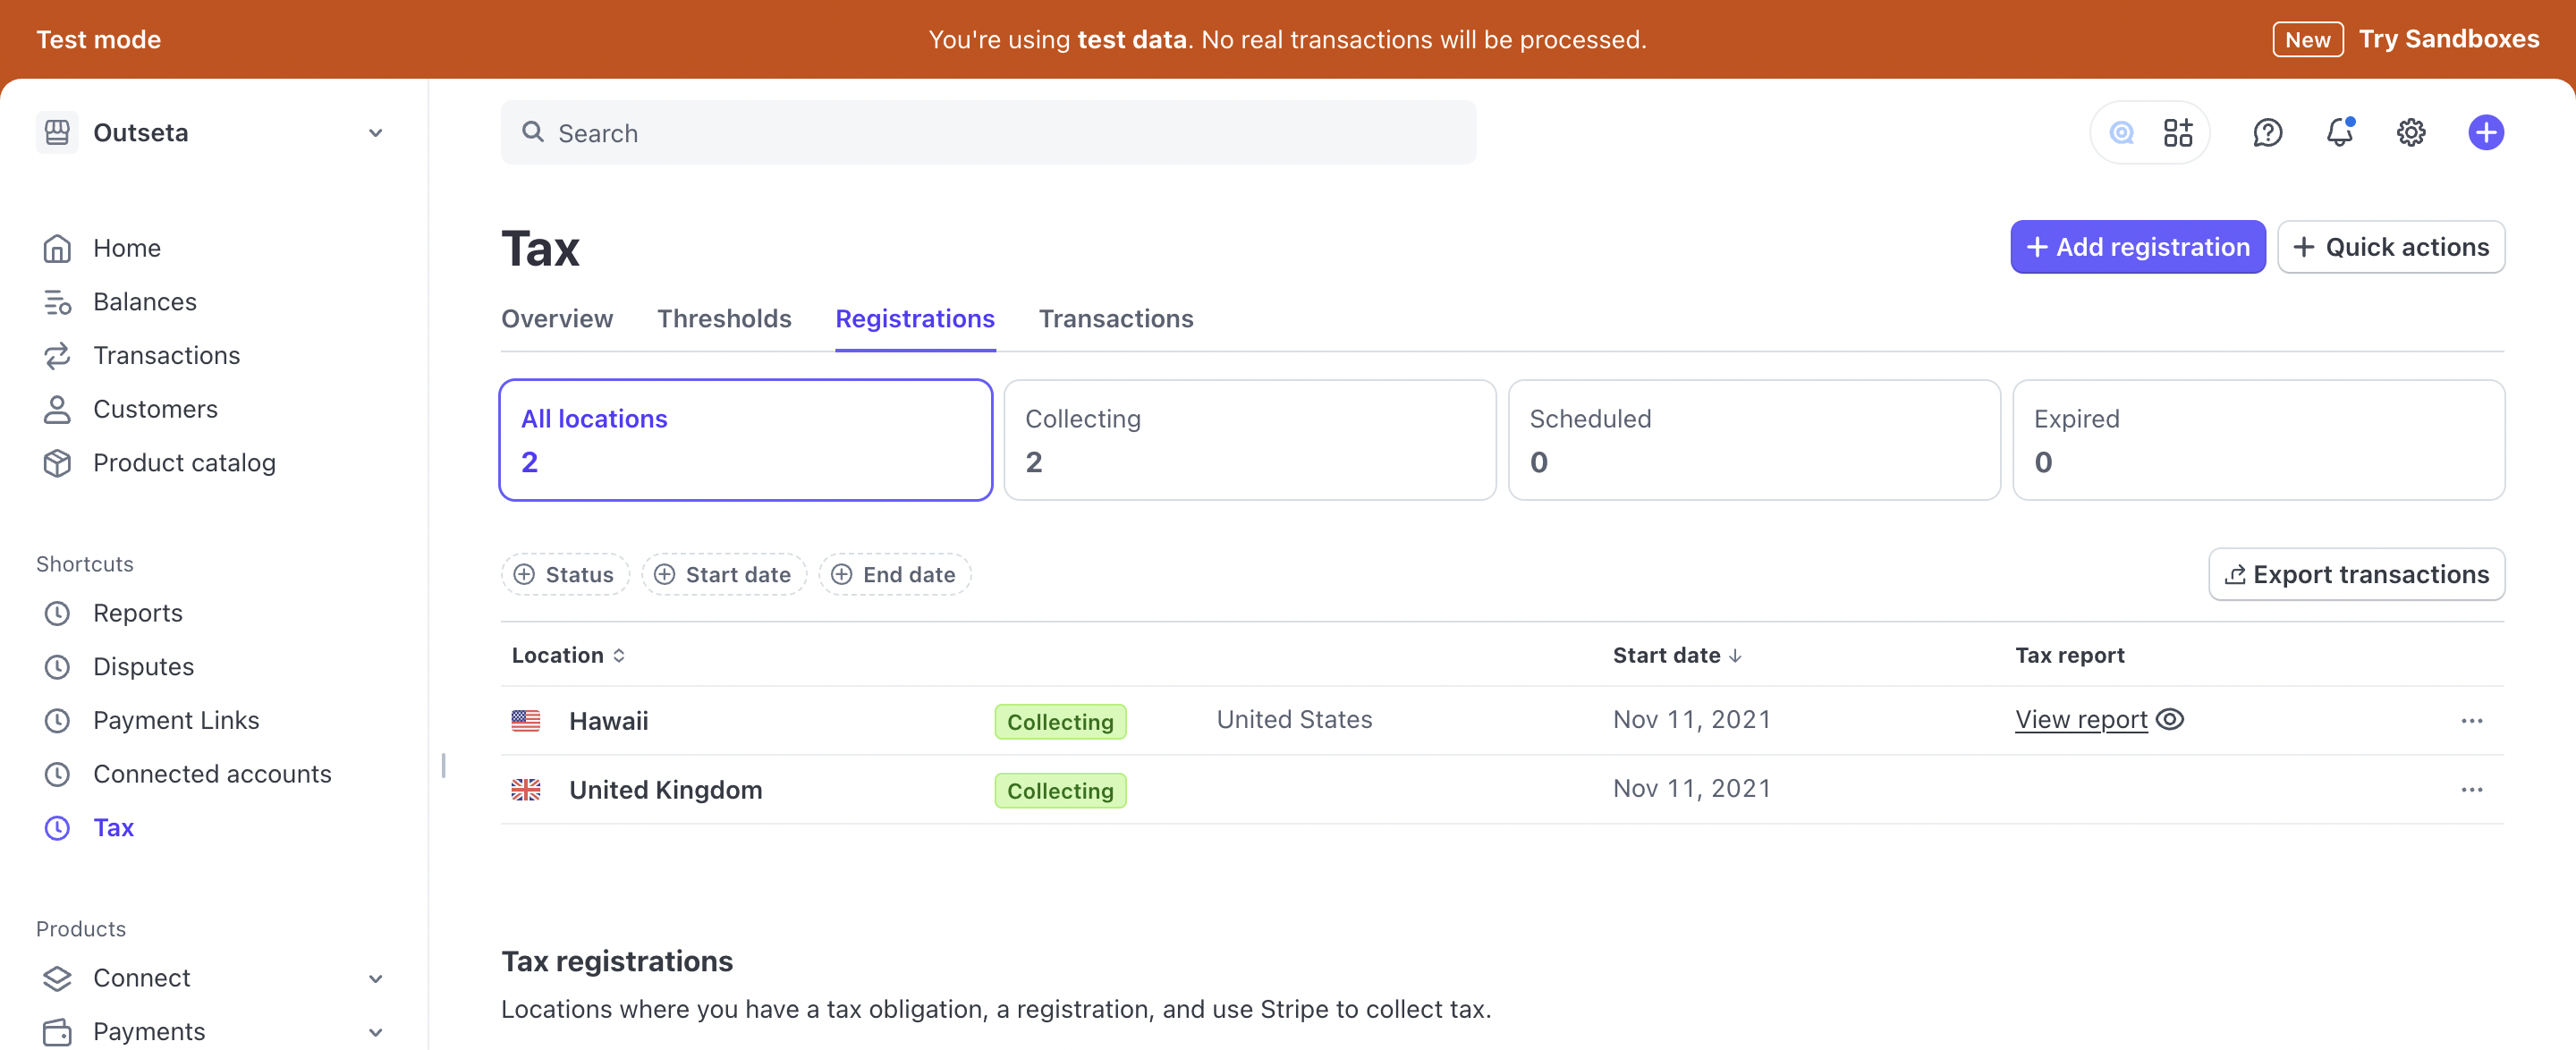
In this example I've included registrations for the state of Hawaii and the United Kingdom.
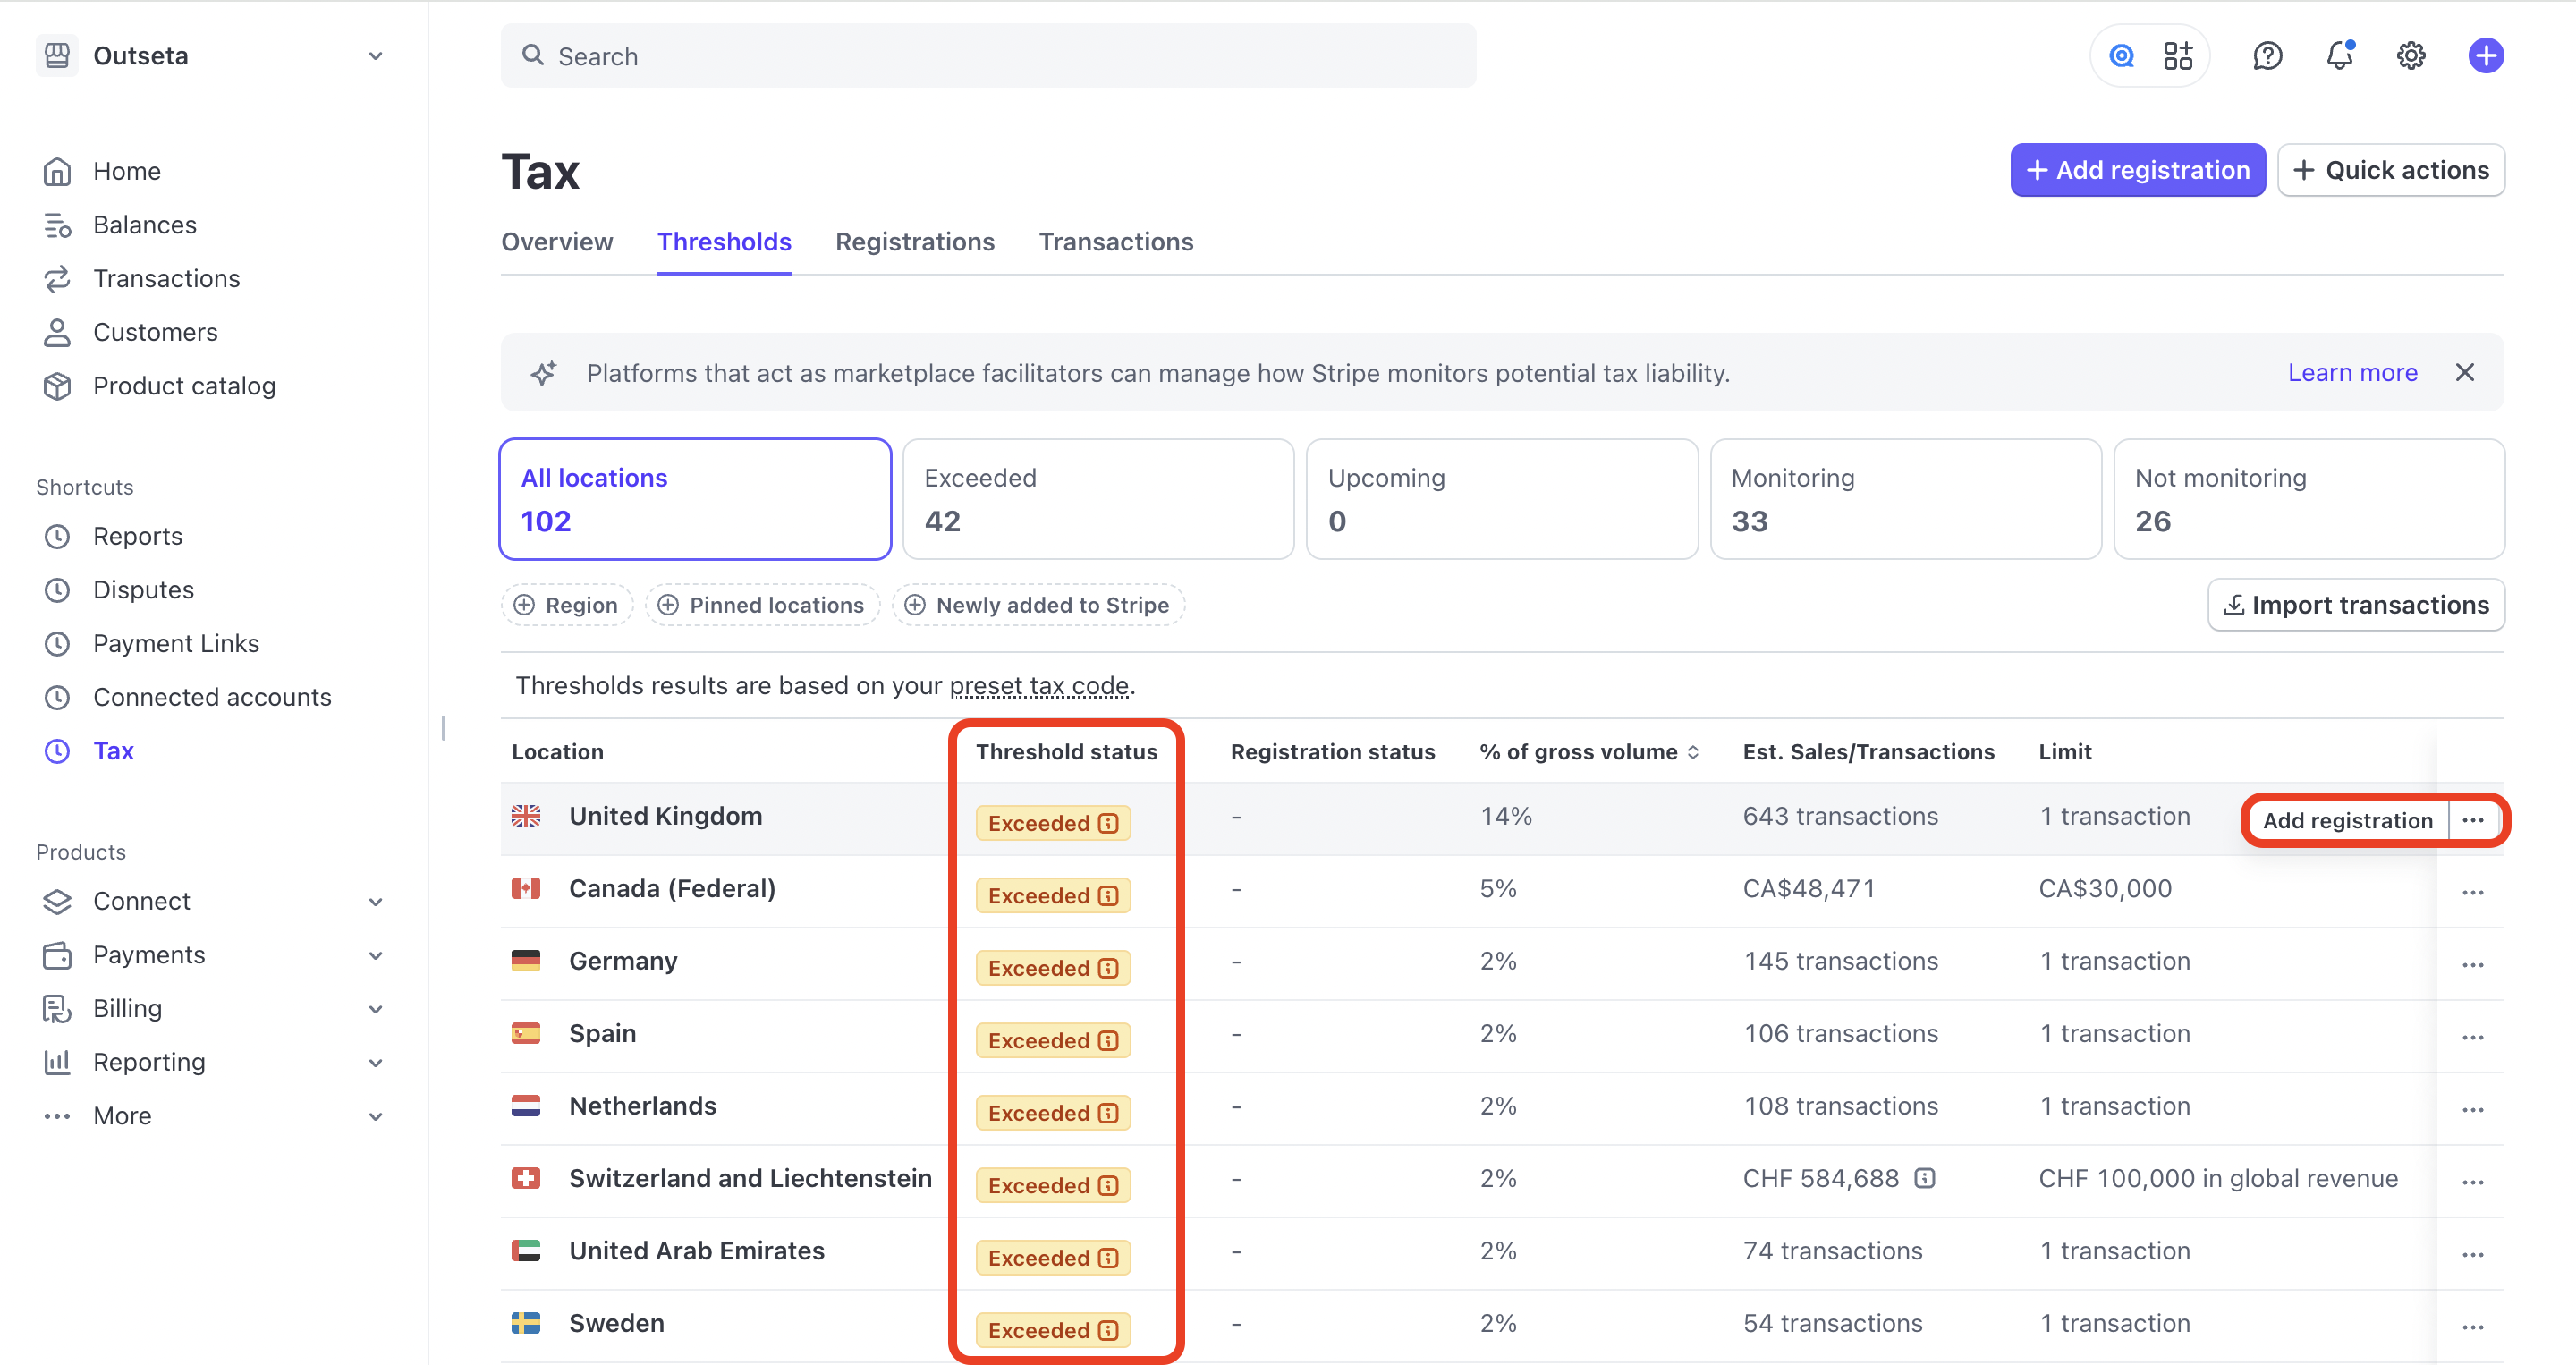
If you're not sure which registrations you should create, head over to TAX > THRESHOLDS tab. Even if you haven't enabled Stripe Tax yet, Stripe automatically monitors where you've exceeded tax thresholds based on payment activity in your Stripe account. You should create registrations for these geographies so you start collecting tax (just click ADD REGISTRATION). You'll also see thresholds that are being monitored—these are geographies where you have customers, but are currently below the thresholds that require that you collect tax. You'll be alerted when you should create registrations for these geographies.
Once you've configured your tax settings and setup your registrations in Stripe, head over to Outseta to enable Stripe Tax.
Enable Stripe Tax within Outseta
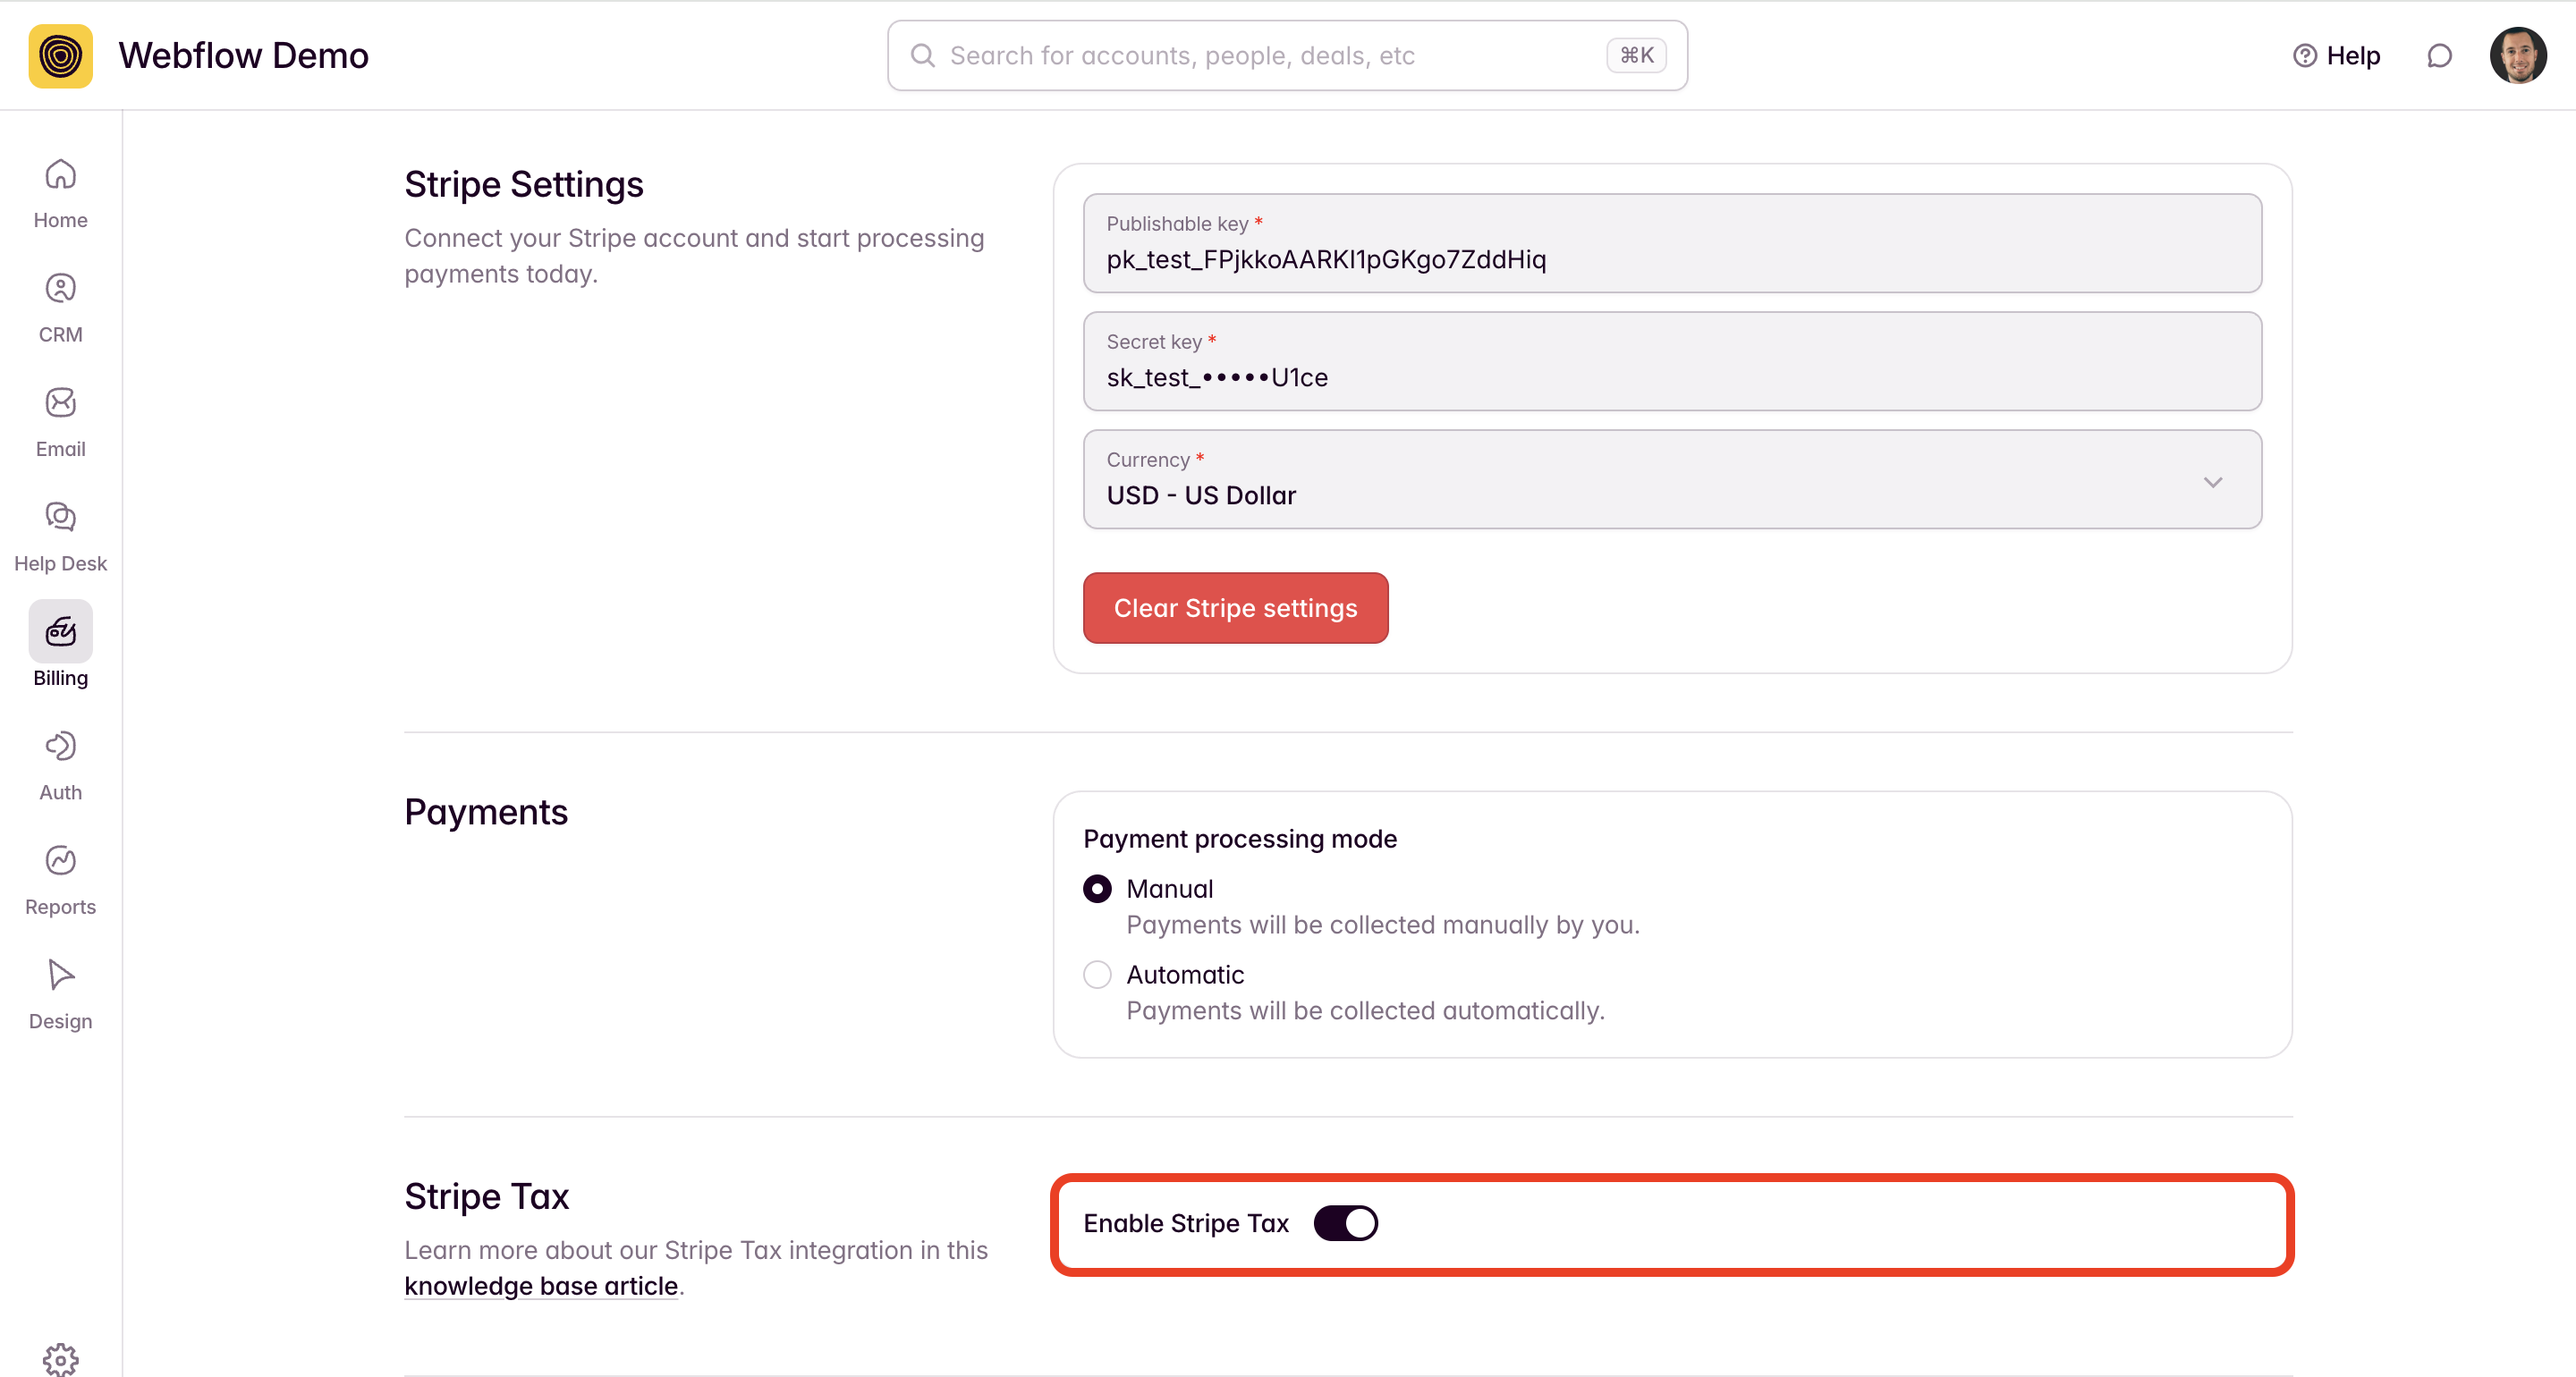
1. Within Outseta, go to BILLING > SETTINGS, scroll to the bottom of the page, and select ENABLE STRIPE TAX.
2. When setting up Plans in Outseta, you'll also want to toggle on the Collect Tax option at the plan level. When doing so, you can also set a tax category specific to each plan—otherwise the default tax category specified in Stripe will be used.

3. You may also want to add the Tax ID field to your sign up form. Collecting a Tax ID is usually a way for businesses like non-profits to identify themselves as being tax exempt. By entering their Tax ID at checkout, this will be recognized and taxes will not be applied to their invoices.
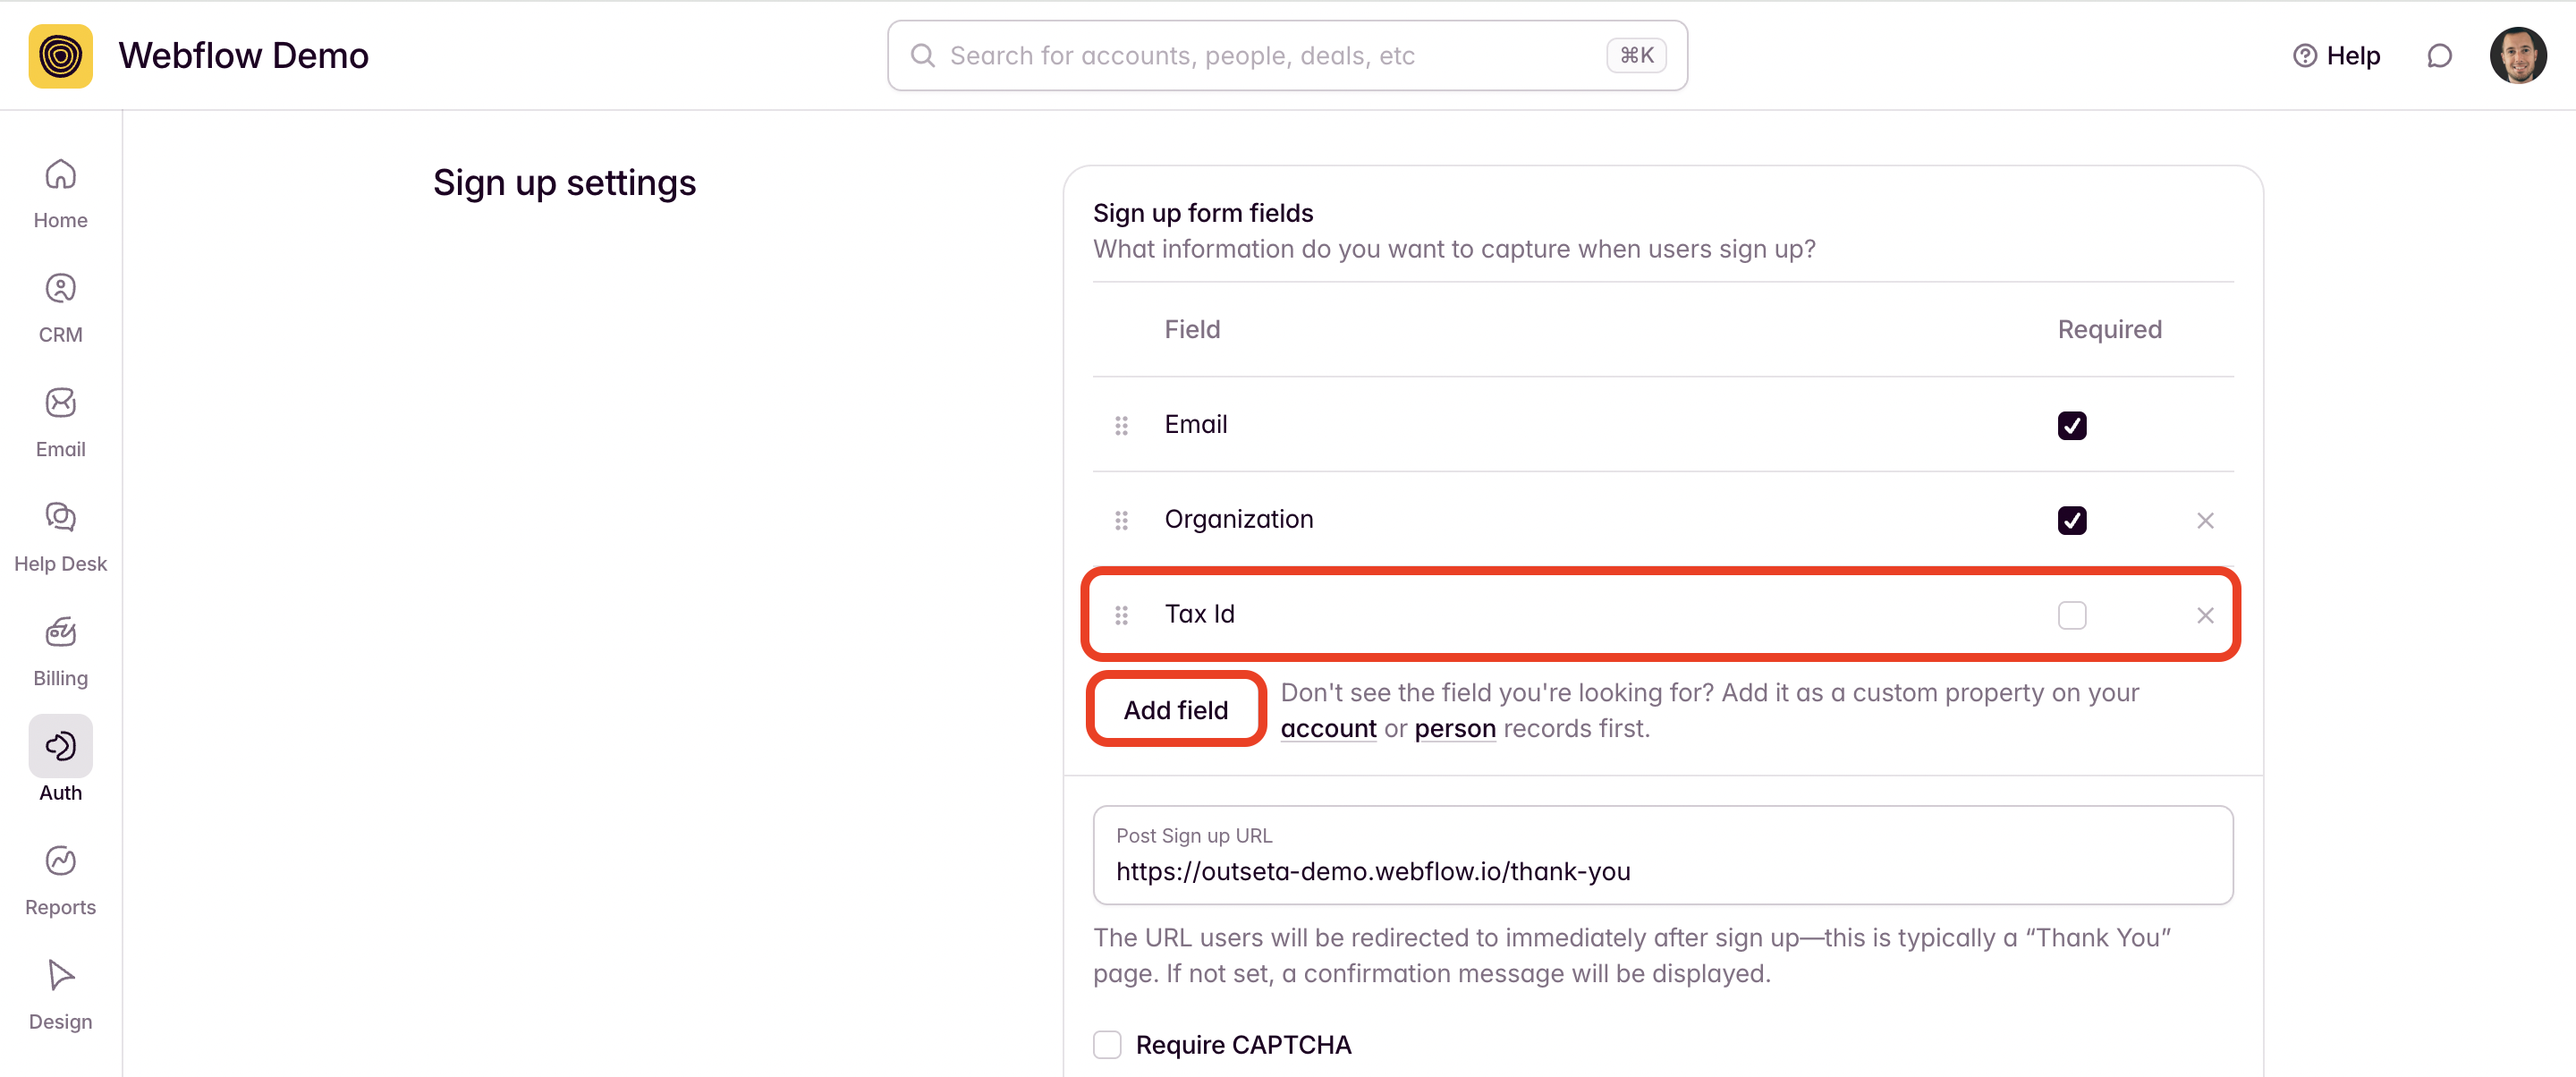
To do so, go to AUTH > SIGN UP AND LOGIN and click ADD FIELD to add the Tax ID field to your sign up form.
If you're not sure if you should be collecting a Tax ID or not, we recommend leaving this off of your sign up form—you can add it anytime if it's requested by a customer.
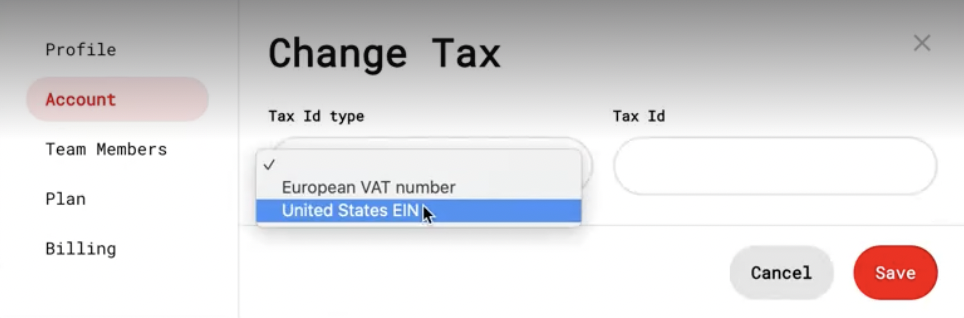
Customers can also update their Tax ID by logging into your product or site and editing this value on the Account tab of Outseta's profile embed.
That's it! Tax will now be included at checkout for any customer that signs up from one of the geographies that you've created a tax registration for.
Here's additional documentation on tax thresholds and how to use Stripe's Monitoring Dashboard.