This article covers how to sync Outseta users to your backend database when they register or are added to accounts.
⚠️ Before implementing sync: Most apps don't need to duplicate user data. Storing just the Outseta UIDs as foreign keys is simpler and avoids synchronization challenges. See Using Outseta with your own backend to understand if syncing is right for your use case.
When syncing makes sense
You may need to sync user data to your database if:
- You need to join user data (names, emails) with app data in complex database queries
- Your database requires foreign key constraints against a local users table
- You need offline access to user data
- You're integrating with a system that requires local user records
If you just need to identify who owns app data, store only the UID — no sync needed. Use Person UID for individual ownership, Account UID for team/organization ownership, or both for scenarios such as role/permissions, per-account settings, and audit logs. See more in Using Outseta with your own backend.
Understanding the Outseta data model
Before setting up sync, understand how Outseta structures user data:
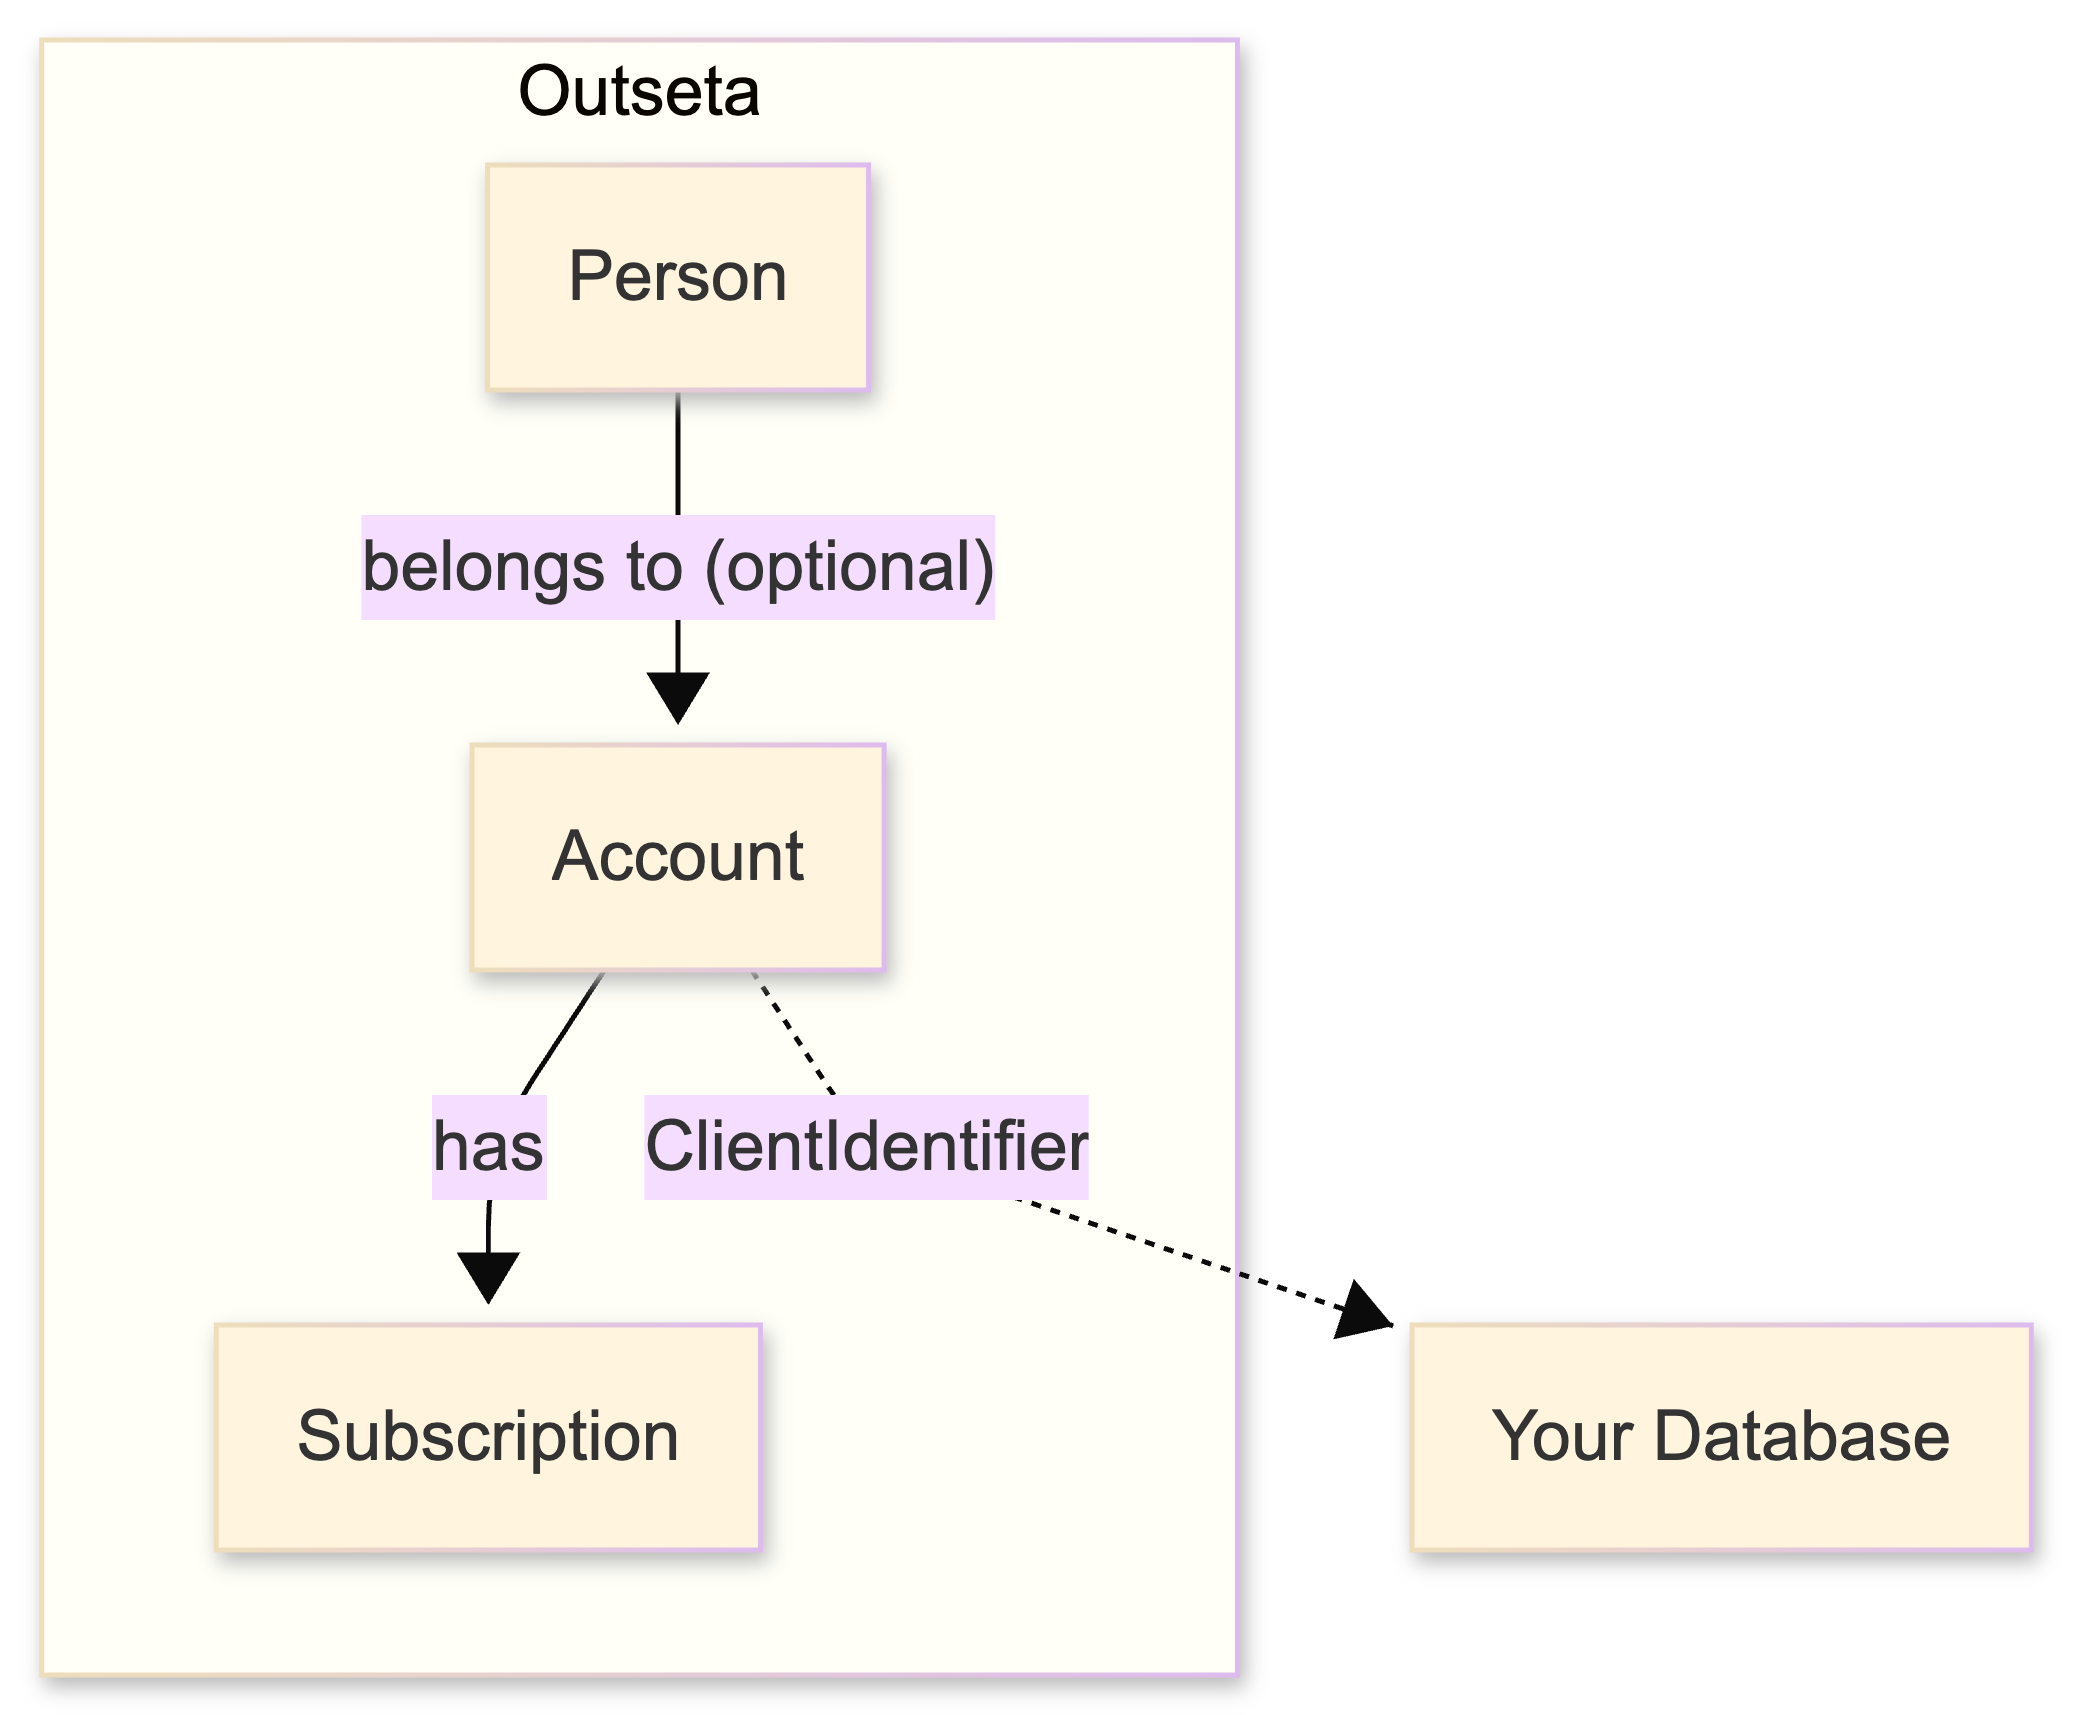
- Person — An individual with a unique email. Can exist without an Account (e.g., email list subscribers).
- Account — An organization or team. Has a Subscription and can have multiple People.
- Subscription — A billing relationship tied to an Account.
A Person can belong to multiple Accounts, and an Account can have multiple People. When a user registers with a subscription, all three are created together.
Approaches to syncing
Which approach you use depends on what you need to capture:
| Event | When it fires | Data provided |
|---|---|---|
| Sign Up Callback URL | User registers with an active subscription | Person + Account + Subscription |
| Account Created webhook | Any Account is created | Account |
| Person Created webhook | Any Person is created | Person |
Common scenarios
| Scenario | What gets created | Events that fire |
|---|---|---|
| User registers with subscription | Person + Account + Subscription | Sign Up Callback, Account Created, Person Created |
| Team member added to existing Account | Person (linked to Account) | Person Created only |
| Someone joins email list | Person (no Account) | Person Created only |
| Admin creates Account manually | Account | Account Created only |
The Sign Up Callback is convenient because it provides Person, Account, and Subscription together in one payload — but it only fires for the registration flow. Use webhooks to catch other scenarios.
Option 1: Sign Up Callback URL
When a user registers with an active subscription, Outseta creates a Person, an Account, and a Subscription. You can configure Outseta to call your API endpoint with all this information at the moment of registration.
Setup
- Within Outseta, navigate to AUTH > SIGN UP AND LOGIN
- In the SIGN UP SETTINGS area, click SHOW ADVANCED OPTIONS
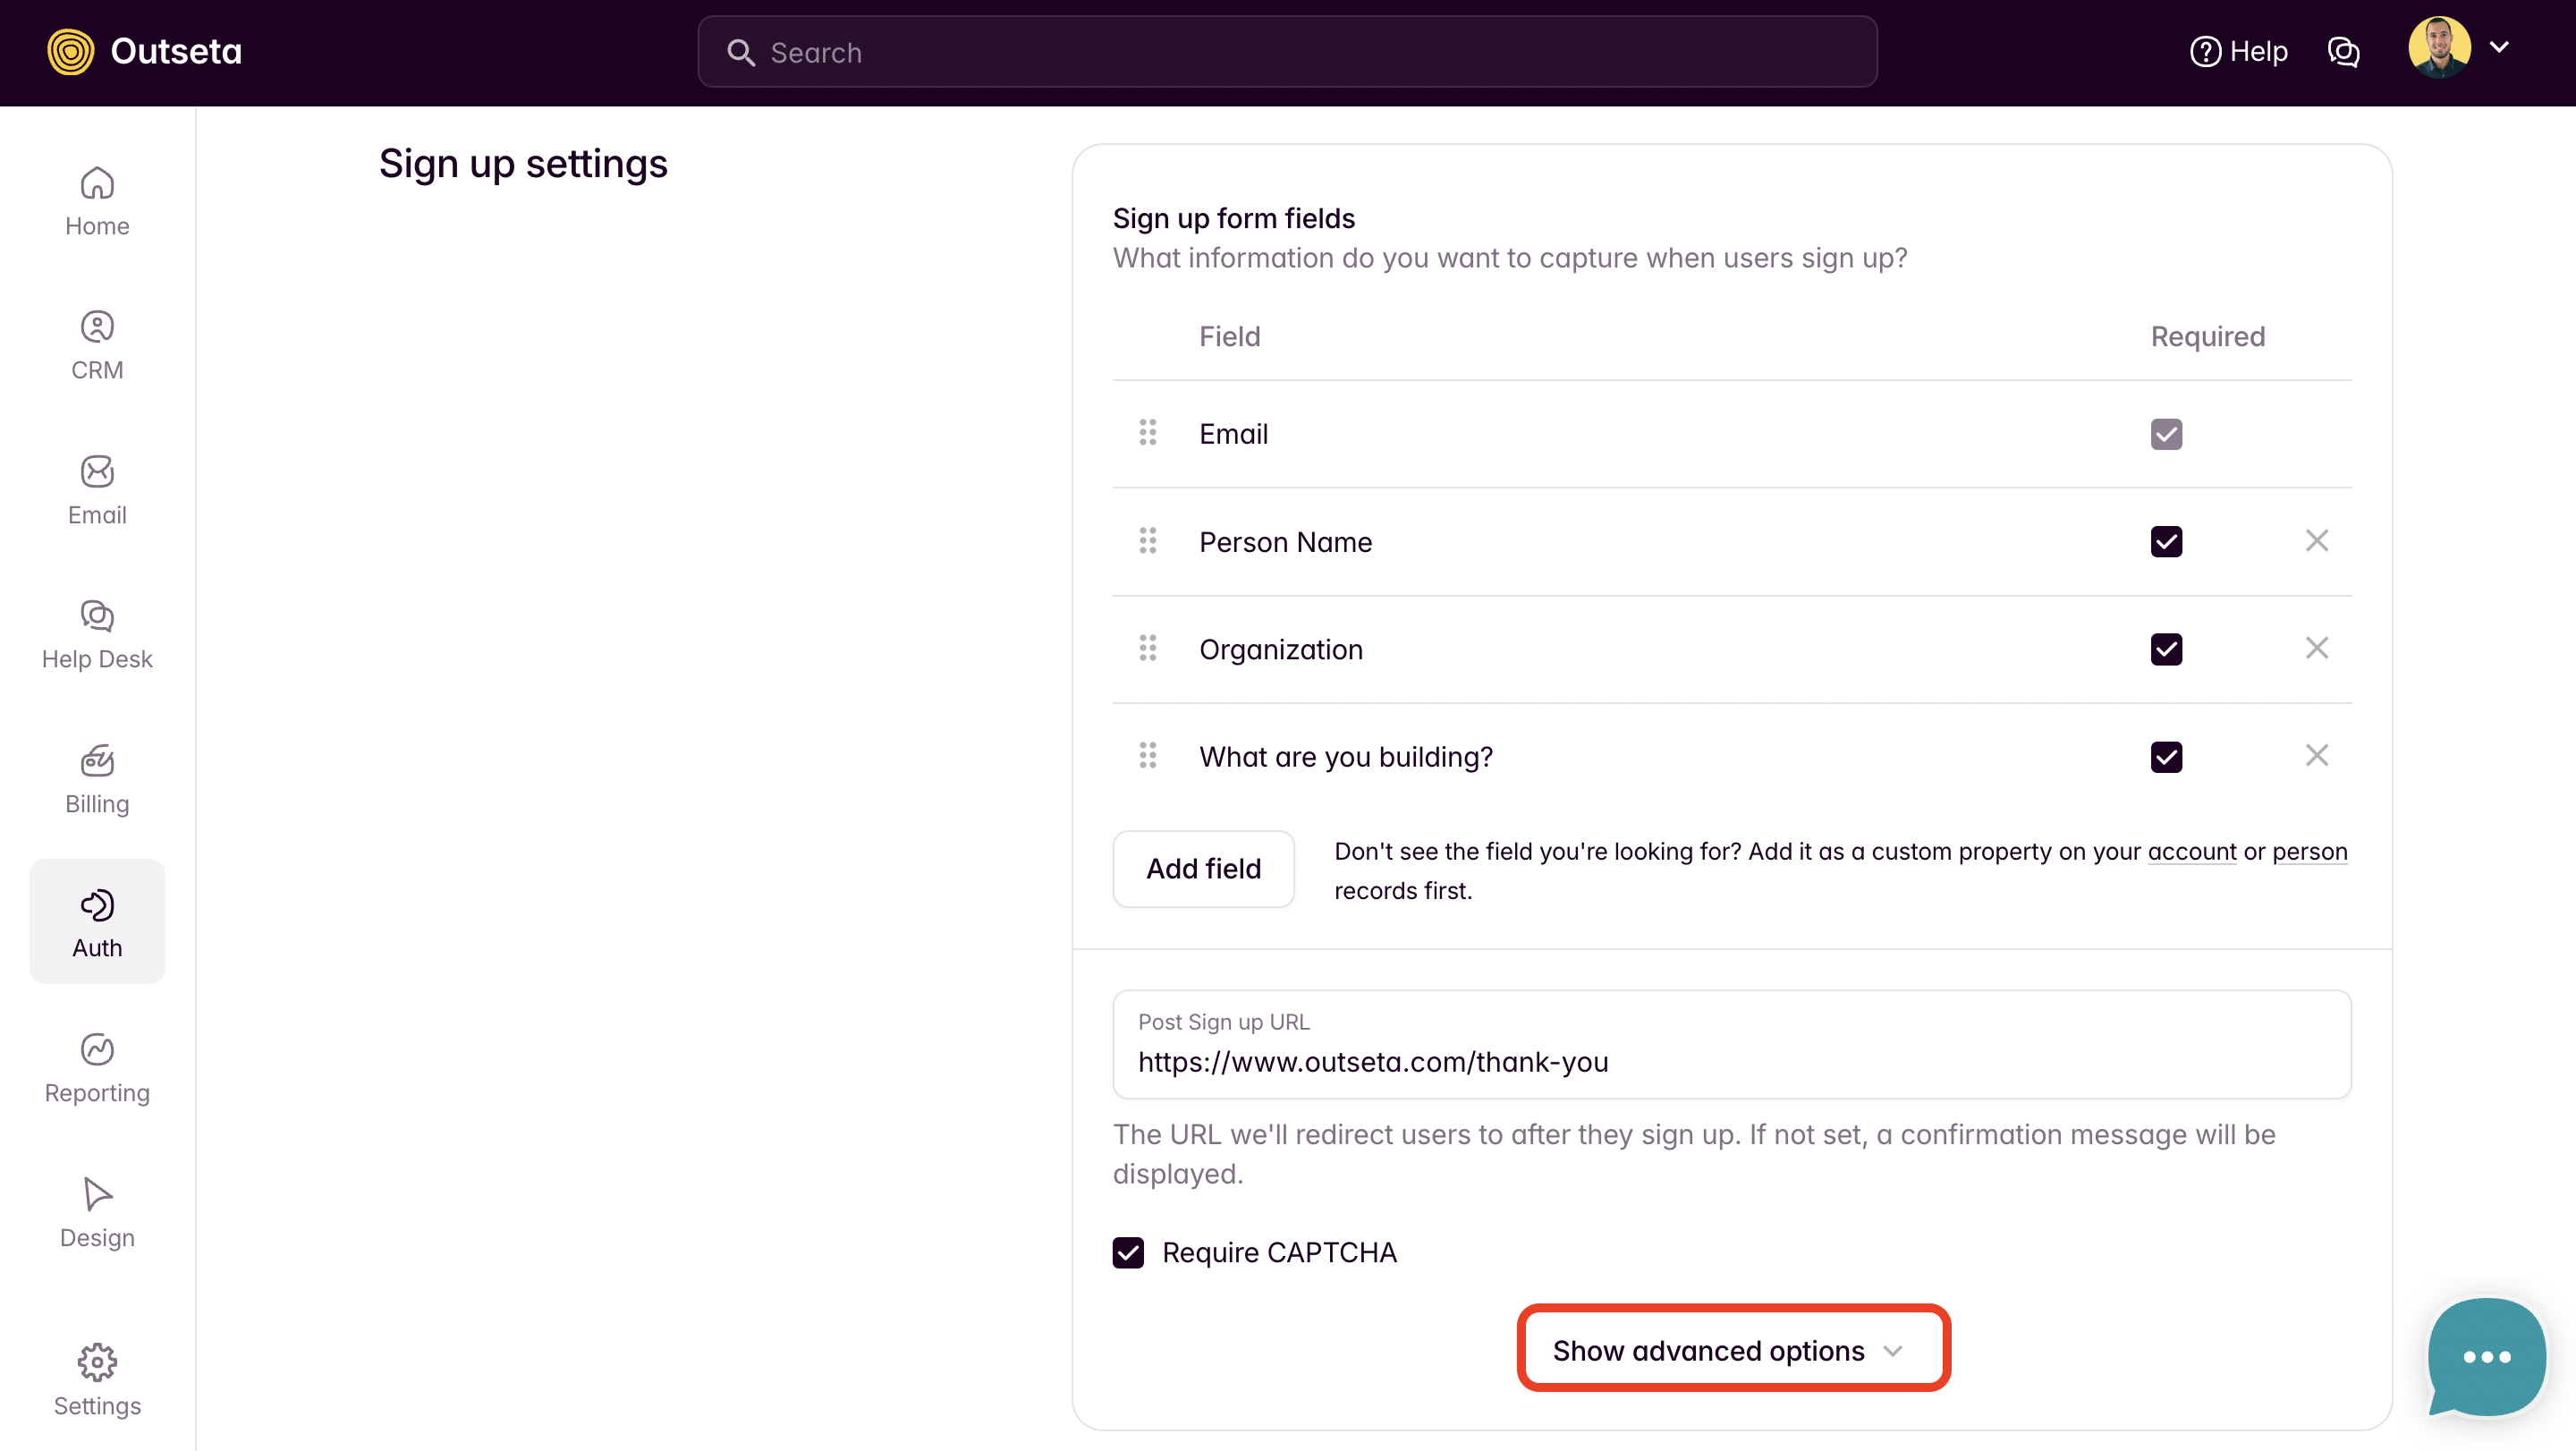
- Enter your API endpoint URL in the SIGN UP CALLBACK URL field

Handling the callback
Here's an example Express endpoint that receives the callback and creates records in your database:
app.post("/api/outseta/signup-callback", async (req, res) => {
  try {
    const { Person, Account, Subscription } = req.body;

    // Create account in your database
    await db.query(
      `INSERT INTO accounts (account_uid, name, plan_uid)
       VALUES (?, ?, ?)
       ON CONFLICT (account_uid) DO UPDATE SET
         name = EXCLUDED.name,
         plan_uid = EXCLUDED.plan_uid`,
      [Account.Uid, Account.Name, Subscription.Plan.Uid]
    );

    // Create person and link to account
    await db.query(
      `INSERT INTO people (person_uid, account_uid, email, first_name, last_name)
       VALUES (?, ?, ?, ?, ?)
       ON CONFLICT (person_uid) DO UPDATE SET
         email = EXCLUDED.email,
         first_name = EXCLUDED.first_name,
         last_name = EXCLUDED.last_name`,
      [Person.Uid, Account.Uid, Person.Email, Person.FirstName, Person.LastName]
    );

    // Optionally return a ClientIdentifier to Outseta
    res.json({
      ...req.body,
      ClientIdentifier: "your-internal-account-id-123"
    });

  } catch (error) {
    console.error("Signup callback error:", error);
    res.status(500).json({ error: "Failed to process signup" });
  }
});
Returning a ClientIdentifier
You can return the callback payload back to Outseta with an additional ClientIdentifier field. Outseta will store this value on the Account, creating a two-way reference between your database and Outseta.
This is useful when you need to look up the Outseta Account from your internal system ID, or vice versa.
// Return the payload with your internal Account ID added
res.json({
  ...req.body,
  ClientIdentifier: "your-internal-account-id-123"
});
Note: ClientIdentifier is only available on Account, not Person.
Option 2: Webhooks for all People and Accounts
The Sign Up Callback only fires for the registration flow. To capture team members added later, email list subscribers, or manually created records, use webhooks.
Setup
- Navigate to SETTINGS > NOTIFICATIONS
- Register callbacks for the events you need:
- Person Created — fires for all new People
- Account Created — fires for all new Accounts
👉 Setup Activity Notifications / Webhooks
Handling Person Created webhook
This webhook fires for everyone — registrations, team members, and email list subscribers. You'll need to check if the Person is linked to an Account:
app.post("/api/outseta/person-created", async (req, res) => {
  try {
    // Verify webhook signature first (see security section below)

    const person = req.body;

    // Check if person belongs to an account
    const accountUid = person.Account?.Uid || null;

    await db.query(
      `INSERT INTO people (person_uid, account_uid, email, first_name, last_name)
       VALUES (?, ?, ?, ?, ?)
       ON CONFLICT (person_uid) DO UPDATE SET
         account_uid = EXCLUDED.account_uid,
         email = EXCLUDED.email,
         first_name = EXCLUDED.first_name,
         last_name = EXCLUDED.last_name`,
      [person.Uid, accountUid, person.Email, person.FirstName, person.LastName]
    );

    res.json({ success: true });

  } catch (error) {
    console.error("Person created webhook error:", error);
    res.status(500).json({ error: "Failed to process webhook" });
  }
});
Securing webhooks
Always verify that webhook requests are actually from Outseta before processing them.
👉 Secure and verify webhooks with a SHA256 Signature
Keeping data in sync
If you sync user data, you'll also need to handle updates and deletions. Consider subscribing to additional webhooks:
- Person Updated — when user details change
- Person Deleted — when a user is removed
- Account Updated — when account details change
- Account Deleted — when an account is removed
- Subscription Changed — when subscription status changes
This is one reason why syncing adds complexity — you need to maintain synchronization across all these events.
Best practices
- Sync minimal data — Only store what you actually need for queries. You can always fetch additional details from Outseta's API.
- Use UIDs as primary keys — Use Person UID and Account UID as your primary/foreign keys to ensure you can always link back to Outseta.
- Handle duplicates gracefully — Use upsert patterns (INSERT ... ON CONFLICT) to handle retries and overlapping events.
- Verify webhook signatures — Ensure requests are actually from Outseta.
- Consider eventual consistency — Your database may briefly be out of sync after changes in Outseta.
- Use ClientIdentifier for two-way lookups — If you need to find Outseta Accounts from your internal IDs, return a ClientIdentifier from the signup callback.
Related articles
👉 Using Outseta with your own backend — Understand the overall architecture
👉 Protecting your data with Outseta authentication — Verify users when they make requests
👉 Activity Notifications / Webhooks — React to Outseta events
👉 Secure and verify webhooks with a SHA256 Signature — Verify webhook requests