Outseta's sign-up and login embeds can be used to add sign-up and login functionality to your website or SaaS product. These javascript embeds handle:
- Registration (signing up for a subscription and creating an account)
- Authentication (logging into your product or site and validating the person is who they say they are)
- Subscription management (knowing which subscription plan the customer is on so that you can show them the appropriate version of your software).
Sign up embed implementation steps
By integrating our sign up embed with your website you can allow new users to sign up and collect payment for their subscription. Before you can use the sign up embed you need to have created at least one subscription plan. Follow the steps below to setup a subscription plan and integrate the sign up embed with your website.
- Go to BILLING > PLANS and set up at least one plan.
- Go to AUTH > SIGN UP AND LOGIN. On this screen you'll enter several configuration options that dictate how you'll sign up and login new users. The Sign up form fields are particularly important—these specify the information you'd like to capture from new customers when they sign up. If you want to capture information that's not already available in the drop down menu, you must first add new customer properties to your account records. Once you've done this, these new fields will appear in the Sign up form fields drop down menu.
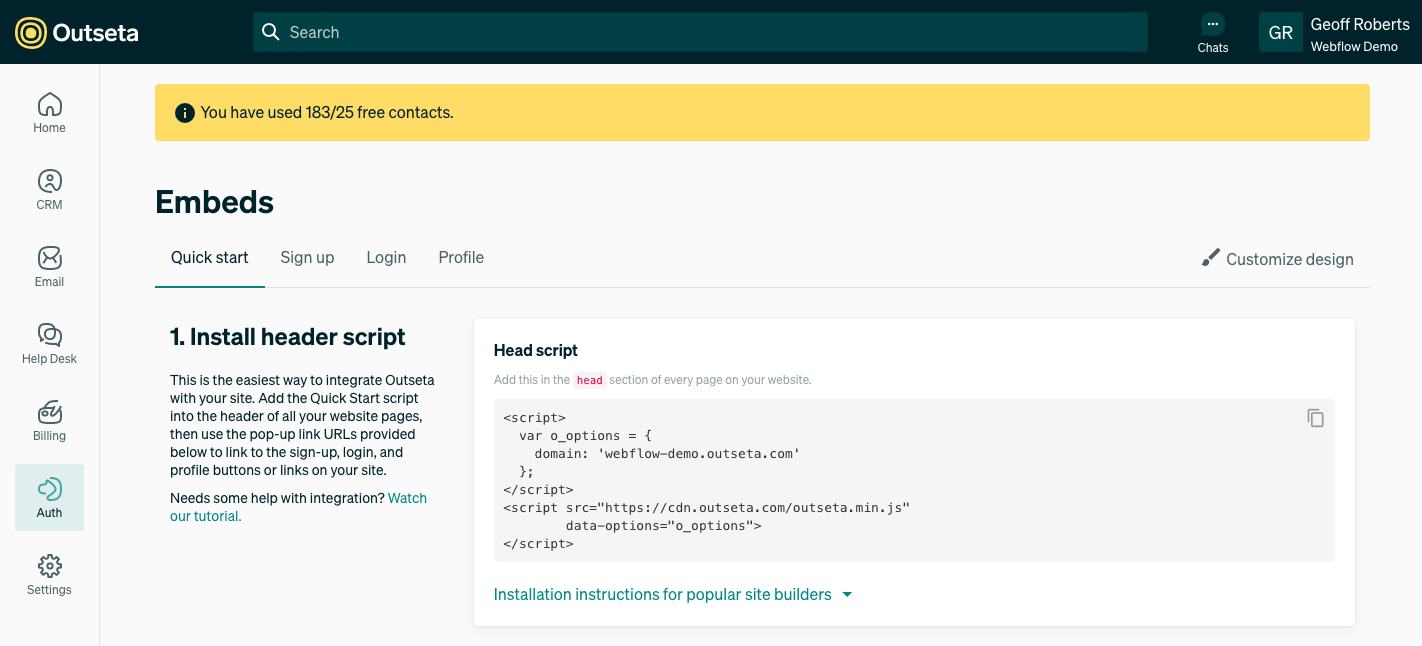
- Once you've completed the settings on this page, you can go to AUTH > EMBEDS to grab the embed script for Outseta's sign up embed.
Login embed implementation steps
- Go to AUTH > SIGN UP AND LOGIN.
- Make sure the Send sign up confirmation email toggle is on. When a new user signs up, this setting will send a confirmation email to the user that both verifies their email address and prompts them to set a password so they can login.
- Specify a Post Login URL. This is the URL you'd like Outseta to redirect users to after they've logged in successfully. This is often a dashboard or initial screen within your software product.
- Click AUTH > EMBEDS to grab the login widget embed script.

Note: A person needs to be associated with an account that has an active subscription in order for authentication to work. The account and subscription get created automatically when a person registers via the sign up widget, but you can also manually add and subscribe accounts under CRM > ACCOUNTS.
After a user signs up they'll receive a confirmation email prompting them to set their password before they are able to login. The page that the confirmation email redirects the user to must have the login widget embedded—Outseta will redirect users to a hosted page where the login widget is present by default.
You can specify the URL of this page (rather than using the hosted page we provide) by clicking Show Advanced Options under Sign up Setting. The Sign Up Confirmation URL is the link that's included in the confirmation email.
Authentication Workflow
- The user enters their email address and password into the login embed.
- If successfully authenticated, Outseta will redirect the user to the specified
Post Login URLpassing a JWT token containing the user's information (email, first name, last name, subscription/plan ids, etc.) in anaccess_tokenquery string parameter.- This JWT token can be verified with a public key that Outseta provides to you. The public key can be found at AUTH > SIGN UP AND LOGIN. Open the Show Advanced Options menu under the Login Settings.
- After verifying the JWT token your website can consider the user as being authenticated.
- A great resource to use for JWT tokens is JWT.IO. On that site you can find a utility that allows you to see the contents of the token as well as libraries in different languages that allow you to verify the token.
Configuration Options
For additional configuration options, please see our Javascript Configuration Guide.
Debugging
To test the callbacks that Outseta initiates and be able to inspect the content of the callback request please use tools like RequestBin or PostBin. The schema of the object sent via a POST request when setting up the Registration Callback URL looks like this:
{
   "Name":"Test Company",
   "IsDemo":false,
   "AccountStage":2,
   "PersonAccount":[
      {
         "Person":{
            "Email":"[email protected]",
            "FirstName":"Test First Name",
            "LastName":"Test Last Name",
            "PhoneMobile":"",
            "PhoneWork":"",
            "IPAddress":"::1",
            "Referer":"http://localhost/auth",
            "UserAgent":"Mozilla/5.0 (Windows NT 10.0; Win64; x64) AppleWebKit/537.36 (KHTML, like Gecko) Chrome/74.0.3729.131 Safari/537.36",
            "FullName":"Test First Name Test Last Name",
            "OAuthIntegrationStatus":0,
            "UserAgentPlatformBrowser":"WinNT (Chrome)",
            "Uid":"dQGpld94",
            "Created":"2019-05-24T14:30:21",
            "Updated":"2019-05-24T14:33:25"
         },
         "IsPrimary":true,
         "Uid":"Kj9baMQn",
         "Created":"2019-05-24T14:34:22.3279439Z",
         "Updated":"2019-05-24T14:34:22.3279439Z"
      }
   ],
   "Subscriptions":[
      {
         "BillingRenewalTerm":1,
         "Quantity":1,
         "StartDate":"2019-05-24T14:34:22.0649555Z",
         "RenewalDate":"2019-06-24T14:34:22.0649555Z",
         "IsPlanUpgradeRequired":false,
         "Uid":"ZBWzp2QE",
         "Created":"2019-05-24T14:34:22.3279439Z",
         "Updated":"2019-05-24T14:34:22.3279439Z"
      }
   ],
   "Deals":[

   ],
   "AccountStageLabel":"Trialing",
   "LatestSubscription":{
      "BillingRenewalTerm":1,
      "Quantity":1,
      "StartDate":"2019-05-24T14:34:22.0649555Z",
      "RenewalDate":"2019-06-24T14:34:22.0649555Z",
      "IsPlanUpgradeRequired":false,
      "Uid":"ZBWzp2QE",
      "Created":"2019-05-24T14:34:22.3279439Z",
      "Updated":"2019-05-24T14:34:22.3279439Z"
   },
   "Uid":"By9qp3QA",
   "Created":"2019-05-24T14:34:22.3279439Z",
   "Updated":"2019-05-24T14:34:22.3279439Z"
}