Outseta's Webflow App allows you to subscribe people to an email list in Outseta—which can also be used to trigger a subsequent email automation.
1. Start in Outseta by going to EMAIL > LISTS and create an email list.
2. Make sure that you've added the required head script in your Webflow site settings (this article walks through installing the Outseta Webflow app).
3. Now you have two options for how to add your form via the Outseta app:
Insert form embed—Allows you to insert one of Outseta's email list forms as a pop-up or by embedding the form directly on a page.
Map to a Webflow form—This option allows you to use a native Webflow form to subscribe people to an Outseta email list by mapping the fields on your Webflow form to fields in Outseta.
- You must first add the Webflow form to the page and publish you site in order for the extension to recognize the Webflow form.
- If you have setup reCaptcha in Outseta, you must also add Webflow's reCaptcha element to your Webflow form.
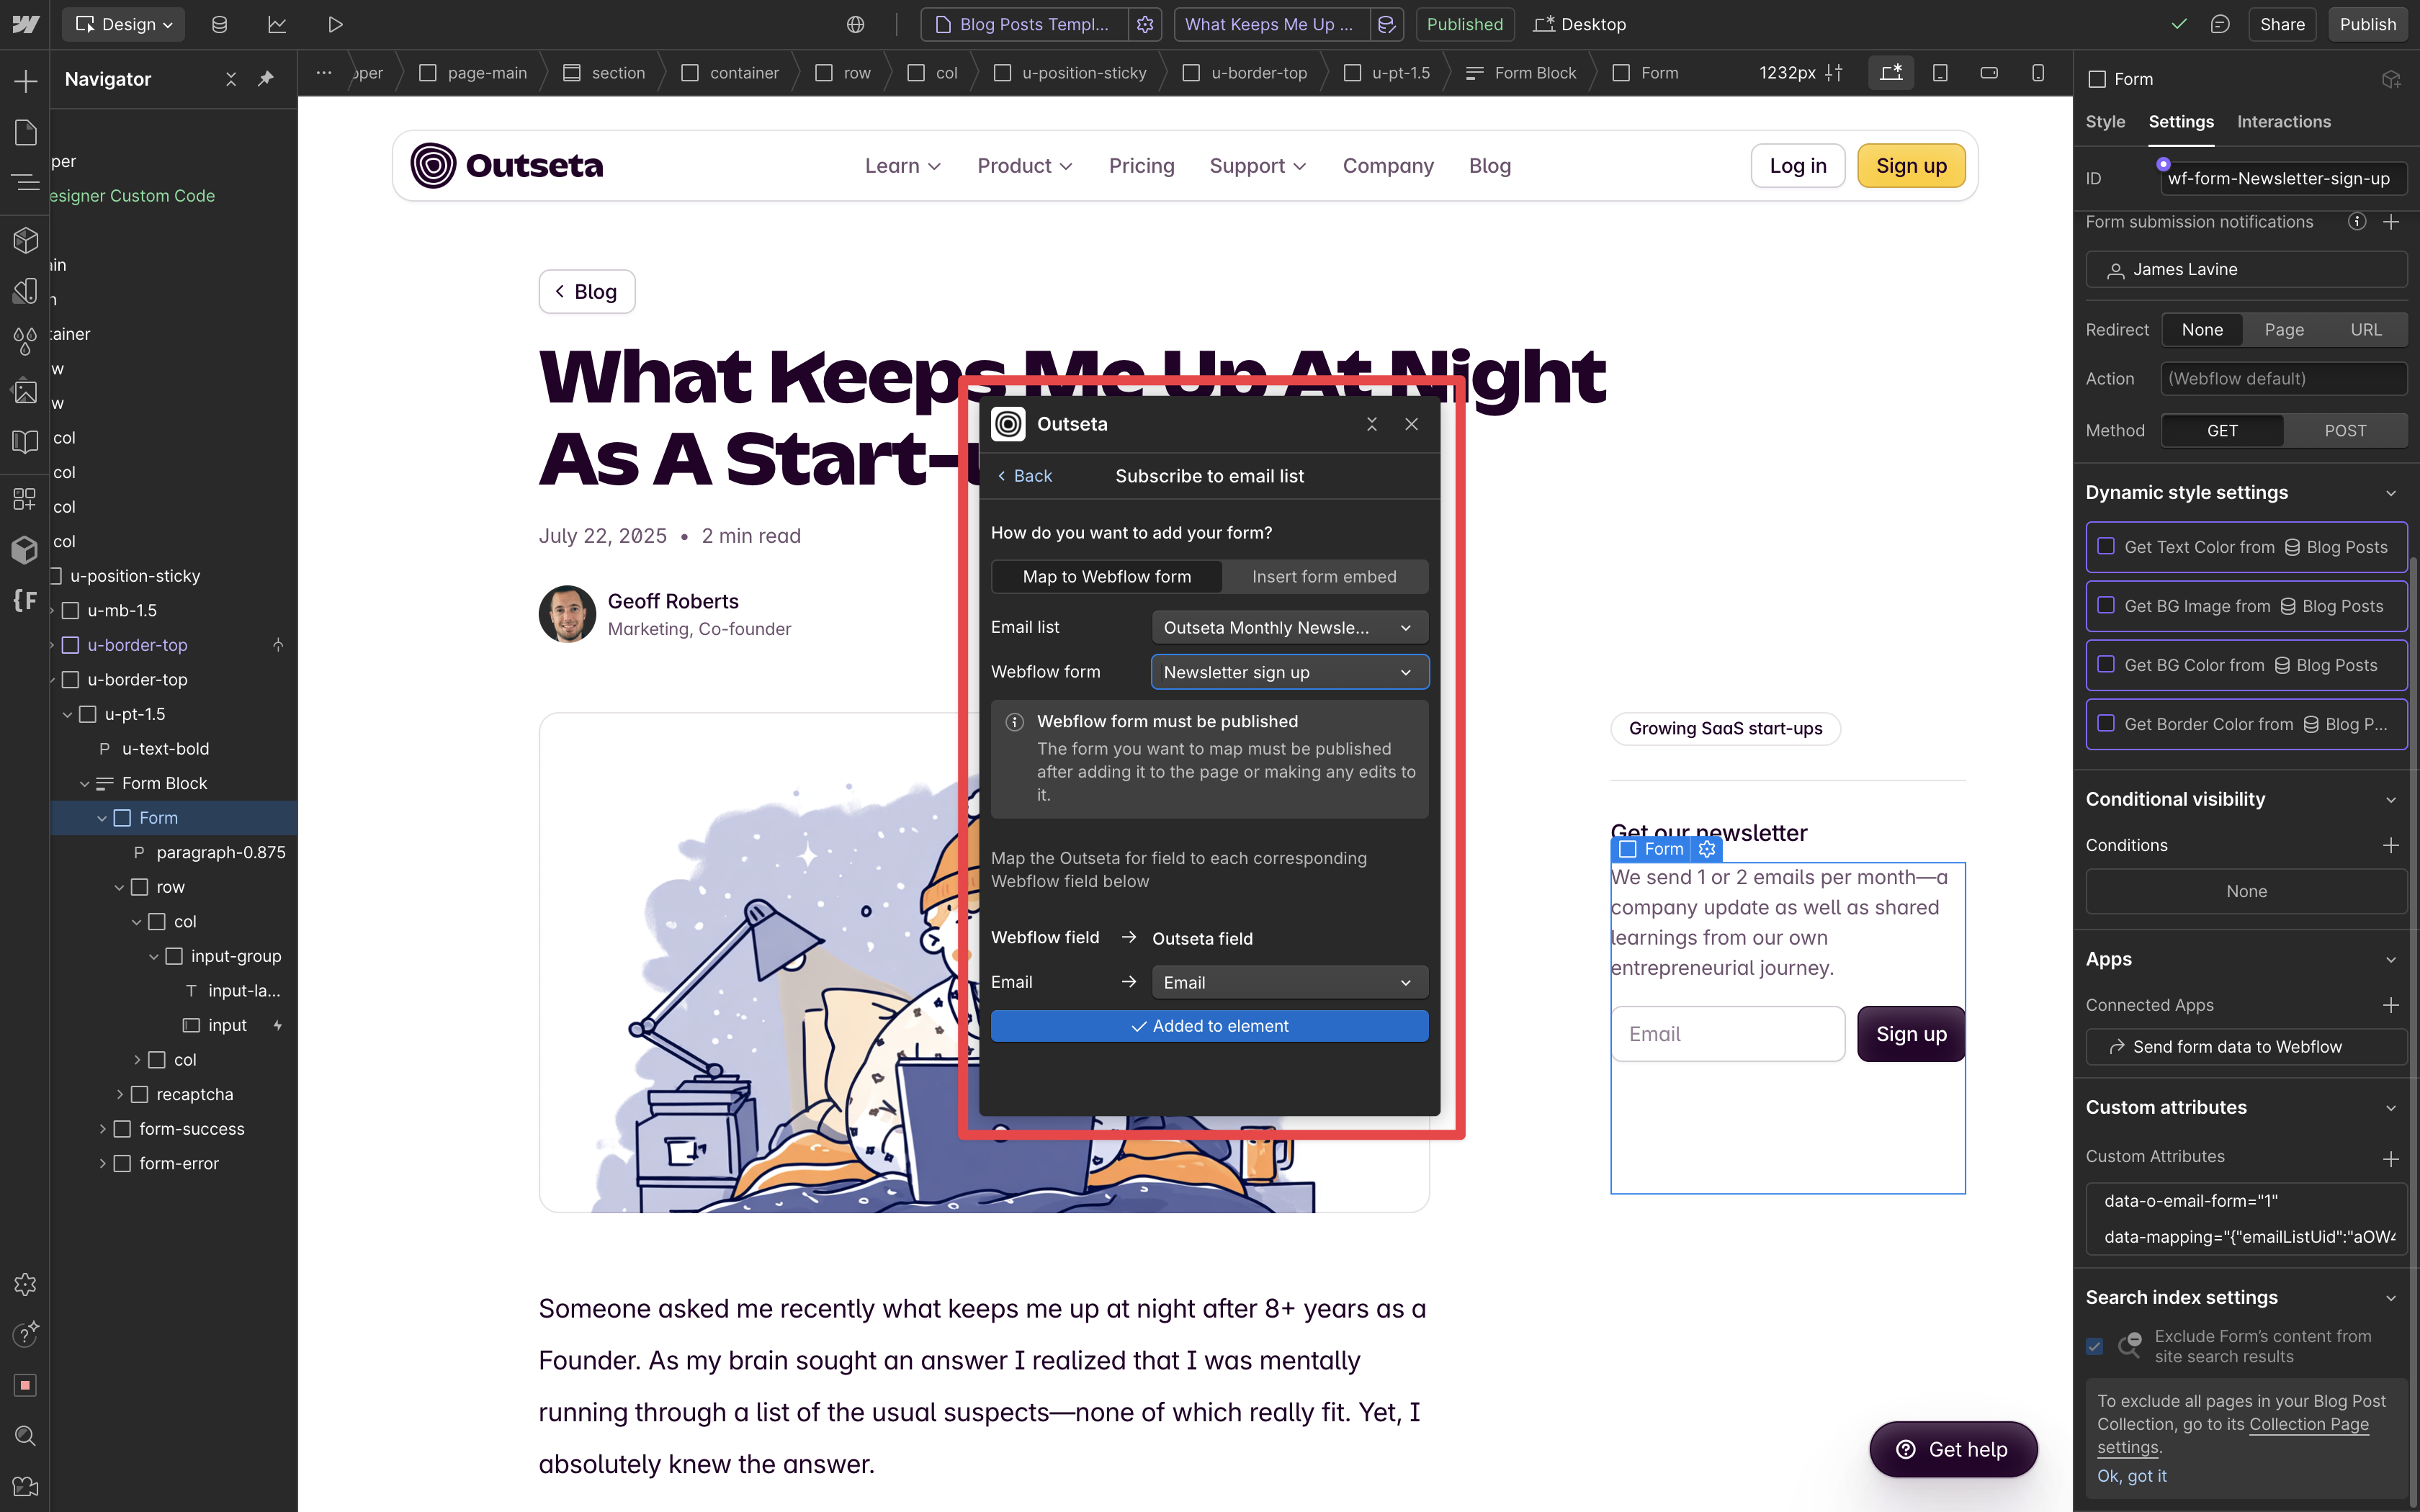
2. Once you've inserted or mapped your form to an email list in Outseta, click ADD TO ELEMENT.
3. PUBLISH you site. When you submit the form on your live site, you should now see the new subscriber added to your email list in Outseta.
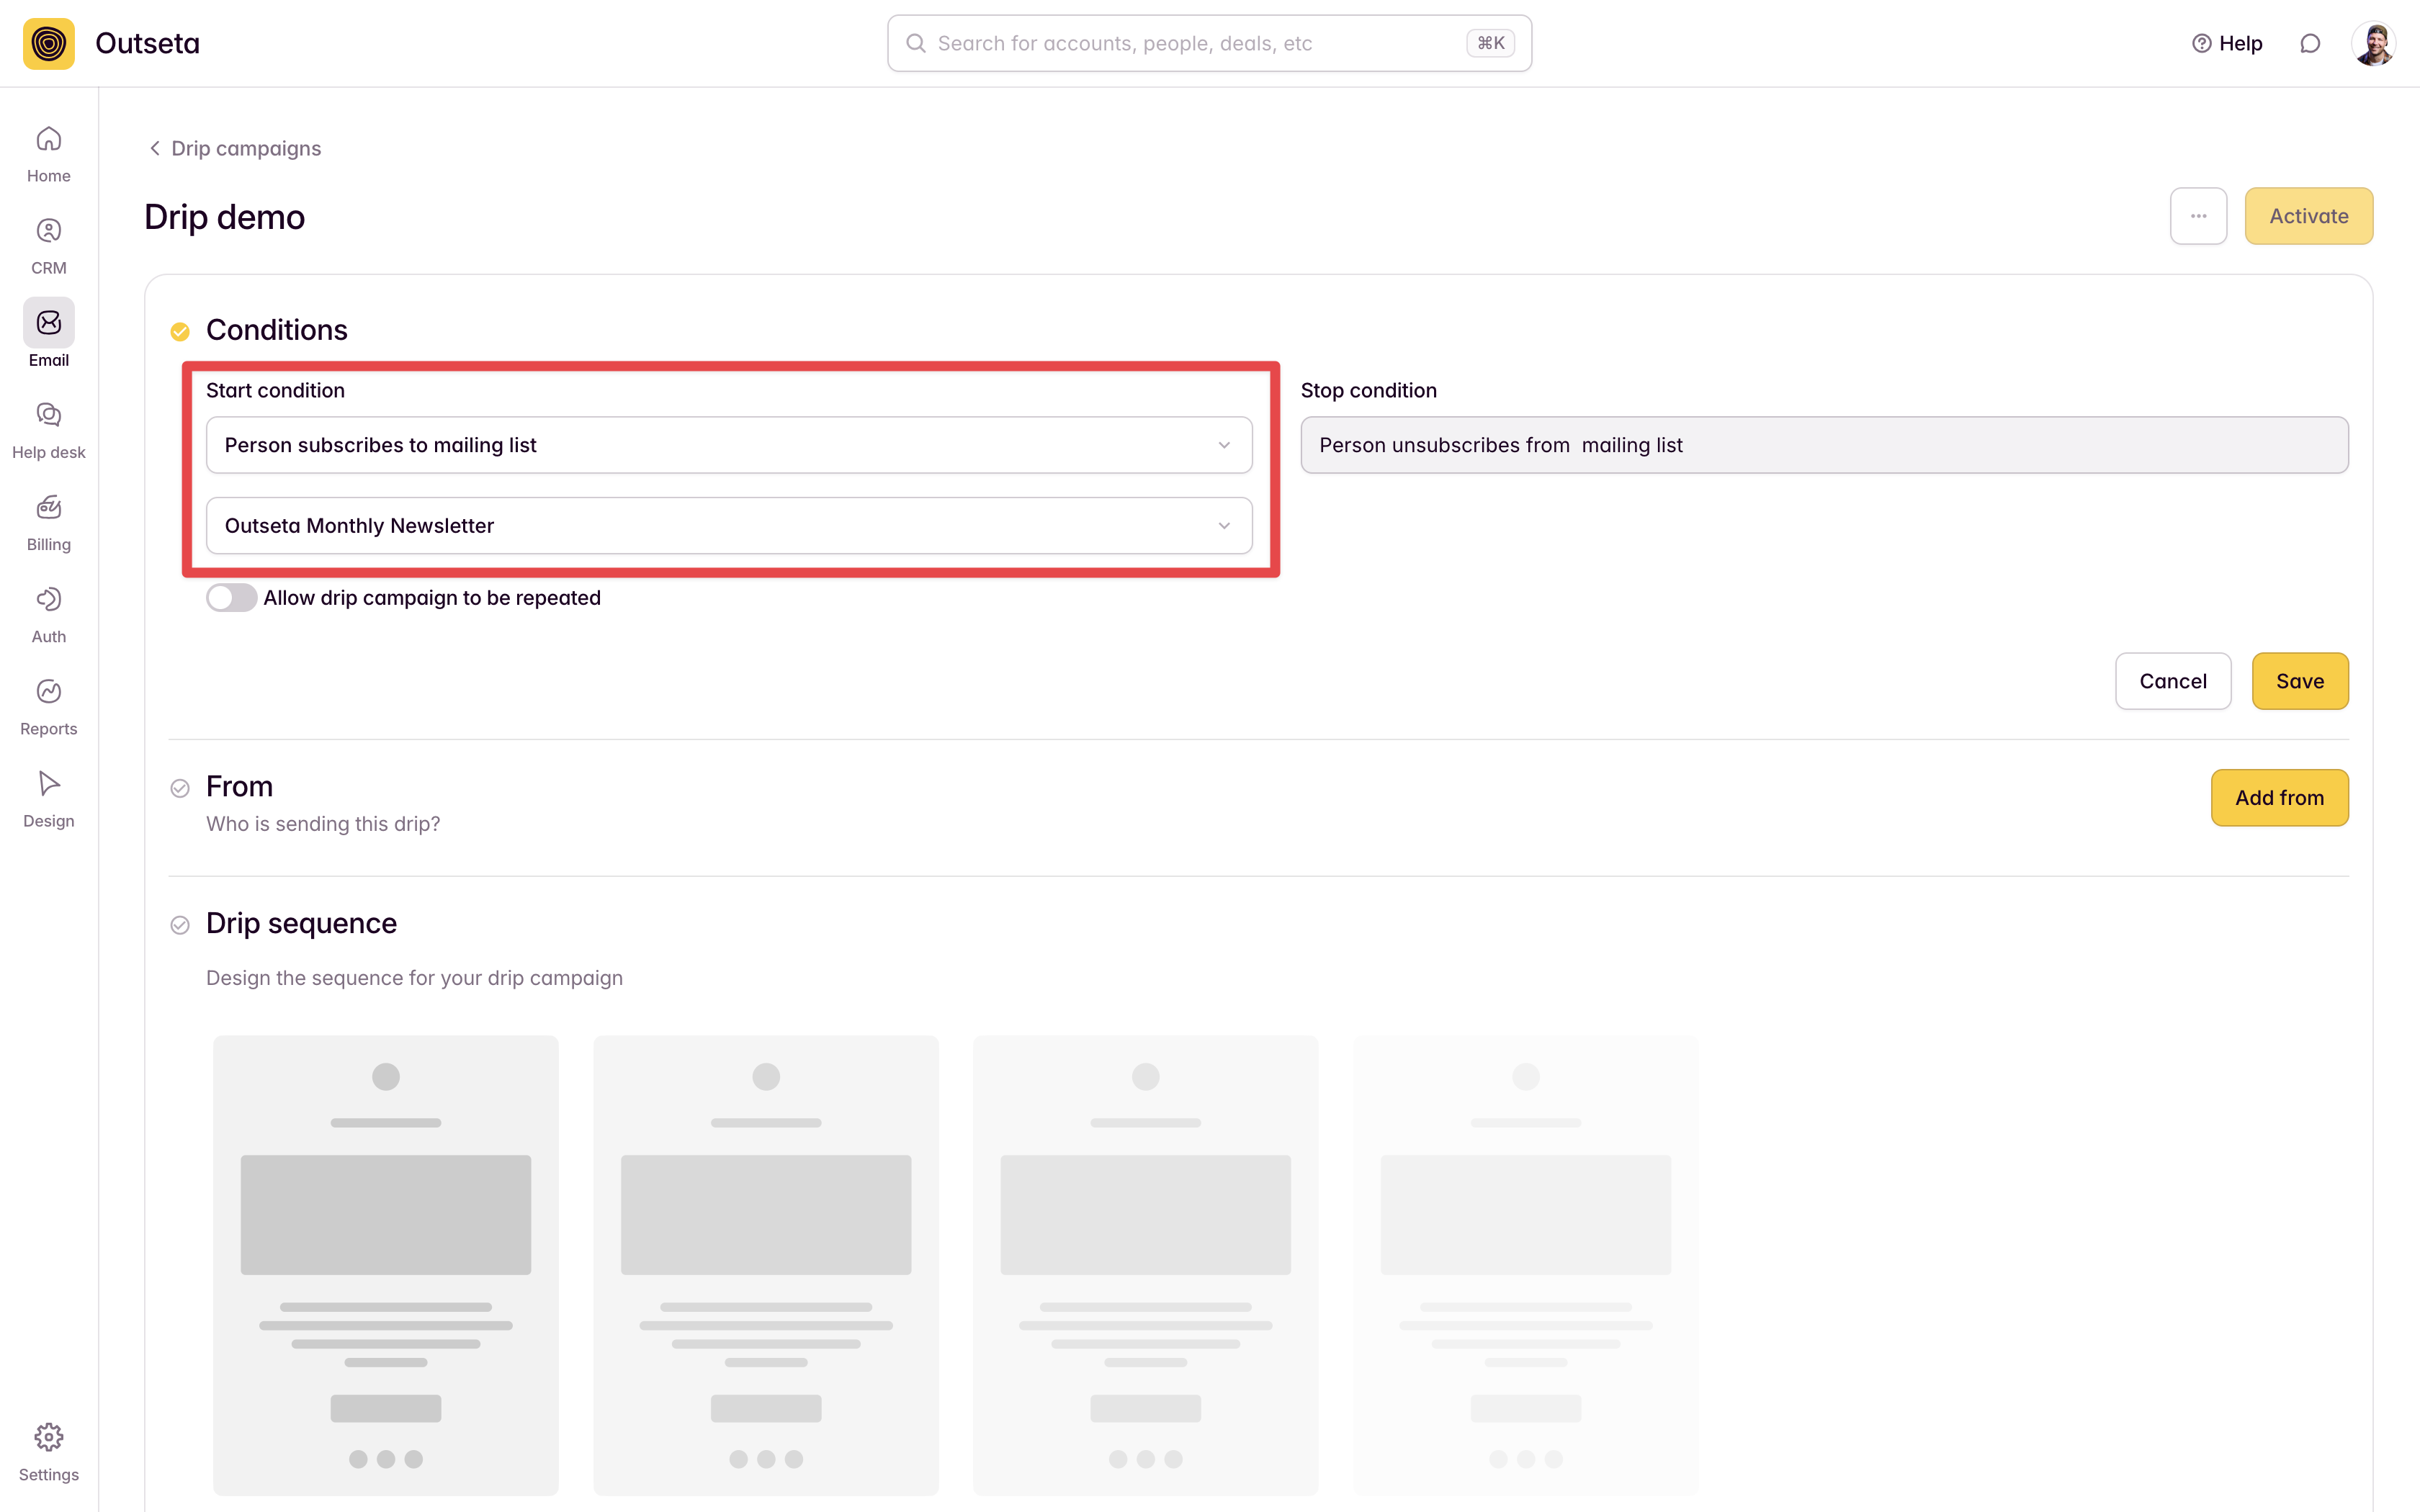
Trigger an email automation when a person subscribes to an email list
In order to trigger an email automation when someone subscribes to an emails list, go to EMAIL > DRIP CAMPAIGNS to create a drip campaign.
Choose Person subscribes to an email list to trigger your email automation.