Would you like to allow your users fill out and submit a Webflow form and have all of the data stored in their Outseta profile? Maybe you want to collect info as part of an onboarding flow. Maybe you need to allow users to update a variety of custom properties for your application to work properly. Whatever the situation, we’ll walk you through the setup in this article.
Custom properties
Custom properties can be used to store information on the Person or Account records in Outseta CRM. In this article we’ll focus on saving information to custom properties on the Person record. Let’s create some custom properties now.
- Click CRM > Custom properties from the left hand navigation.
- Click Person and then Add property.
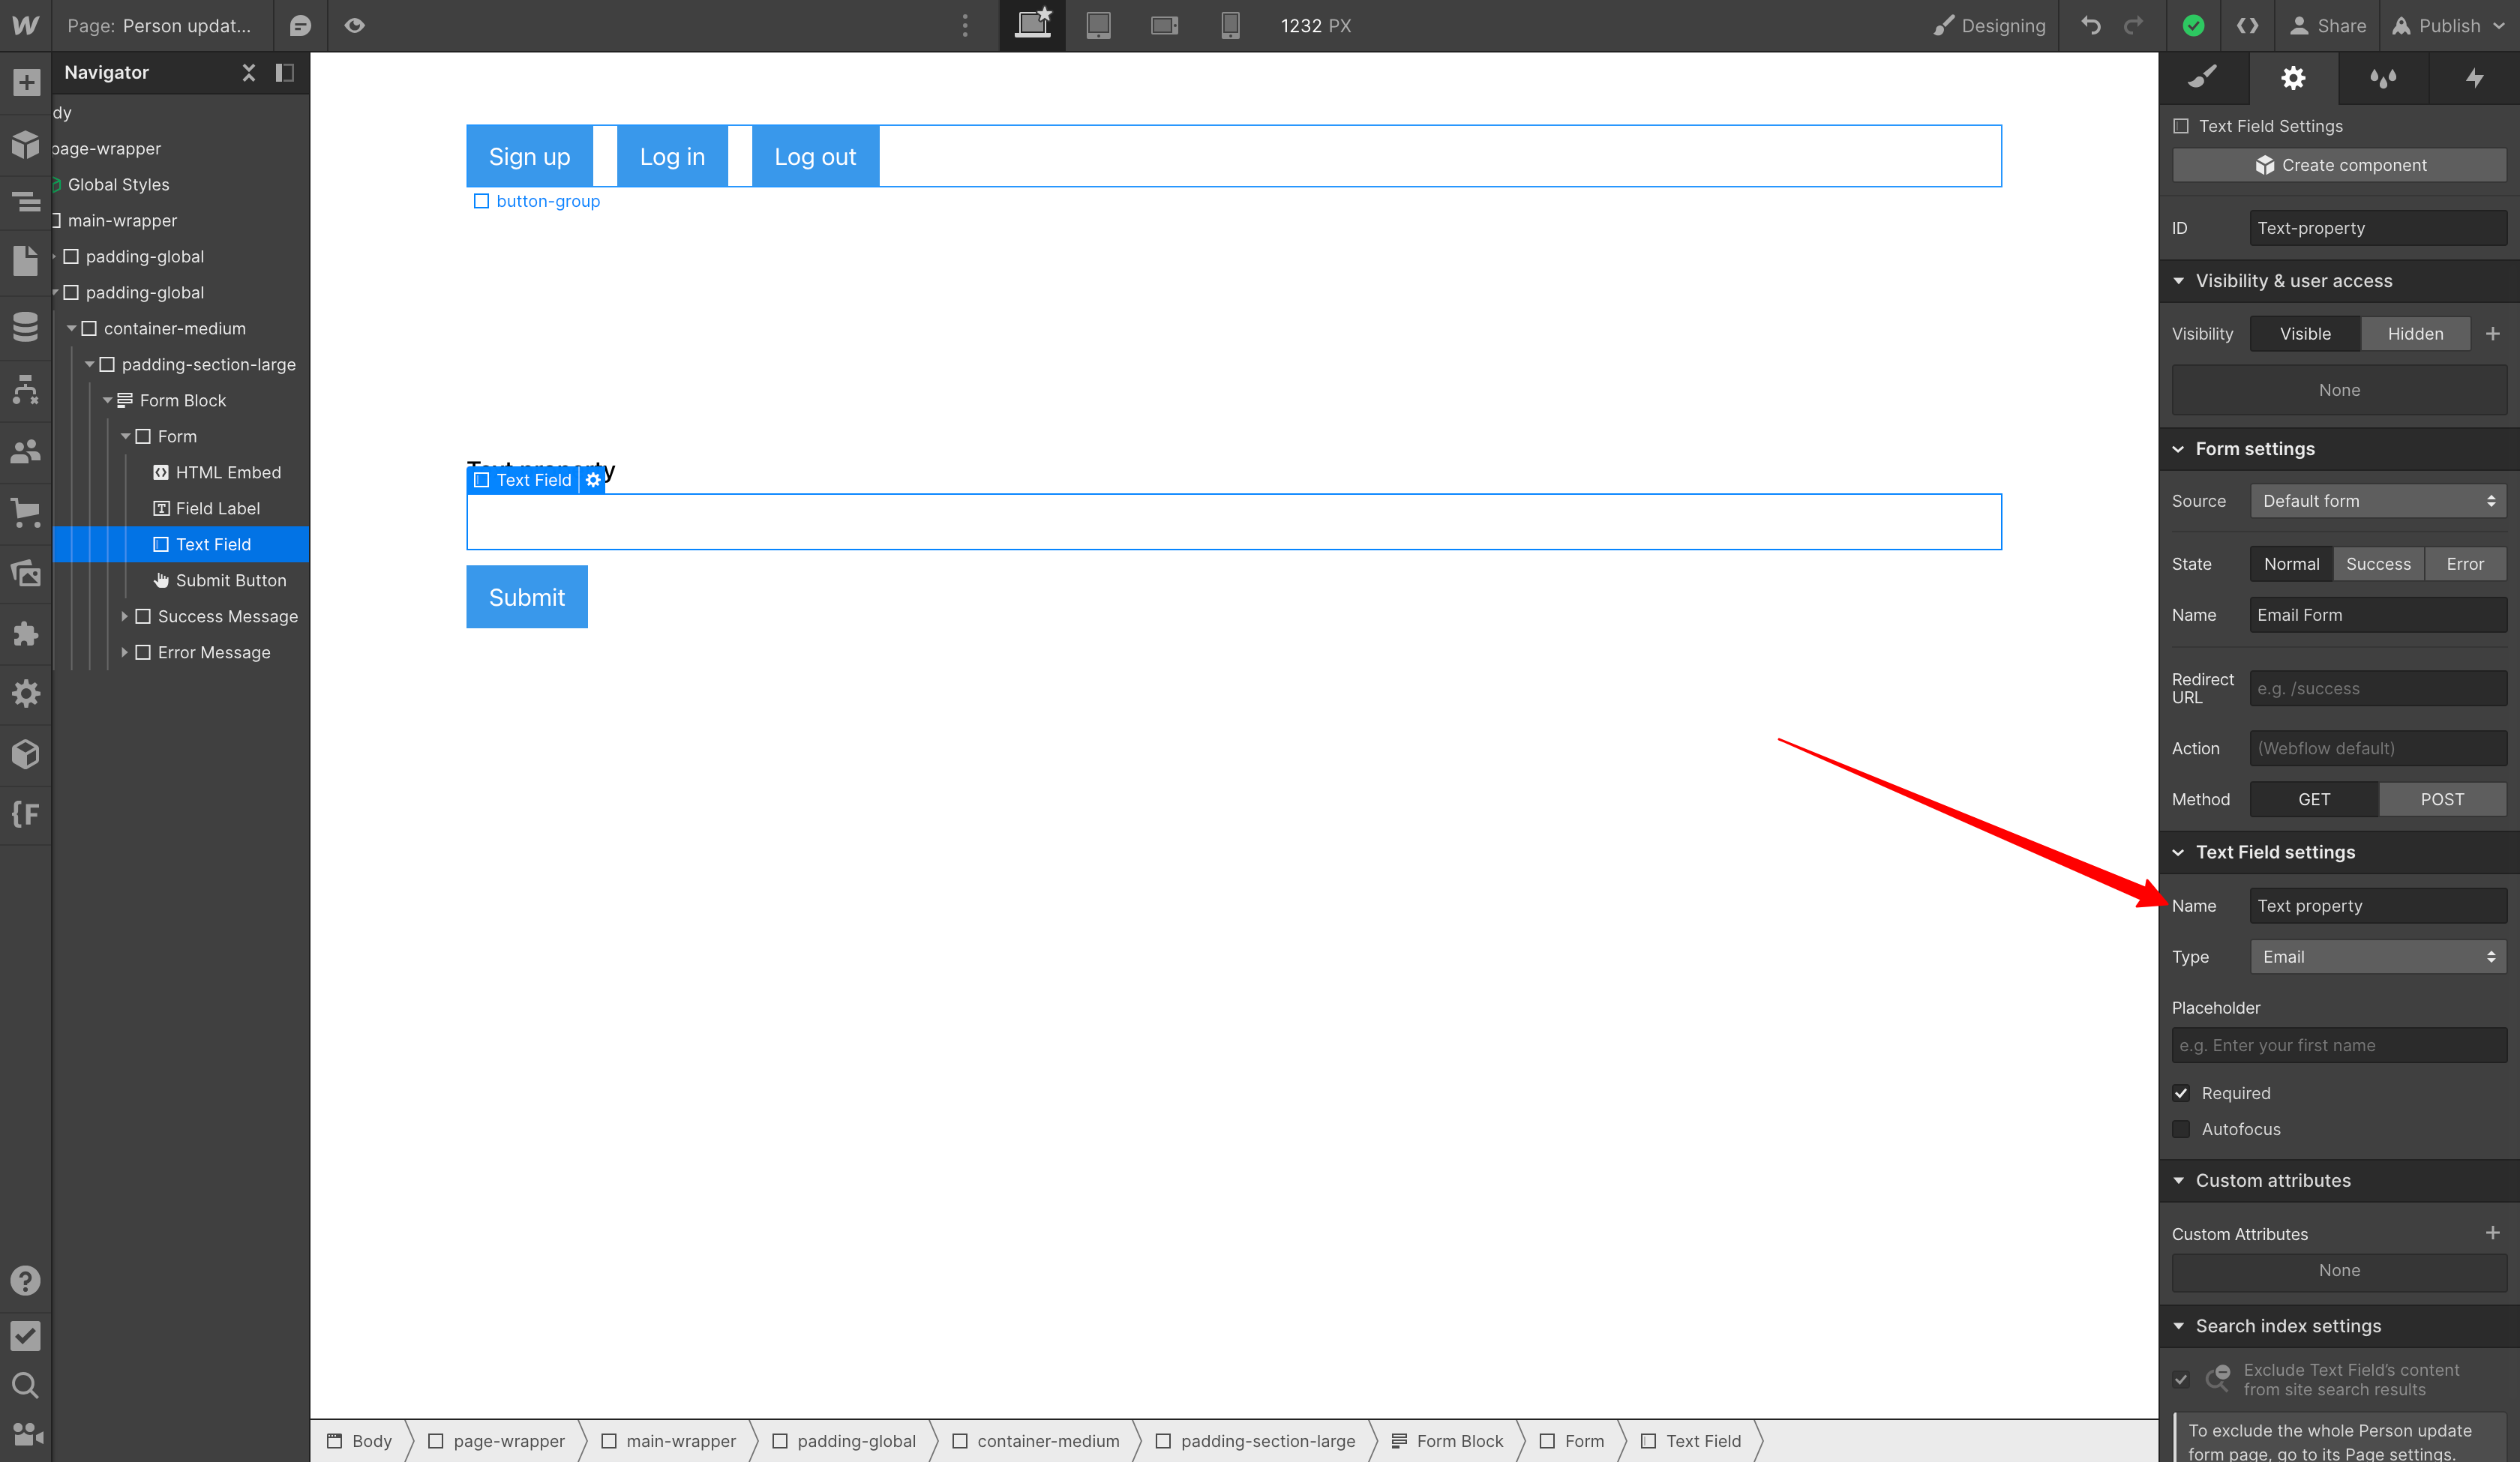
- Enter a name for your custom property in the Label field. In this case we've entered "Text property". A system name will be set for the custom property by default.
- Select a Control type—you can choose from checkbox, checkbox list, number, radio list, select, text, text area, or date. In this case we've selected "Text" to match our label.
- Click Add. That's it! You now have a text field on all your person records called "Text property."
You can optionally do the same for other types of properties you may want to include in your form. In this article we’ll go over updating a text property, but you can have a form with any combination of fields (text, checkbox list, radio list, select, etc.).
Install Outseta script and links on your Webflow site
Add Outseta's Quick Start Embed Script to the header of your site
Within Webflow, go to Project settings > Custom code. Copy and paste the Quick start head script that you'll find within your Outseta account on the Auth > Embeds page. You can copy it from below as well, but don’t forget to replace the subdomain with your Outseta subdomain.
<script>
  var o_options = {
    domain: '[YOUR-OUTSETA-SUBDOMAIN].outseta.com'
  };
</script>
<script src="<https://cdn.outseta.com/outseta.min.js>"
        data-options="o_options">
</script>
Hook up your sign up, login, and logout links
Go to Auth > Embeds within Outseta. On this page you can grab your sign up, login, and logout links. Use the URLs provided for the corresponding buttons on your site. You can also grab them below, but remember, if you grab them here make sure you fill in your Outseta subdomain. Just skip this whole step if you’ve already done it.
Sign up link
https://[YOUR-OUTSETA-SUBDOMAIN].outseta.com/auth?widgetMode=register#o-anonymous
Login link
https://[YOUR-OUTSETA-SUBDOMAIN].outseta.com/auth?widgetMode=login#o-anonymous
Logout link
/#o-logout-link
For the logout link, append this value to the end of any URL. We'll redirect the user the the URL you select when they logout.
Add the custom script to your page in Webflow
On the page your where your form will be, go to the page settings and scroll down to the “Custom code” section. In the “Inside <head> tag” field, copy in the following script.
<!-- Outseta [Add access token to hidden form field] -->
<script>
  Outseta.on("nocode.initialized", token => {
    var accessTokenInput = document.getElementById("access-token");
    var accessToken = Outseta.getAccessToken();
    if(accessTokenInput && accessToken) {
      accessTokenInput.value = accessToken;
    }
  });
</script>
This script is going to add the logged in user’s access token to a field in our form so that we know which user to apply the submission data to.
Build the form
Start by adding a form block element to your page in Webflow. Inside of the form add an embed block and copy in the following.
<input type="hidden" name="Access token" id="access-token">
This is a hidden input that will get populated with the access token, thanks to the custom script we added to the page in the last step.
Next, we’ll add a text input field to the form that corresponds to data we want to send to the Outseta person profile. You can delete the default “Name” and “Email address” fields that come with the form block. Add a label and an input to your form. In our case we’ve made the name of the input “Text property”. This name is what we’ll use to identify the field in Zapier.
You’re done building the form! Now publish your site.
Build the automation in Zapier
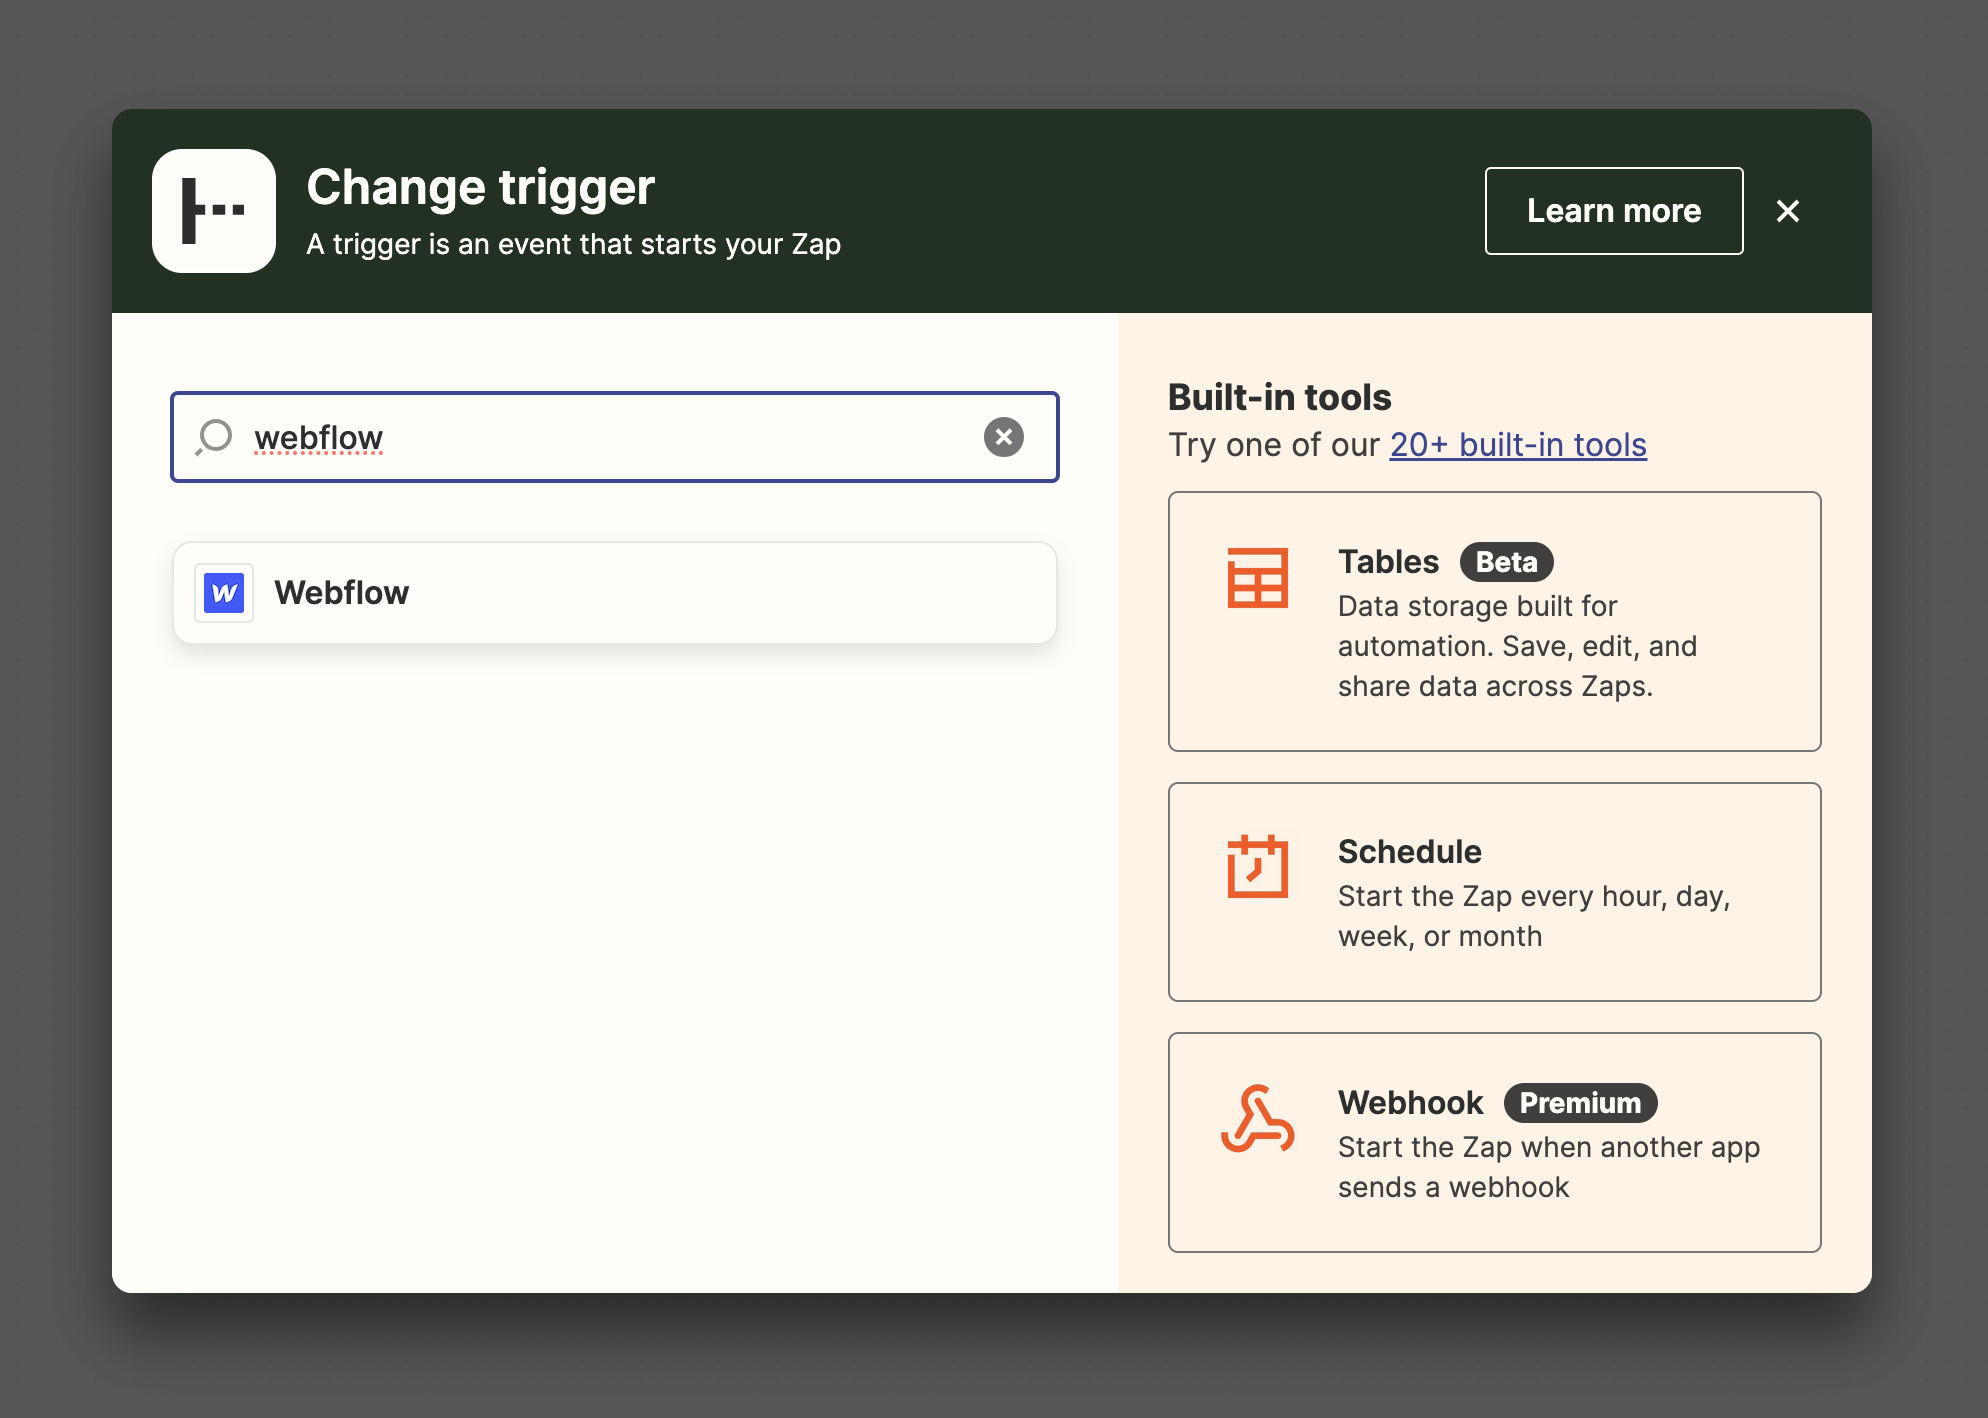
Create a new zap in Zapier and search for Webflow as the trigger.
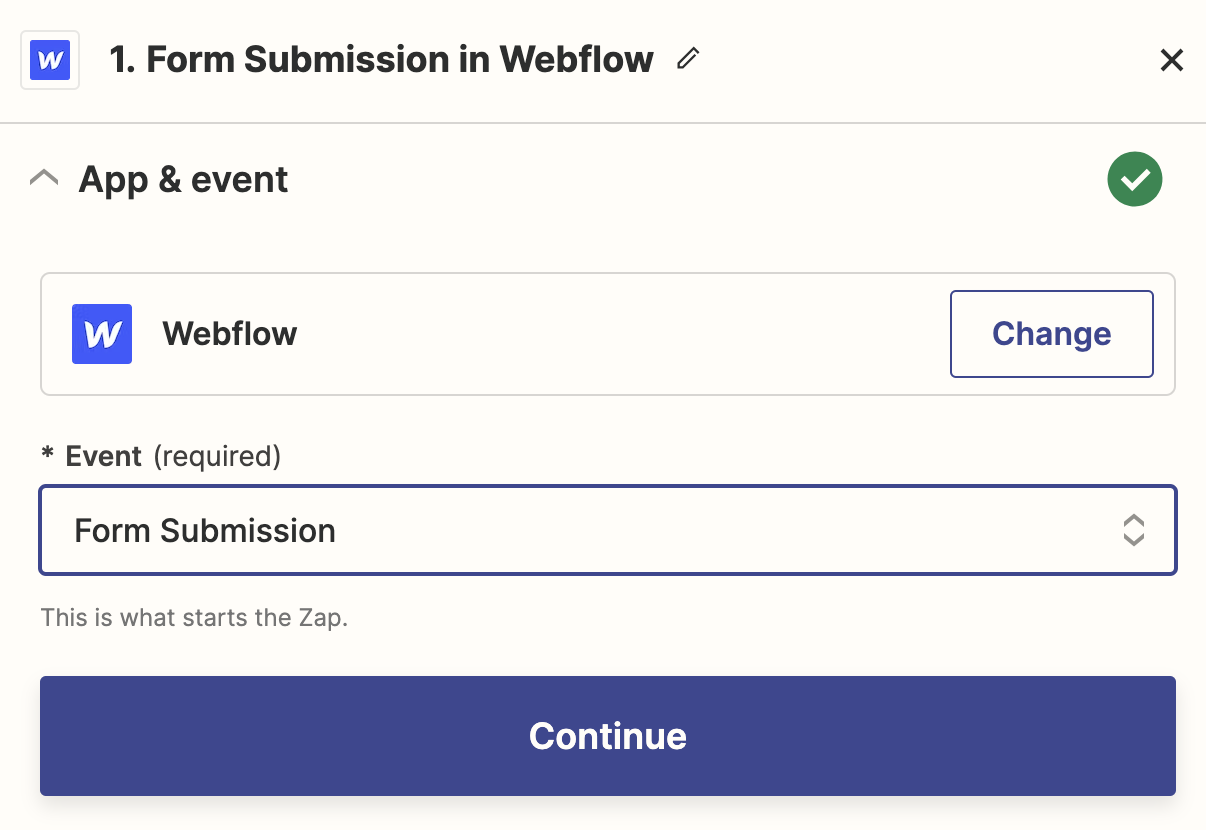
Choose “Form submission” when you see the list of events provided by Webflow.
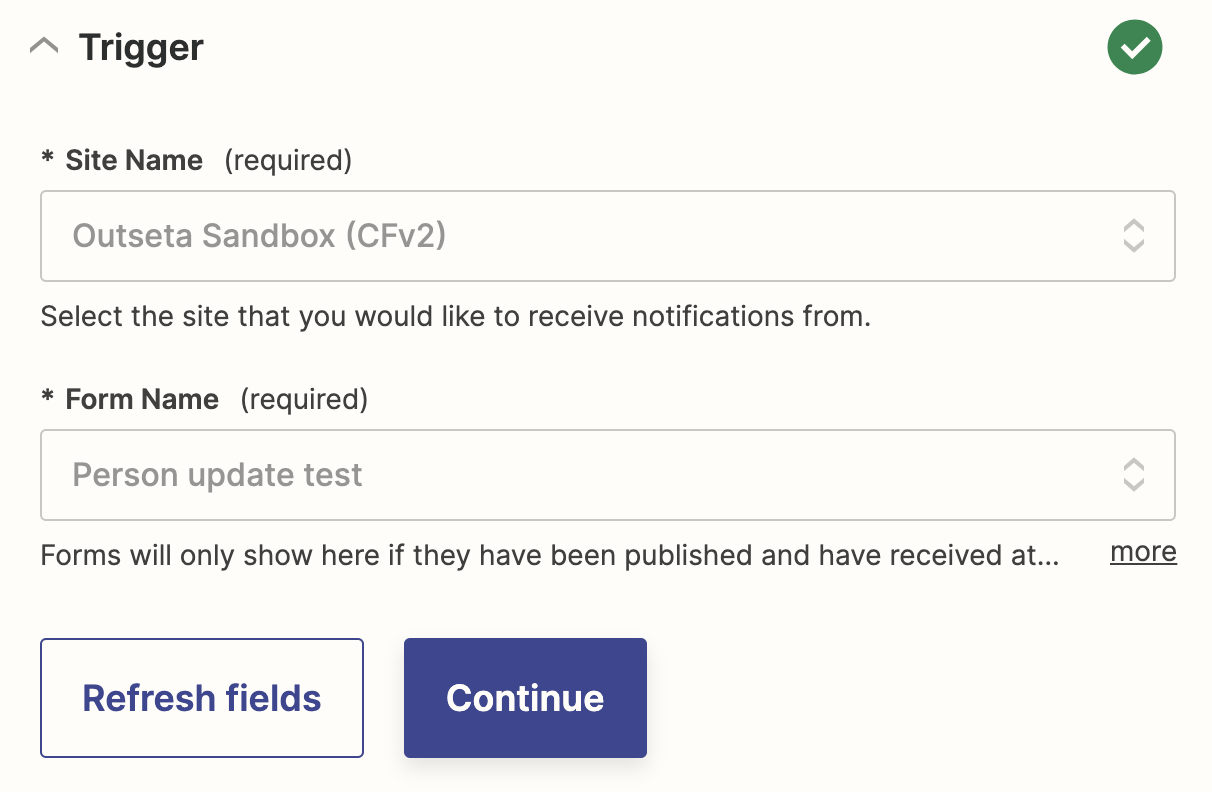
It will then ask you to choose an account. Go through the process of connecting your Webflow site. Then choose your site and the form you’d like to connect.
Next, go back to your Webflow site (the published link) to log in and submit the form so that Zapier has data to test with. Click test and you should see something like this.
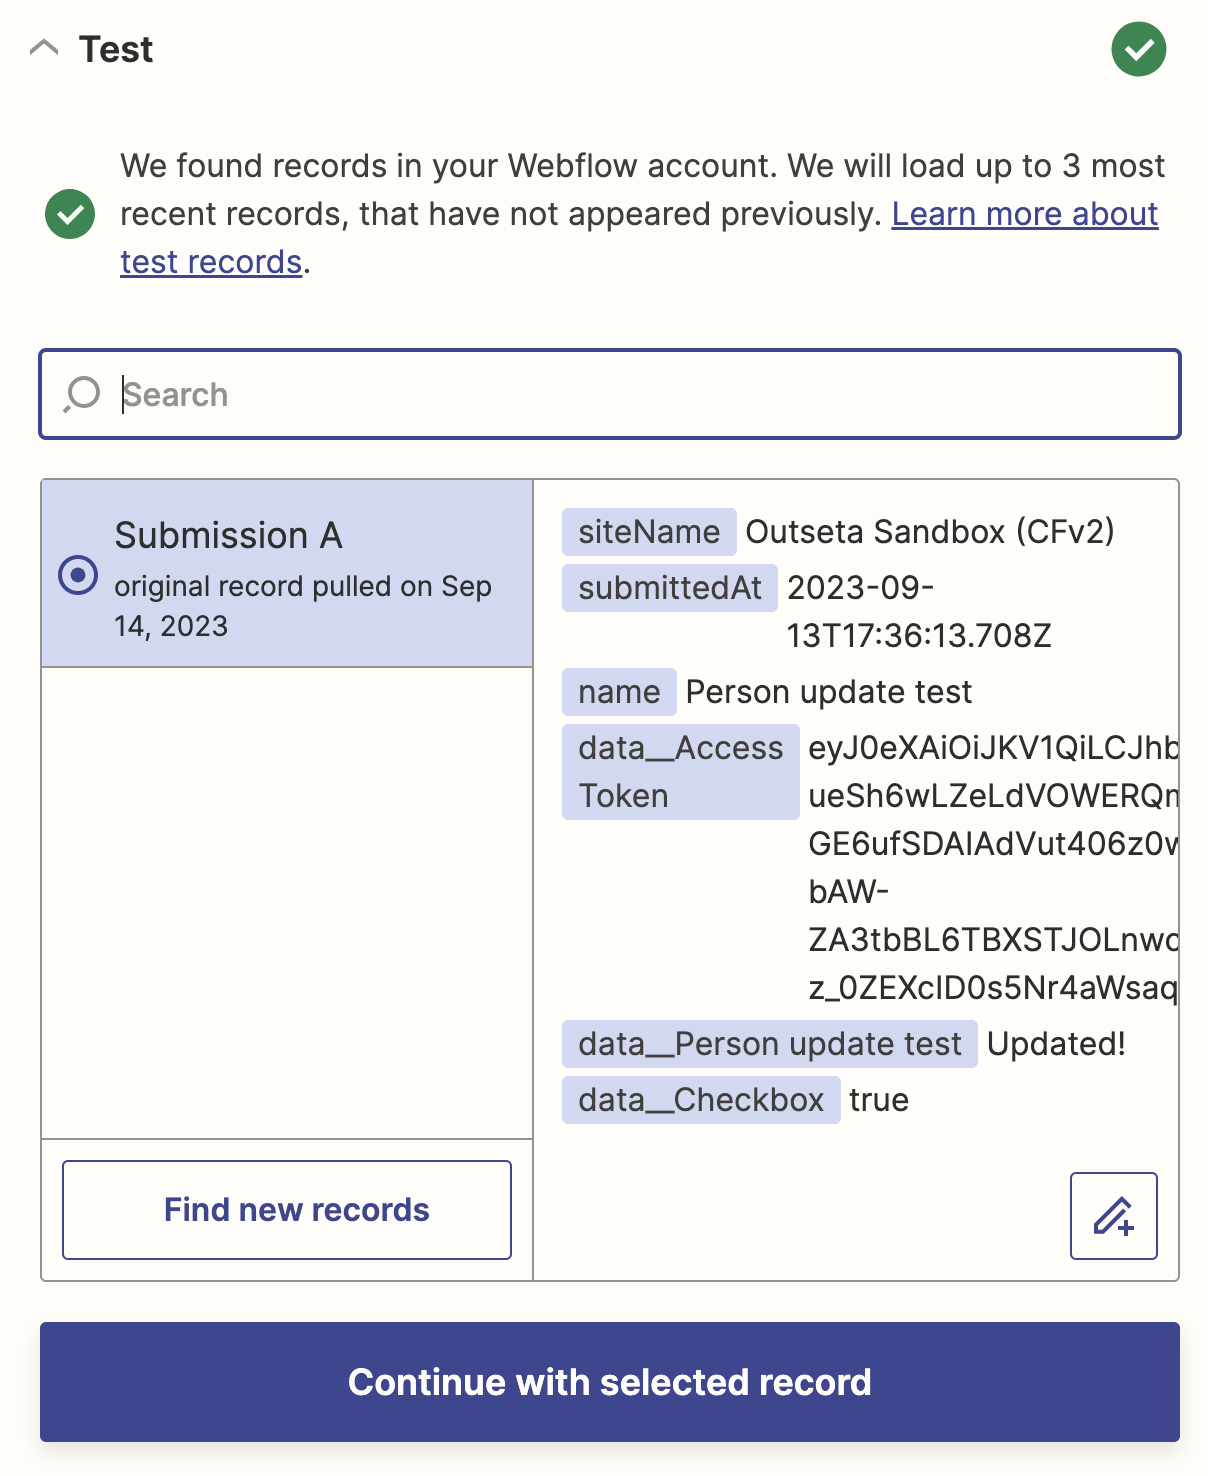
Check the data to make sure that the access token and the text property have come through. If so, we’ll move on to the next step in building the automation. Add an action to your zap and search for “Webhooks by Zapier”.

Choose “Custom request” when you see the list of events provided by Webhooks by Zapier.

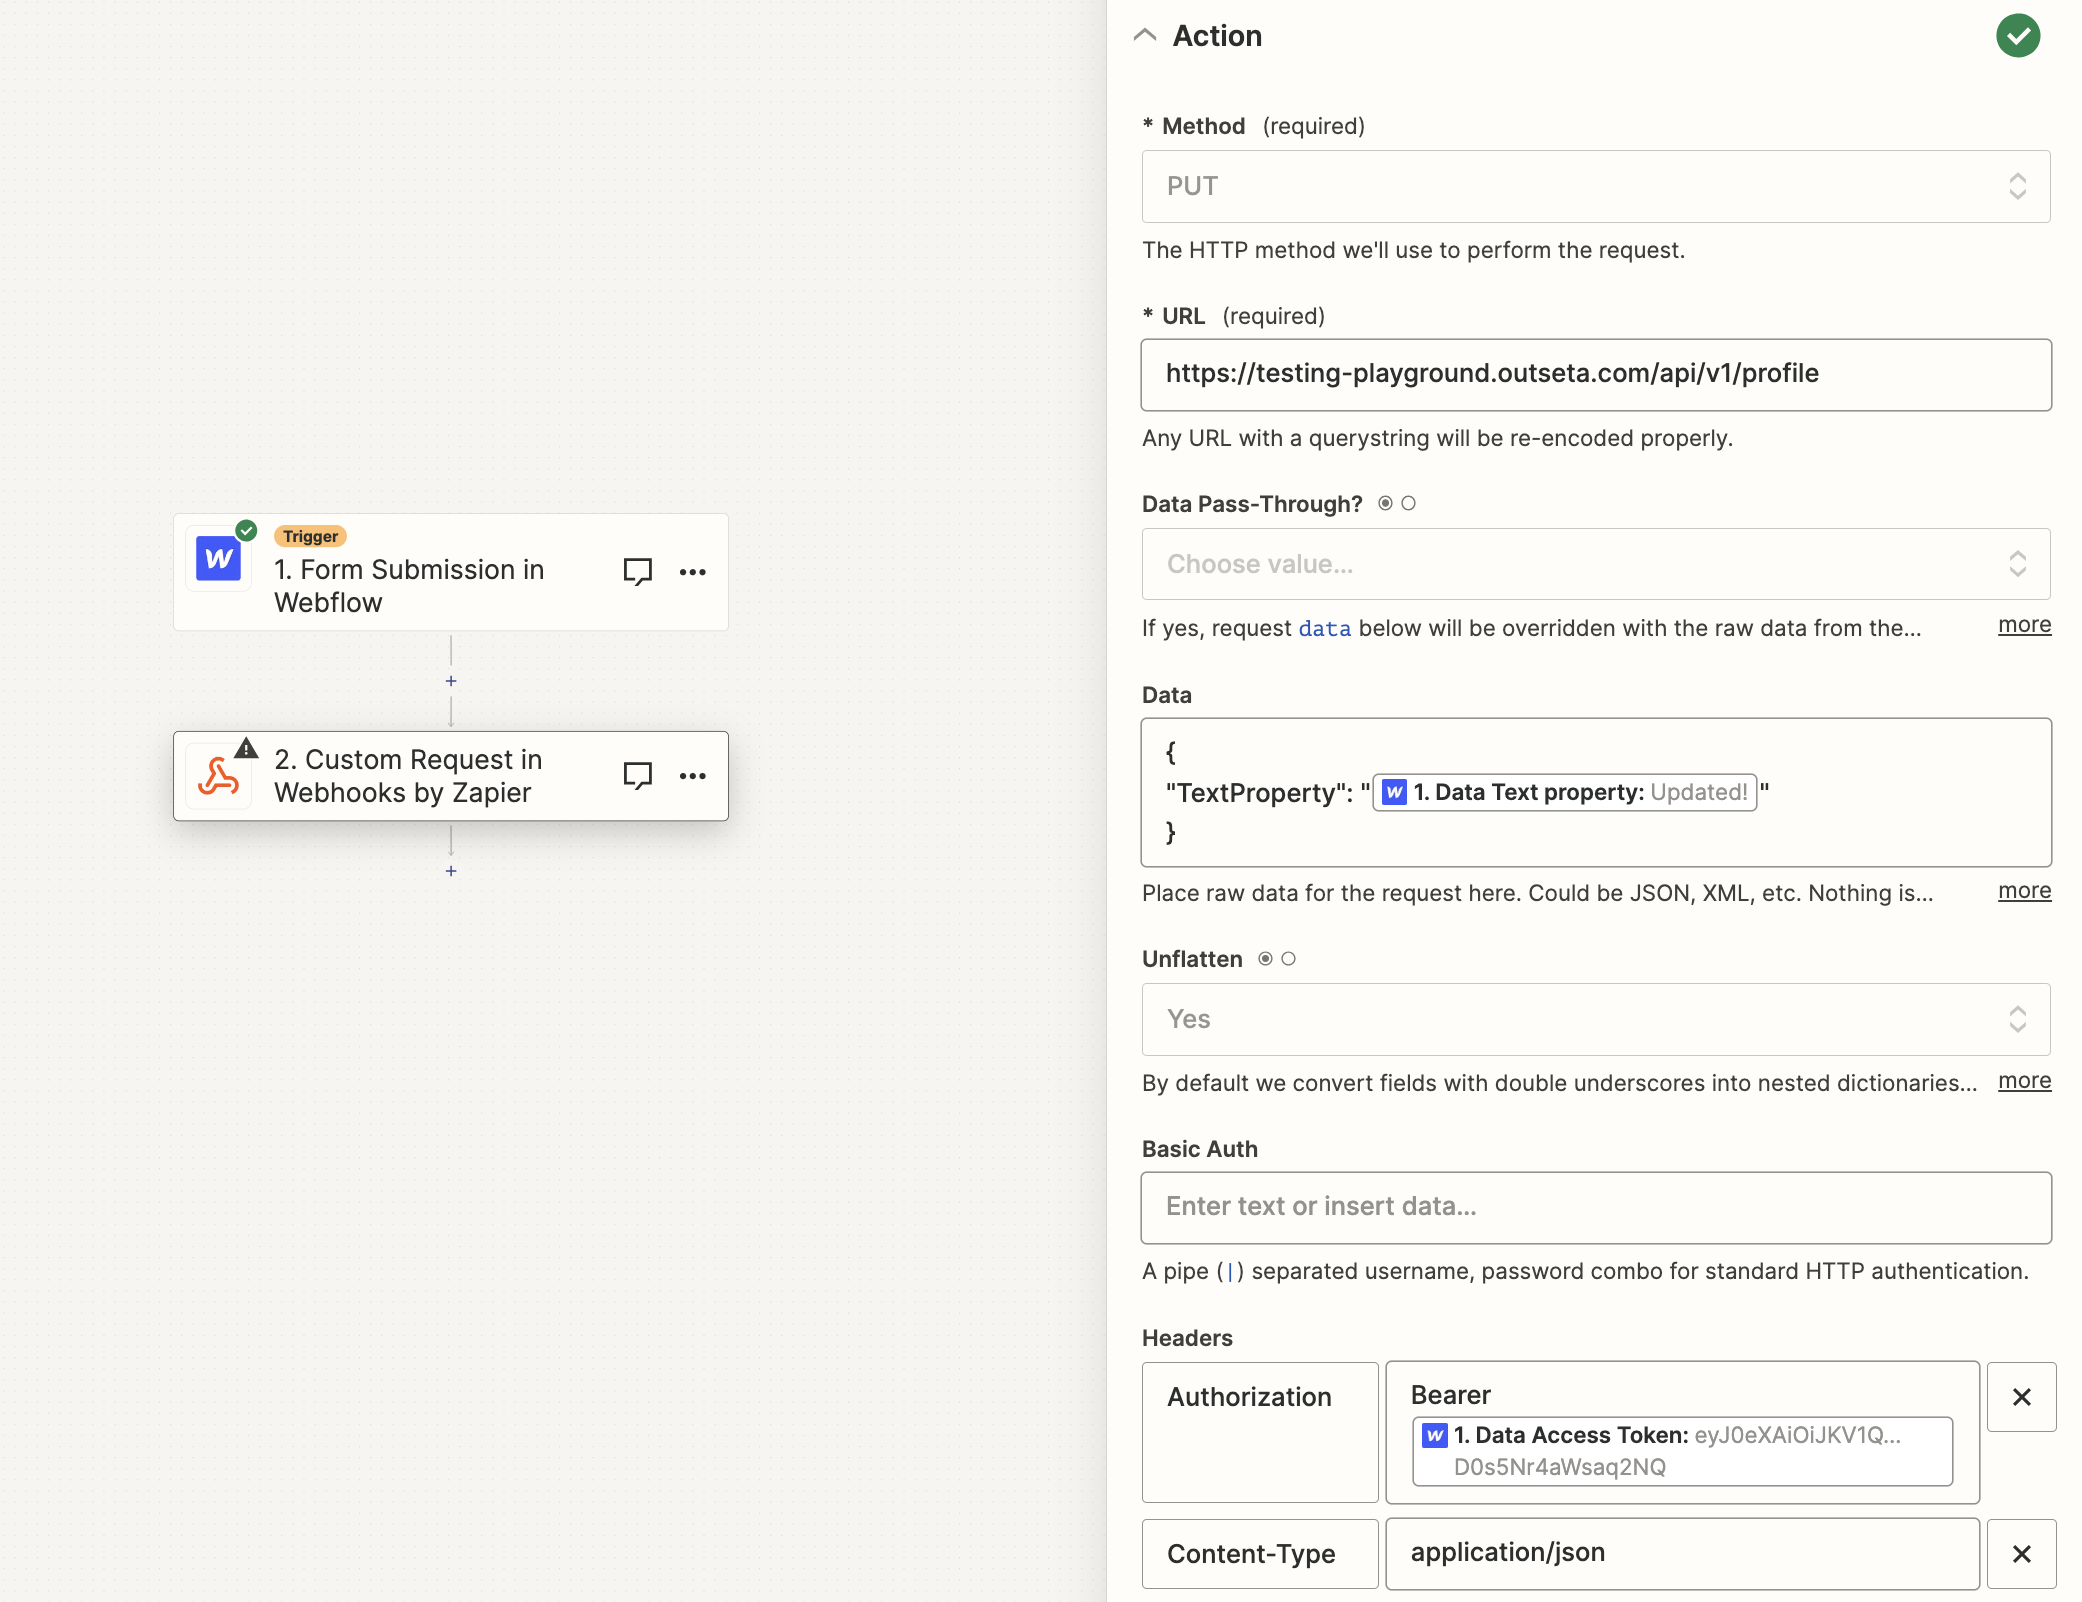
Now the custom request action will need to be filled out.
-
For the “Method”, choose “PUT”.
-
For the URL, paste in the following (but make sure to replace the subdomain with your own Outseta subdomain.
https://[YOUR-OUTSETA-SUBDOMAIN].outseta.com/api/v1/profile -
It will now ask you for the “Request content”. This is where we’ll match up the system names of custom properties from Outseta with data coming in from the form (also known as constructing key/value pairs). It should be structured as follows, where the value (the part after the colon) is the dynamic data that came in from the text property form field when we submitted the form.
{ "TextProperty": "[1. Data person update test]" } -
Next you’ll need to add a header. The name will be “Authorization”. The value will be “Bearer [Access token], where the access token is the value that was sent when we first submitted the form.
-
Ok, now add another header. The name will be “Content-Type”. The value will be “application/json”.
When the custom request action is completely filled out, it should look something like this.
Your Zapier automation is now complete. Click “Test”, and you should get a confirmation that the request was sent successfully, like this.

At this point you’ll want to go into Outseta, find the person you were logged in as when you submitted the form (remember, it’s the person, not the account) and check to see if the custom property has been updated.
The last step is to go back into Zapier and actually publish the zap so that all future form submissions will trigger the automation.
That’s it! If you have any question about this process, we'd be happy to help! Please email us at support(at)outseta.com.