The article covers how to build a member application process, allowing you to collect and review information from prospective members before inviting them to sign up for you site.
Add a Member Status custom property
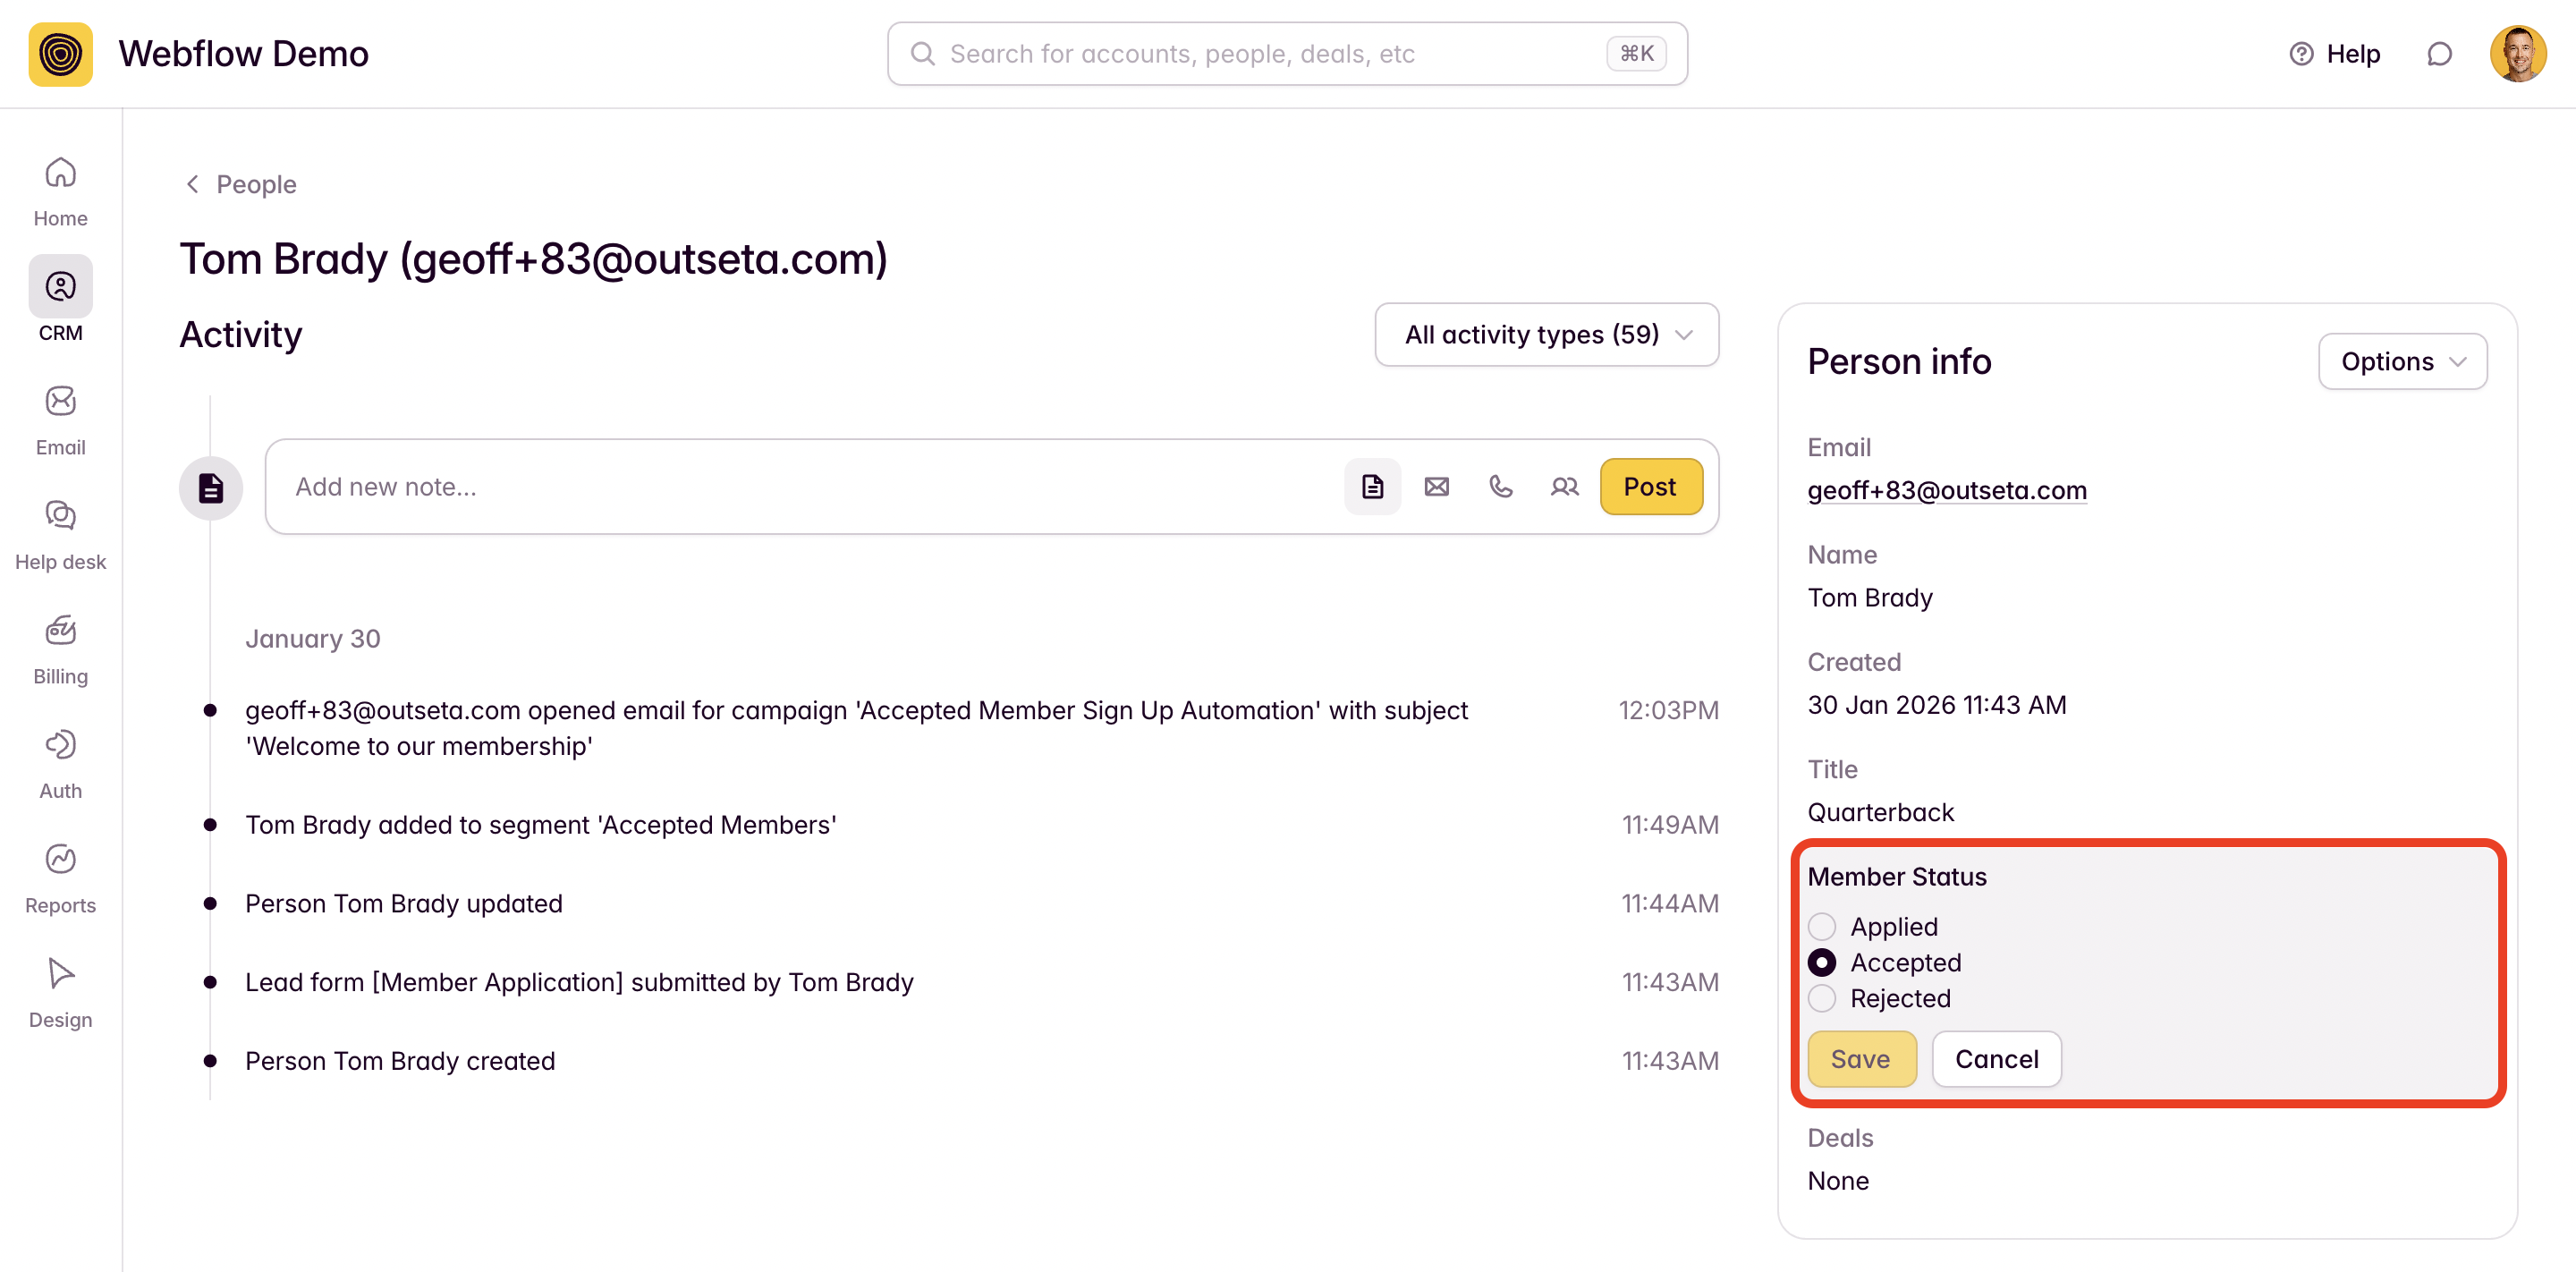
Start by adding a custom property to your People records called something like Member Status. The idea here is to have a place in Outseta that reflects the status of the potential member's application.
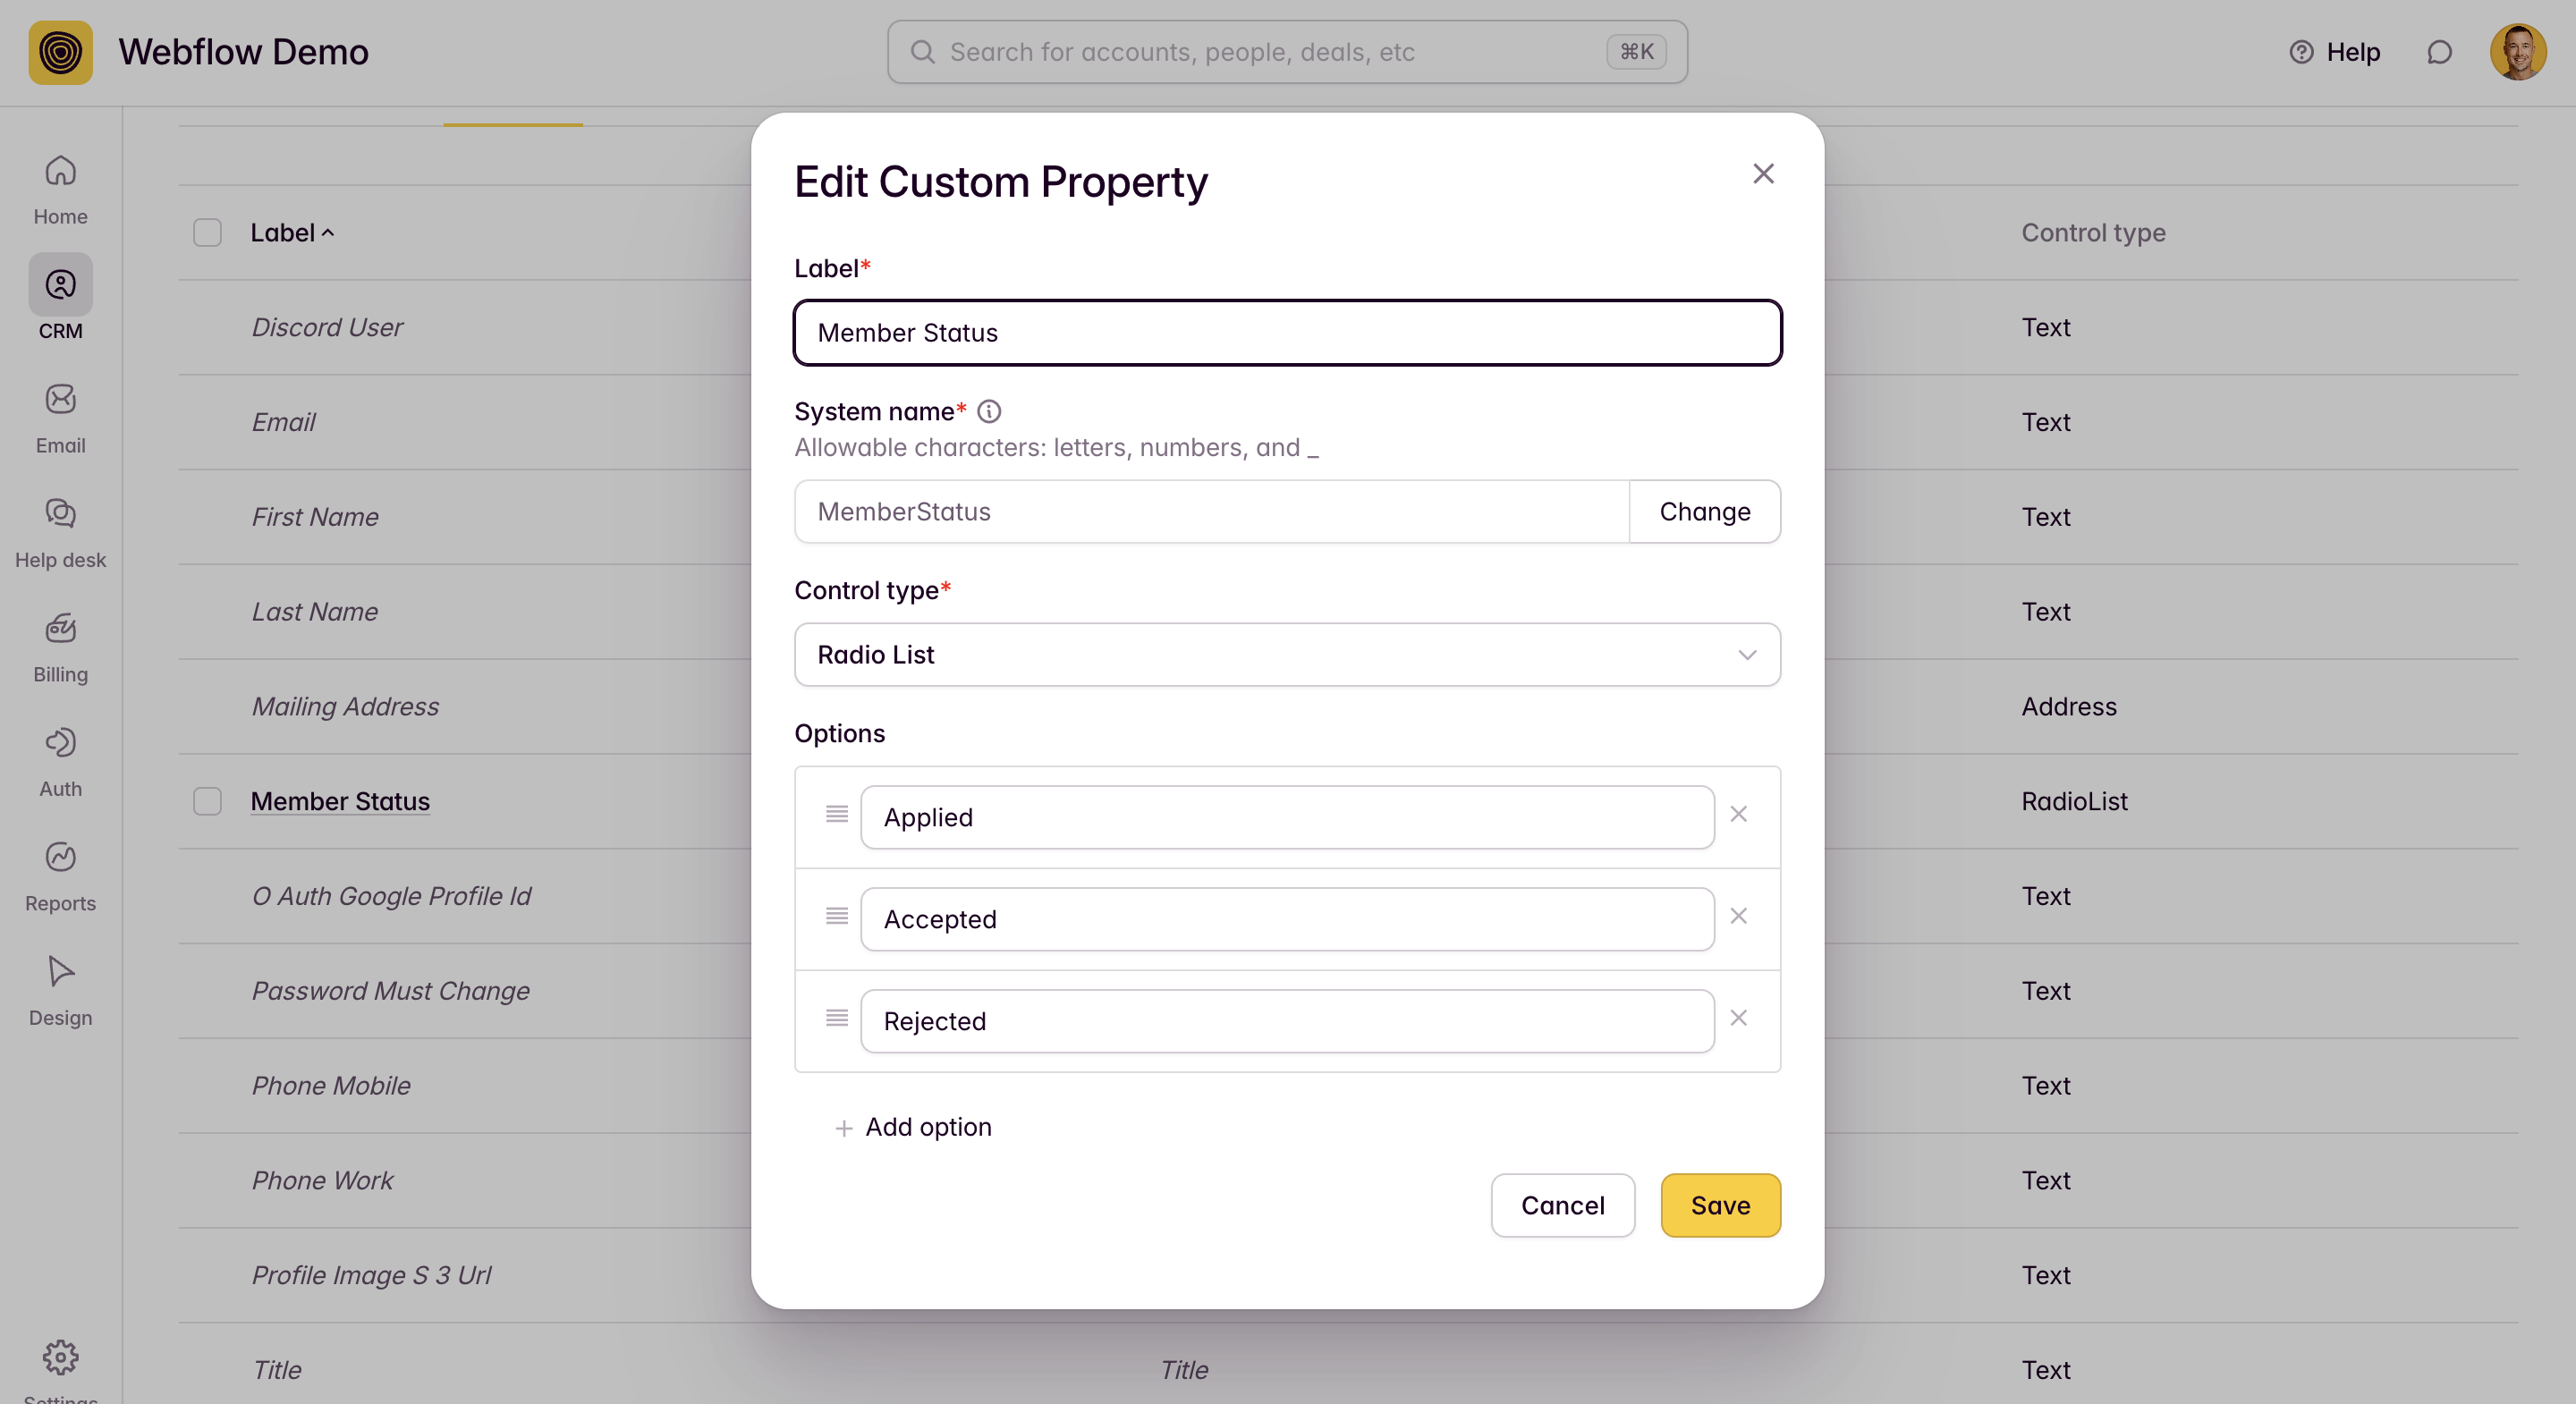
In the example above, I've created a Radio List property with three pre-defined values—Applied, Accepted, Rejected—but you can add any additional stages that you'd like that reflect your own application process.
The values pertaining to this custom property will be used to trigger automated emails in subsequent steps of this process.
Build your application form
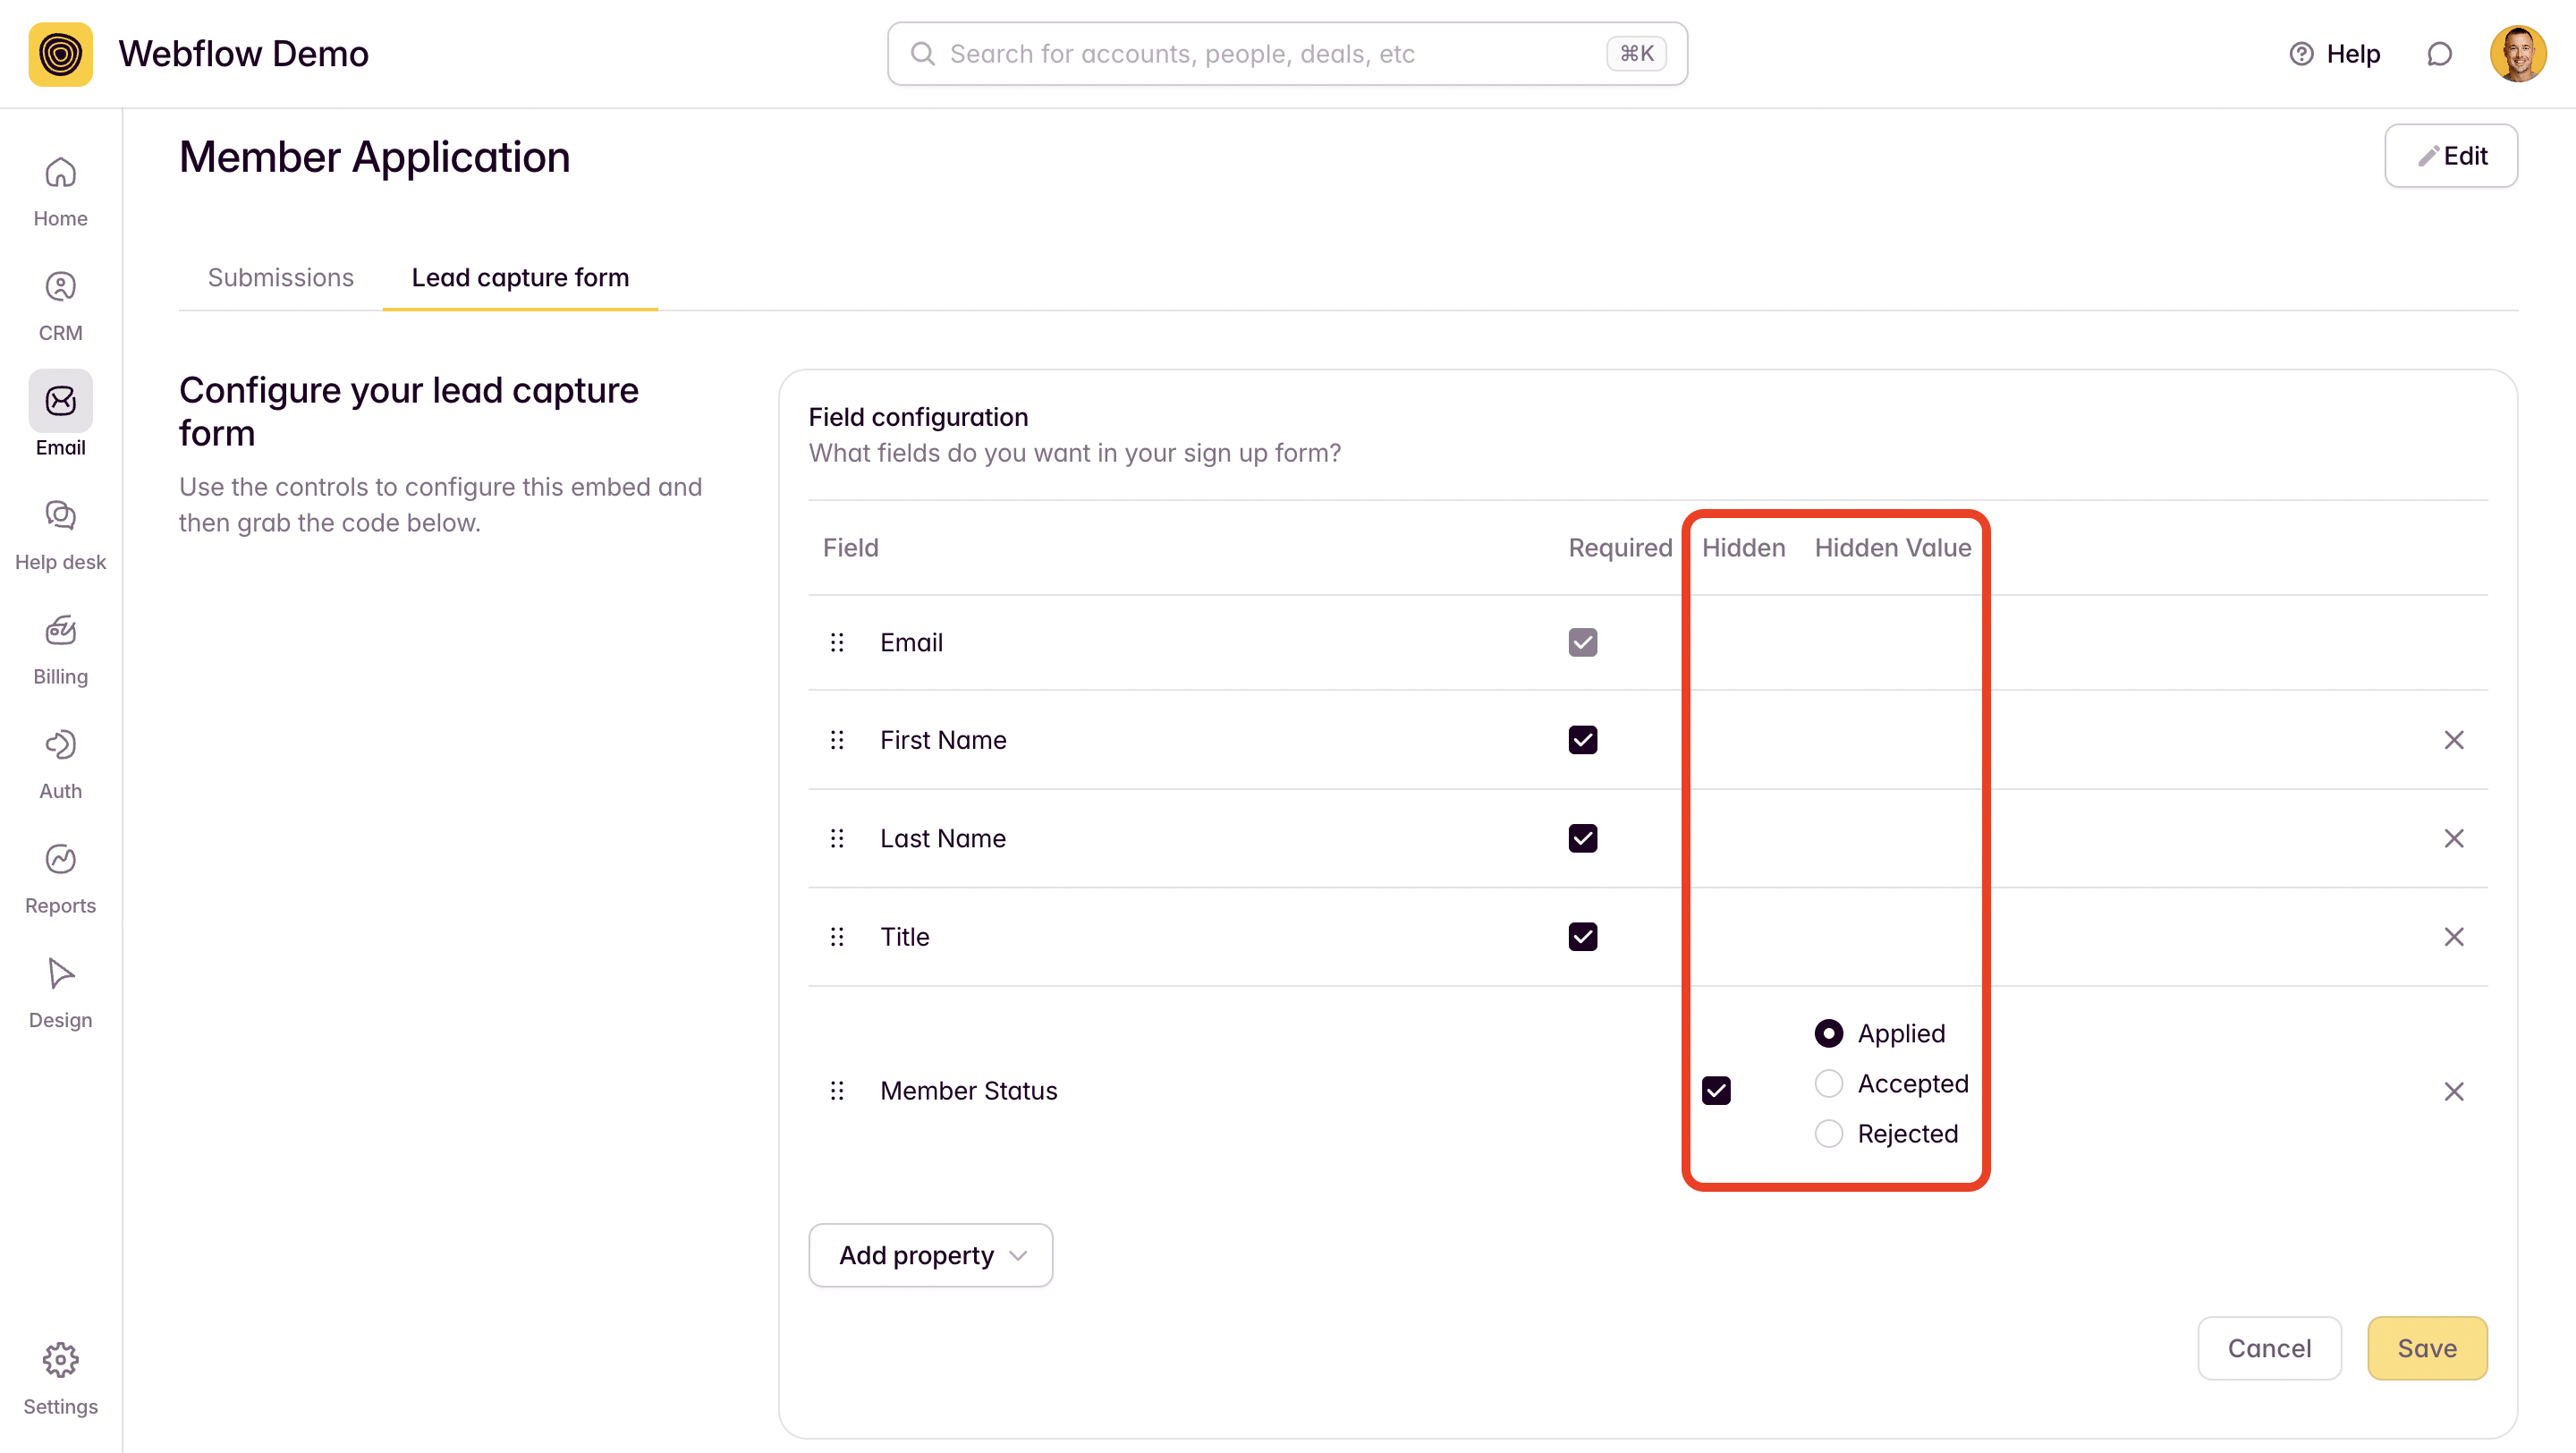
Next, you'll build your application form. In the video above, I've used an Outseta Lead Capture Form to build my application, but you can use any third party form builder that you prefer as well. If you do use a third party form builder, you can use a tool like Zapier or Make to create a Person record in Outseta when the form is submitted—this would send all of the details captured via the form submission into Outseta. By using an Outseta lead capture form, you cut out the need to use a tool like Zapier and a Person record is automatically created in Outseta when the application form in submitted.
The most important part of this step is to pass a HIDDEN field with a value of APPLIED when your application form is submitted. This field will not show your application form, but the value of APPLIED will be passed into Outseta along with the other data captured by the form.
Create a segment to trigger automated invite emails
Next, go to CRM > SEGMENTS and create a segment using the conditions:
Person Member Status is one of Accepted
You can see I've named this segment ACCEPTED MEMBERS.
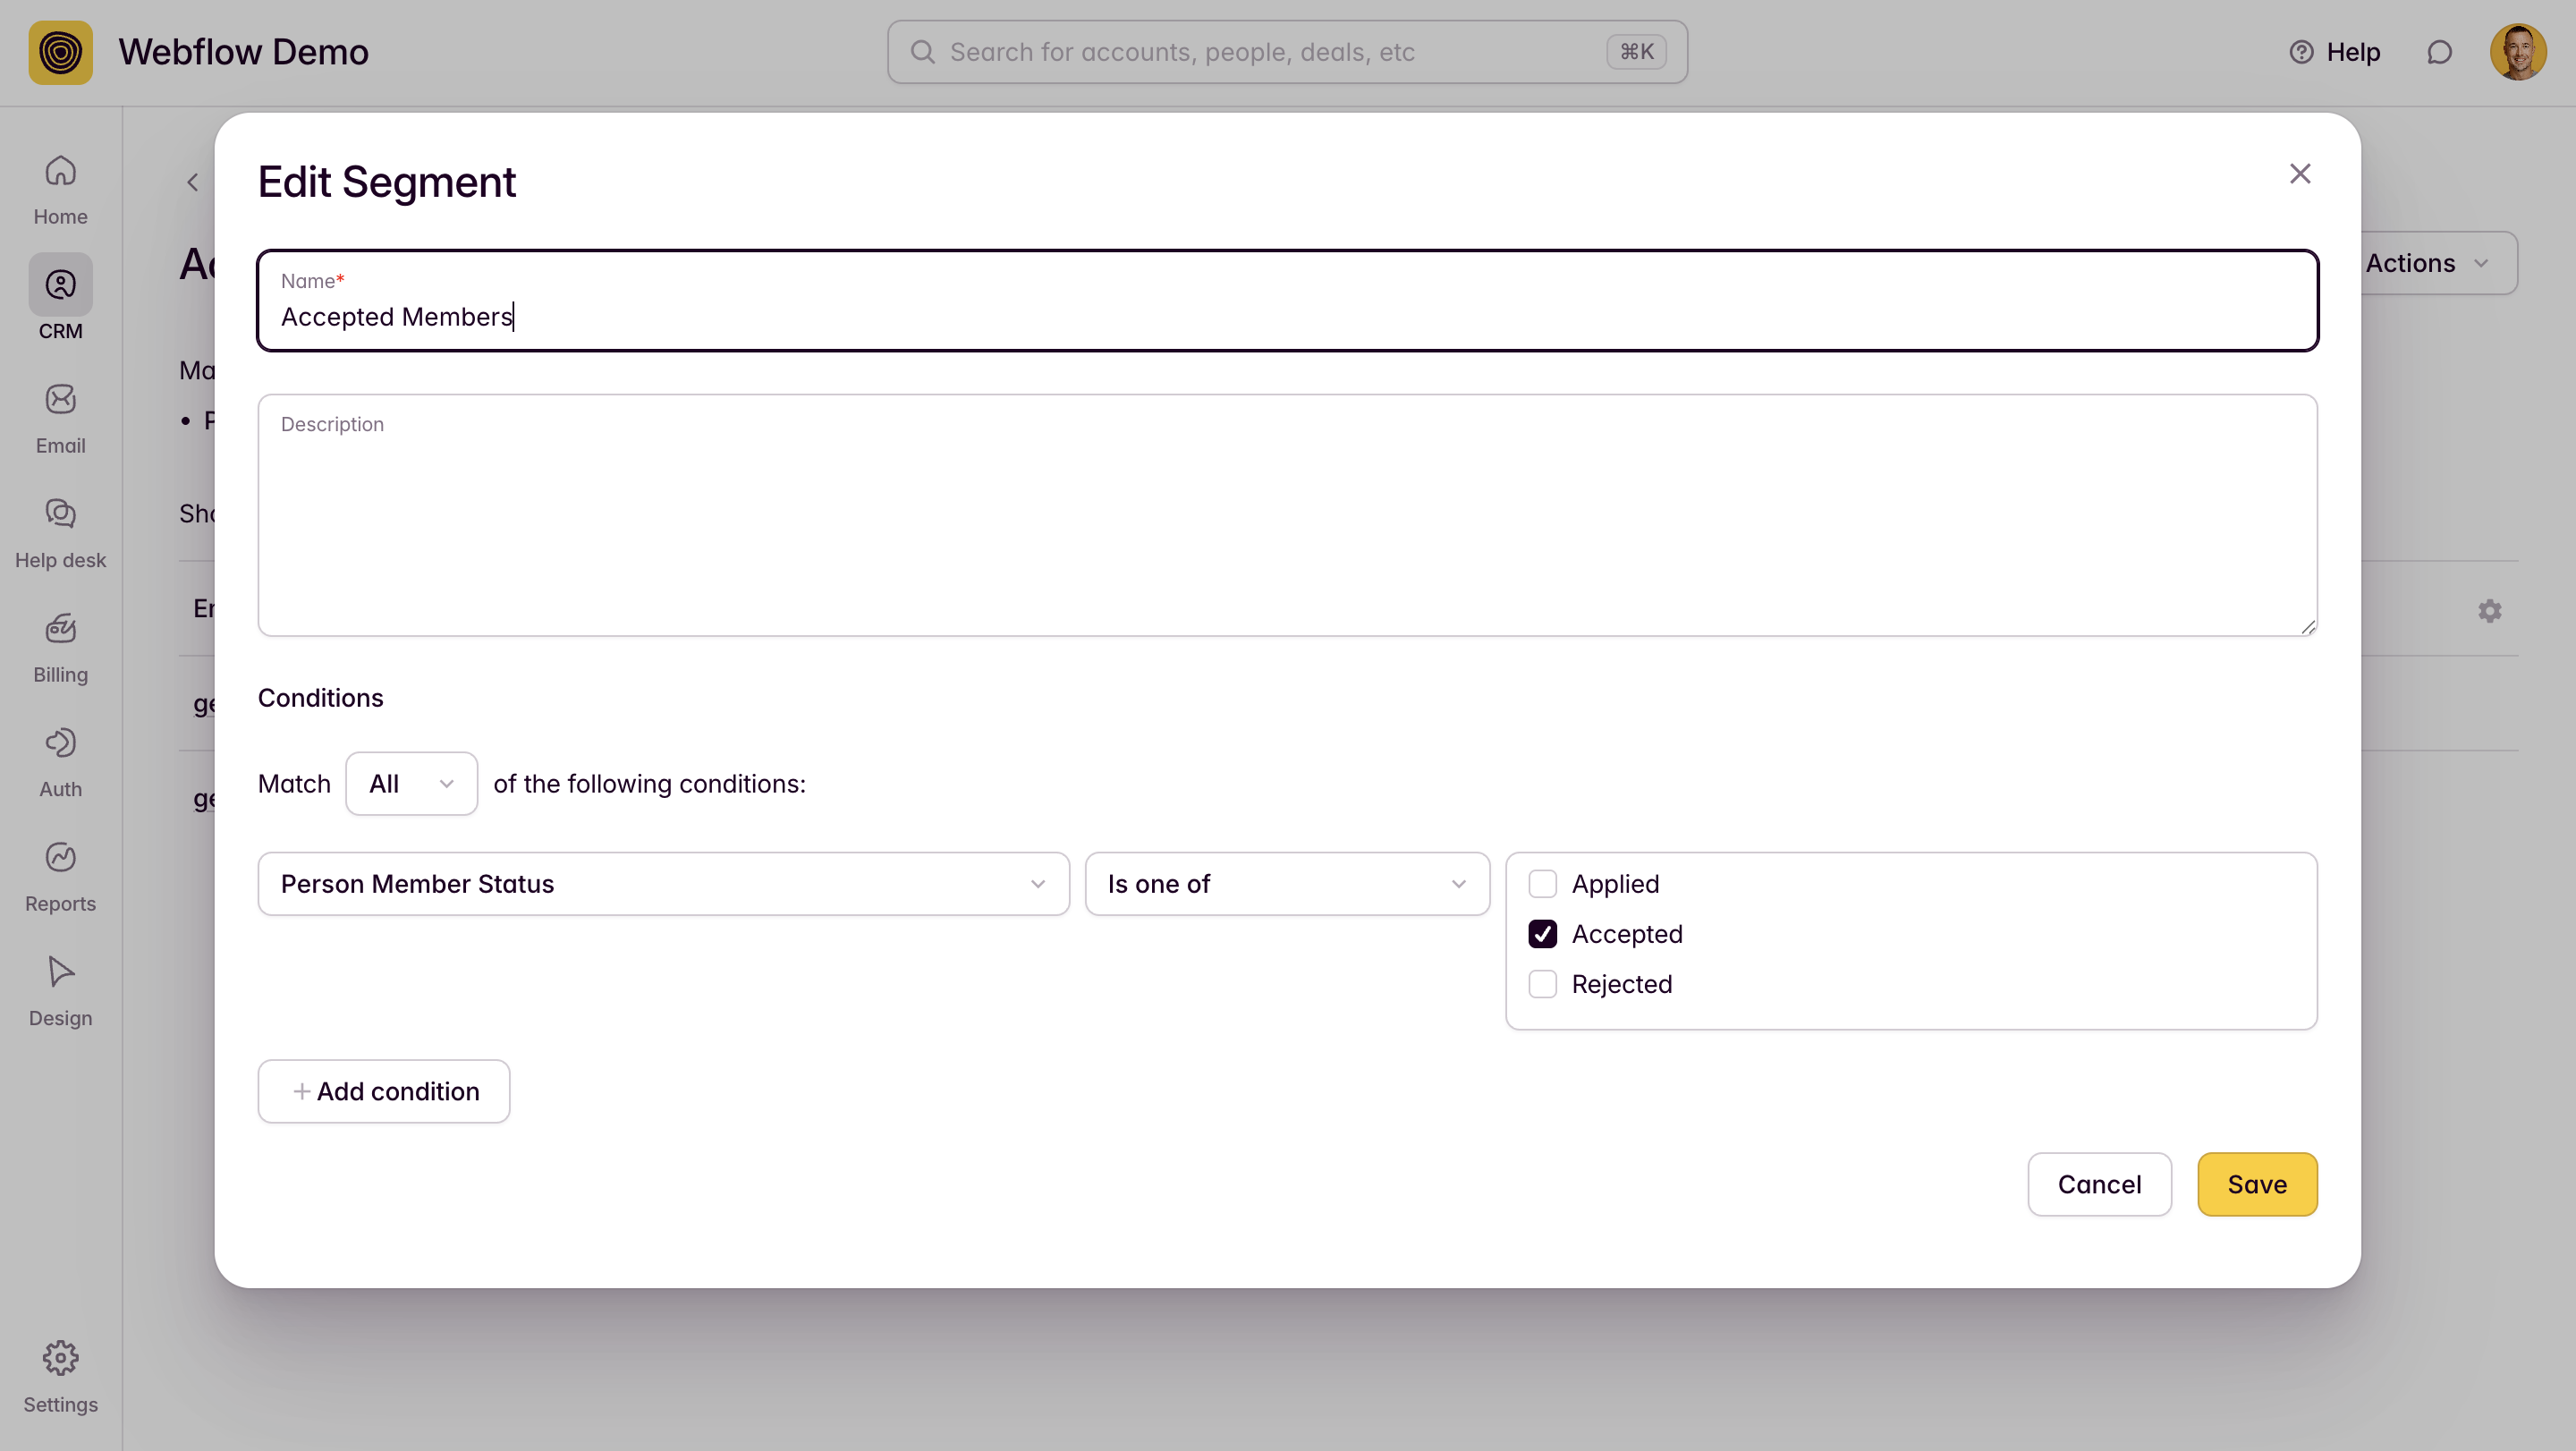
When you review an application (we'll cover that soon) and change the Member Status property value to ACCEPTED, the applicant will be moved into your segment of ACCEPTED MEMBERS segment.
Set up a drip email to invite accepted members to sign up
Next, you'll setup a drip campaign email that automatically gets sent when someone is added to your ACCEPTED MEMBERS segment.
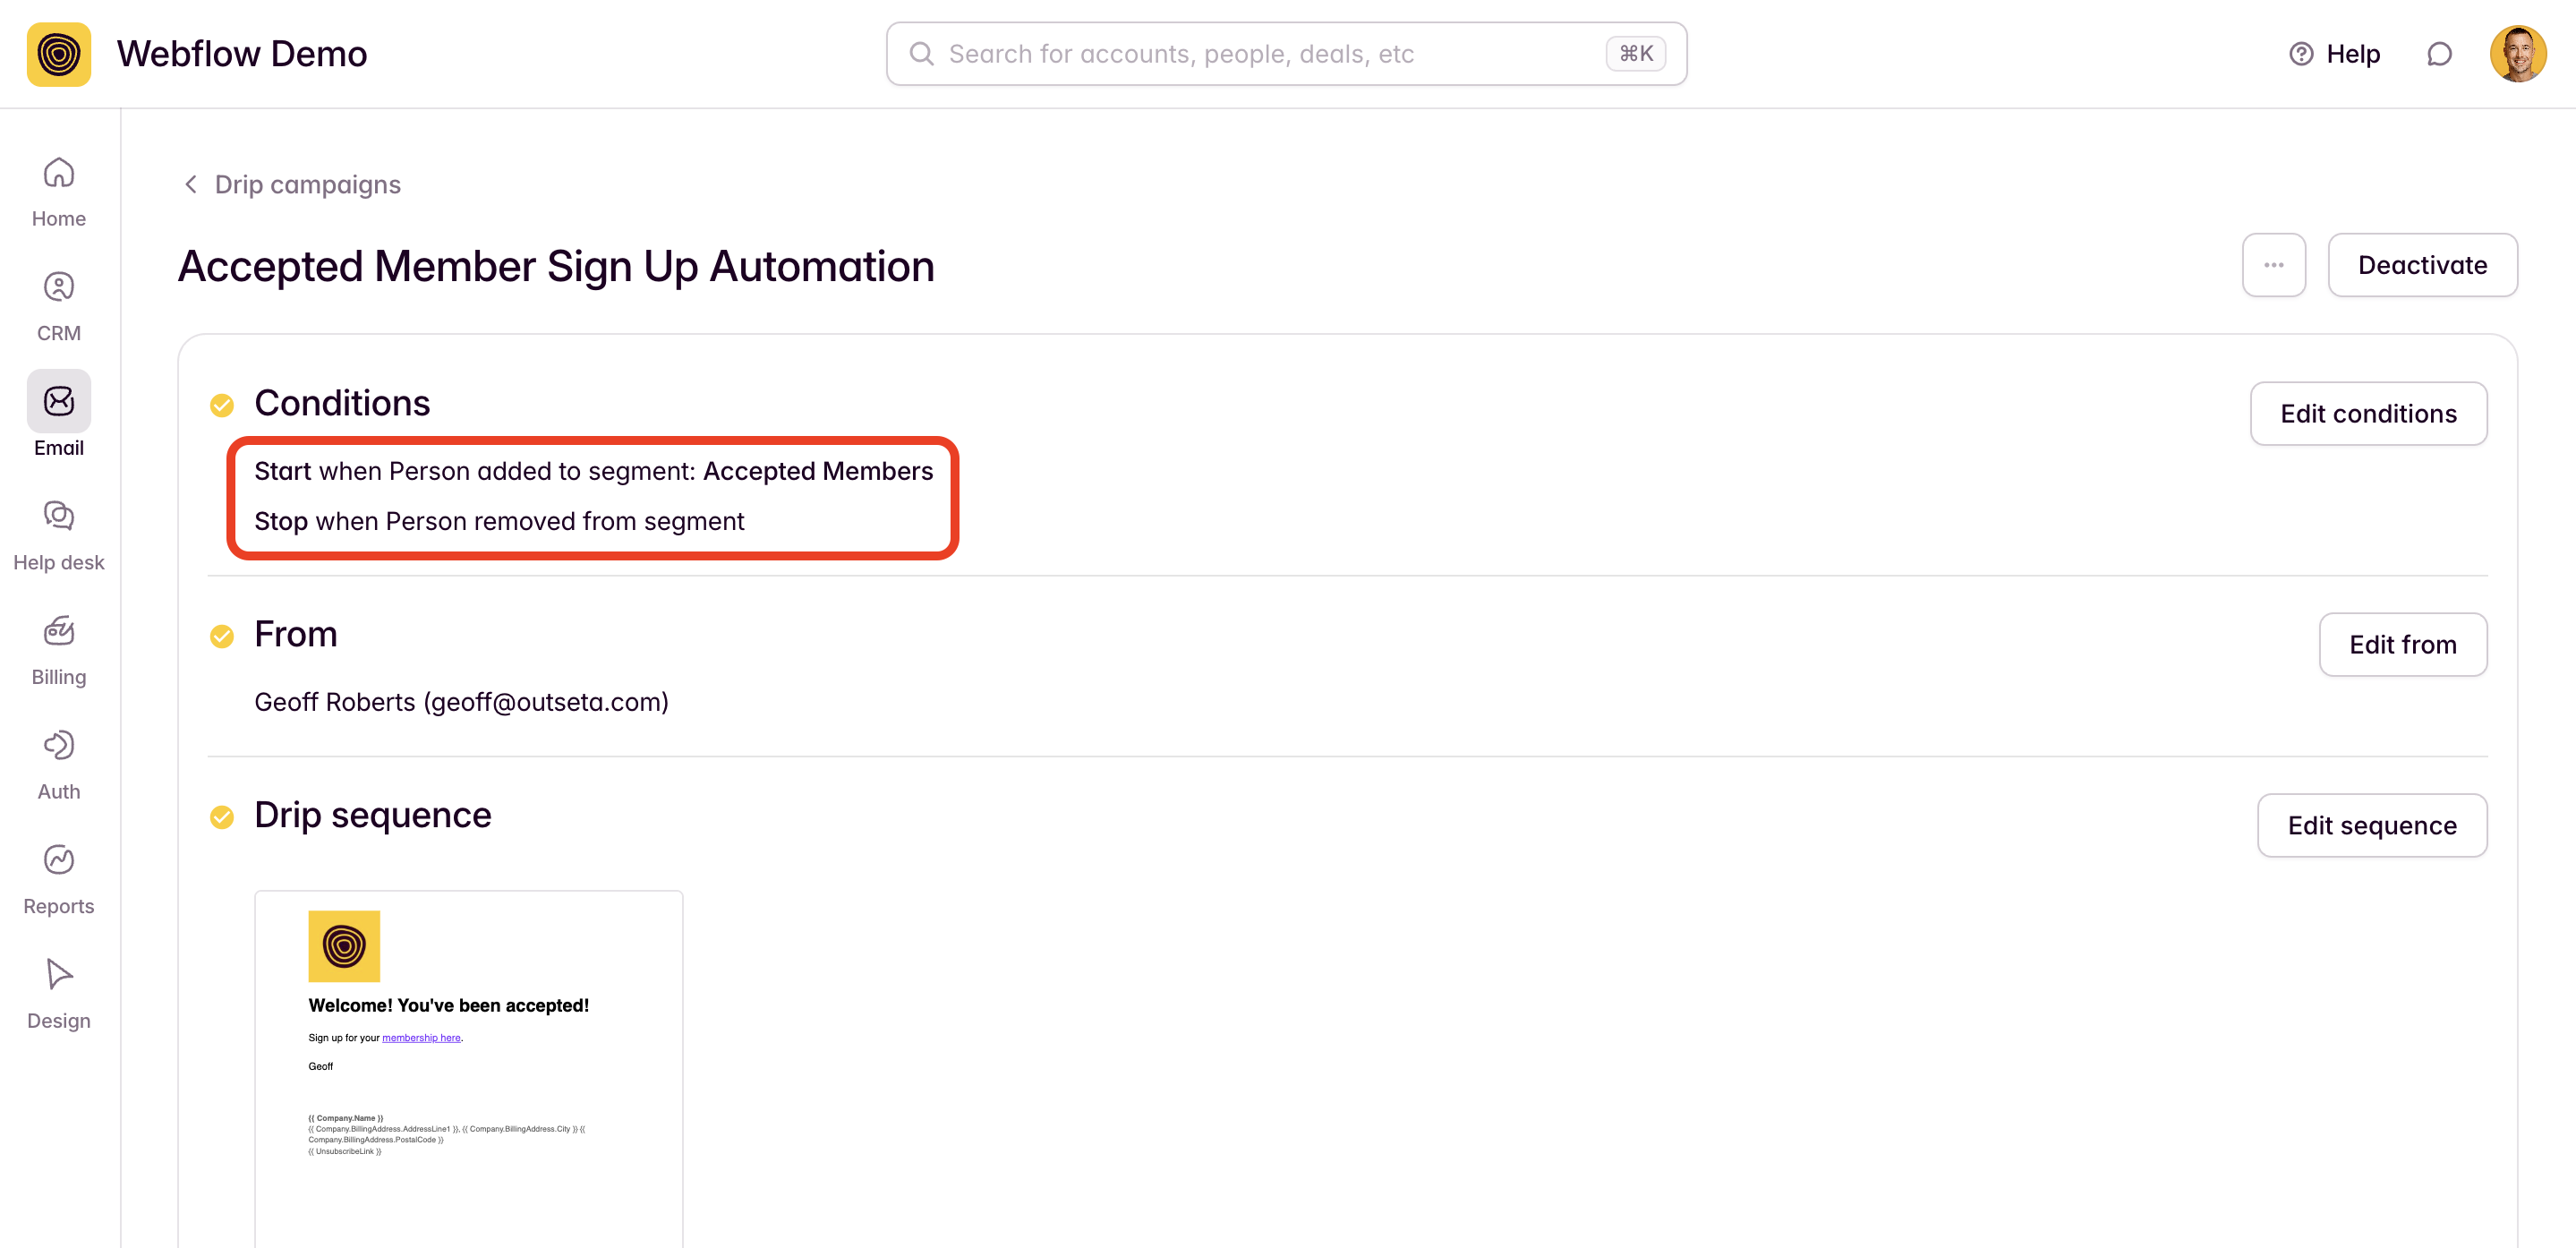
You have complete control over what this email looks like, but you'll likely want to include a Payment Link or a link to a sign up page on your site. This will allow the accepted member to actually sign up, pay, and create a password to login to your site.
You can create plan-specific sign up links using the configuration tool found at AUTH > EMBEDS > SIGN UP.
Review applications
Every time you receive a new application, a Person record will be created in Outseta with all of the information submitted via their application.
All you need to do is review the application and change the value of the Member Status field to ACCEPTED or REJECTED.
- If you used an Outseta Lead Capture Form for your application, you can easily find all submitted applications by going to CRM > LEAD CAPTURE FORMS and reviewing the submission data for the application form.
- You may also want to setup an email notification so you know when a new application has been submitted. To do so, go to SETTINGS > NOTIFICATIONS and configure the PERSON LEAD FORM SUBMITTED notification.
That's it! You've now add a very streamlined member application approval process to your site.