Outseta supports two different mechanisms to authenticate users into your product or site.
Outseta's Login Embed
Outseta's login embed can be found by going to AUTH > EMBEDS > LOGIN. It can function either as a pop-up or can be embedded directly in a page. It's designed to authenticate the user into a single product or site using an email address and password or a user's Google account.
OpenID Connect Single Sign On (SSO)
OpenID Connect (OIDC) should be used if you want to authenticate users into multiple products or sites concurrently. Users will be sent to a hosted login page to enter their login credentials and will be logged in to both your site and any external sites or products that you enable.
IMPORTANT: Outseta's OpenID Connect integration can be used to authenticate users into any product that accepts another service's OpenID Connect (OIDC) credentials. If you're wondering if you can enable single sign-on with another product, check their documentation or ask their team if they accept credentials from other OIDC providers.
For example, say you have a Webflow website and a Circle.so community. If you need users to be logged into both when they authenticate, you could use OpenID Connect. This would allow users to login to your website to view protected content, but they'd also be able to access your Circle community without requiring them to login again.
Set up authentication using OpenID Connect
In order to use OpenID Connect as the authentication method for your site, you will need to perform the following steps:
Set up OAuth clients for each product that you need to login to
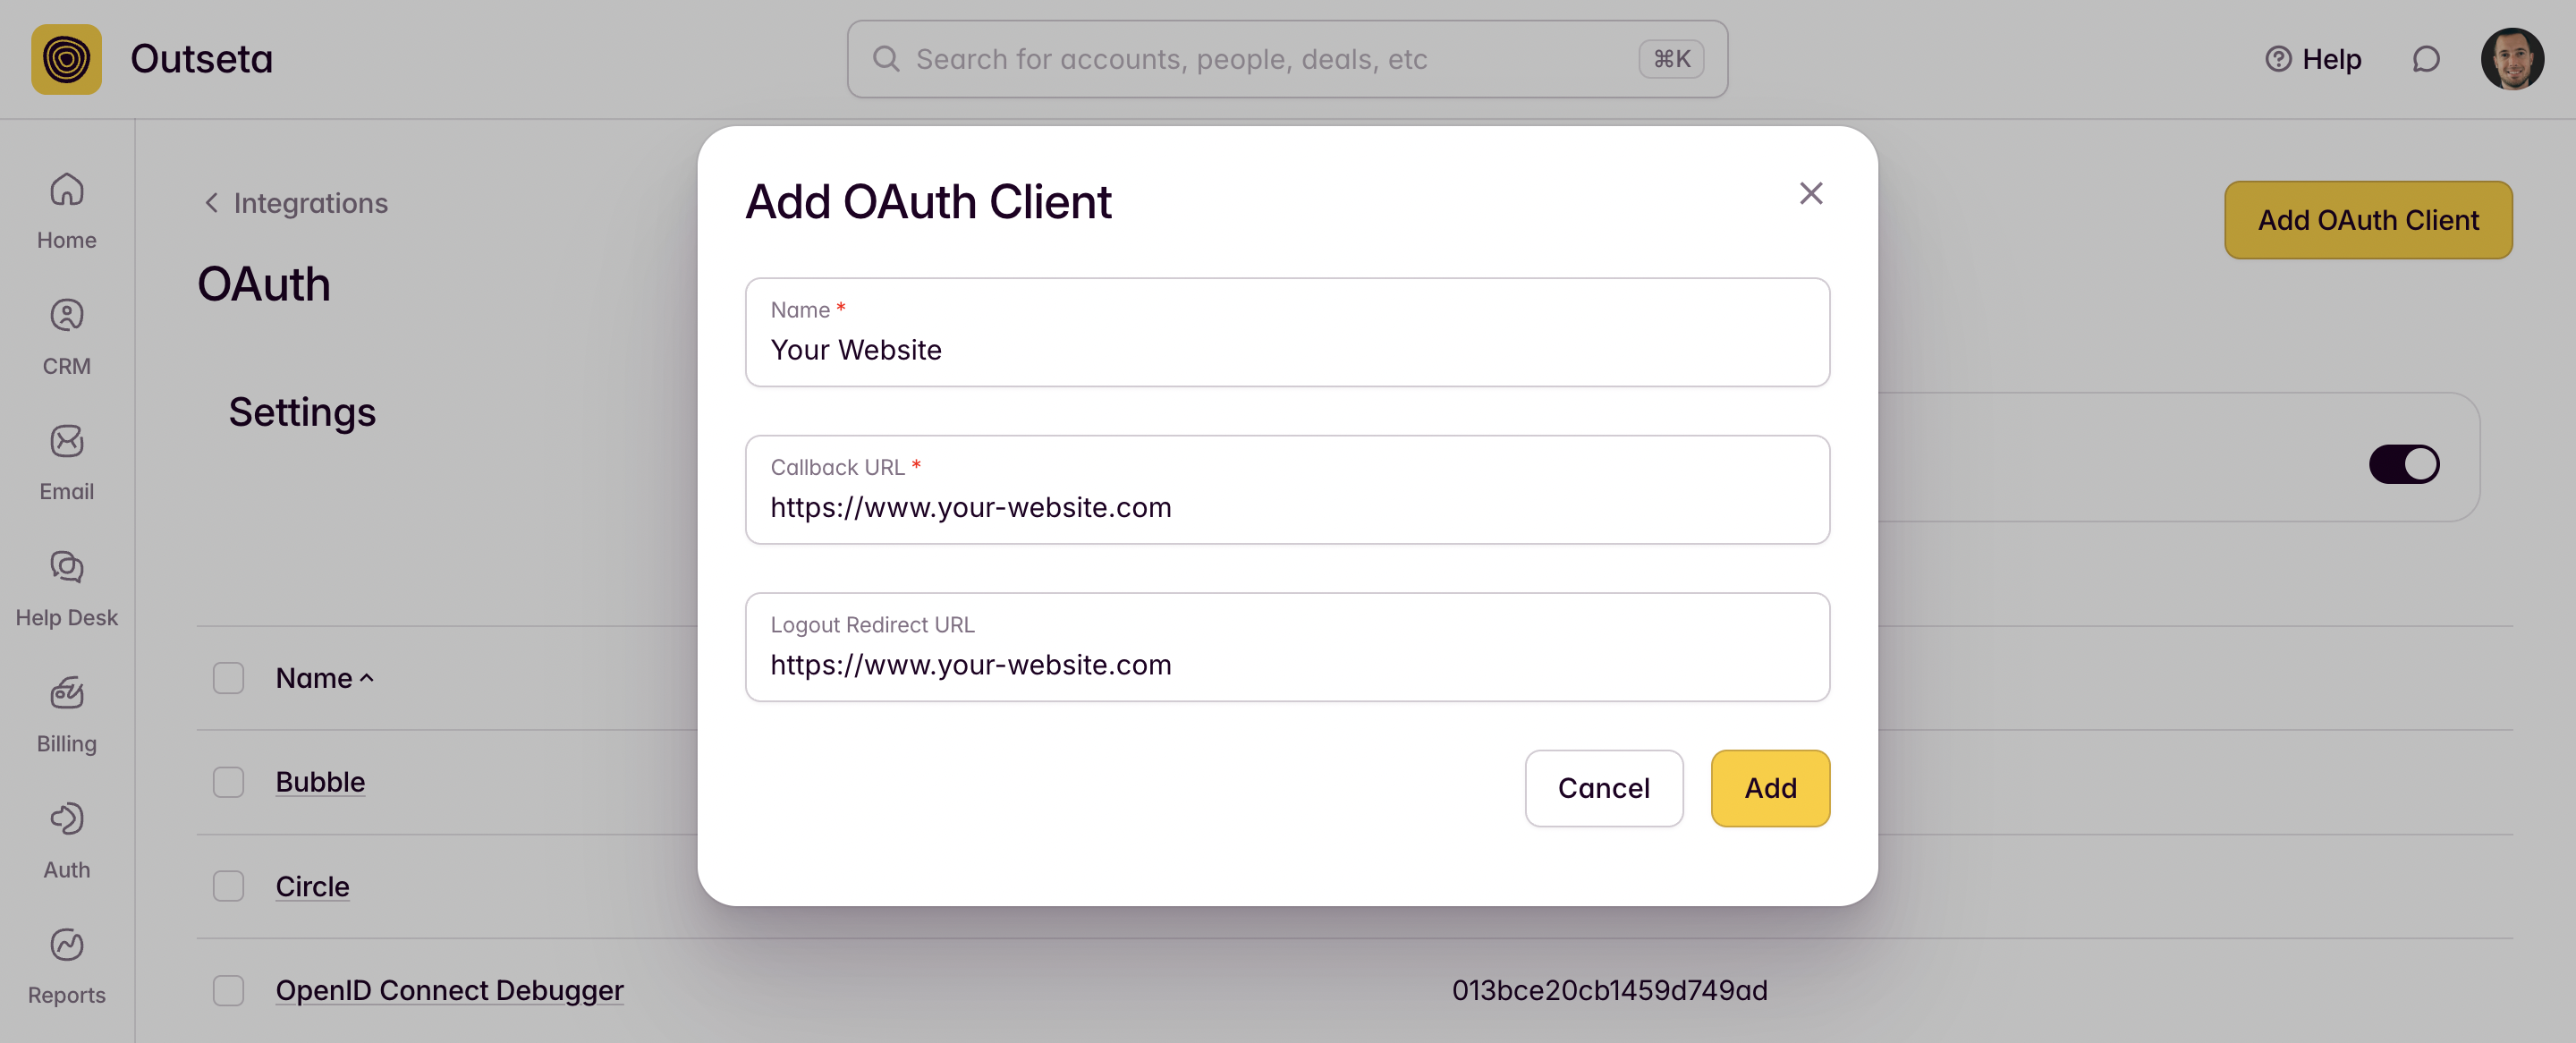
Go to SETTINGS > INTEGRATIONS > OAUTH and create a separate OAuth Client record for each of the products that you want to login to. Below is an example of what this would look like for your website.
- Name: Your Website
- Callback URL: https://www.your-website.com (where the user will be redirected once they login successfully)
- Logout Redirect URL: https://www.your-website.com (where the user will be sent when they logout)
A specific callback URL may be required when integrating some products—Circle communities provide a specific Callback URL, for example. Repeat this process for all products that you need to login to.
Update the header script on your website
If you already had Outseta implemented on your website, you should have a script that looks like this in the header of your website pages.
<script>
  var o_options = {
    domain: 'your-domain.outseta.com'
  };
</script>
<script src="https://cdn.outseta.com/outseta.min.js"
        data-options="o_options">
</script>
This is Outseta's configuration object—making a small change to this object to add an authMode parameter will enable the use of OpenID Connect. The updated script you'll need is shown below—you can copy this into the header of your website pages.
Be sure to change the bolded your-domain section—it should reflect the URL of your Outseta account.
<script>
  var o_options = {
    domain: 'your-domain.outseta.com',
    nocode: {
      authMode: 'oidc'
    }
  };
</script>
<script src="https://cdn.outseta.com/outseta.min.js"
        data-options="o_options">
</script>
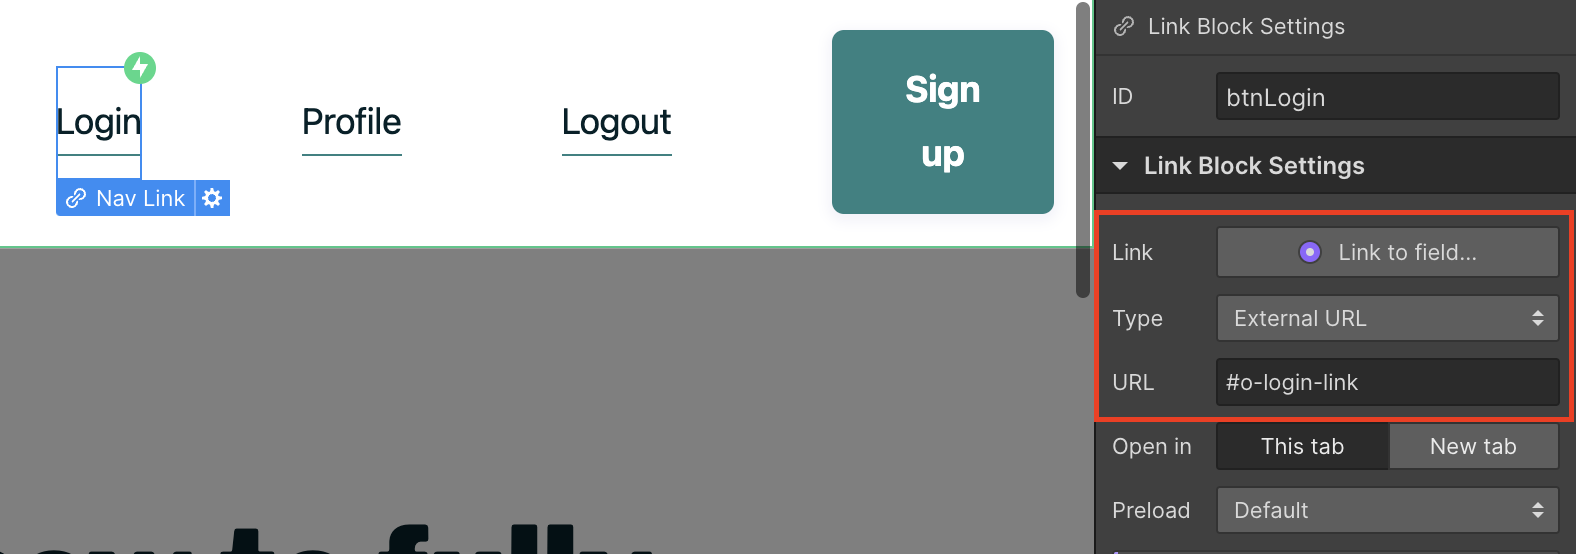
Give your login link a custom attribute or URL hash
Finally, find the login link on your website. You'll need to give this link either a custom attribute or a URL hash. The attribute to add is data-o-login-link:
<a data-o-login-link>Login</a>

Or you can use a URL hash:
<a href="#o-login-link">Login</a>
That's it! You've now setup OpenID Connect SSO on your site. In order to test your configuration you can:
- Click the login link on your site. You should be brought to a hosted login page.
- Sign up and set a password. Once you set a password, you should be redirect to whatever is set as the Post Login URL on the AUTH > SIGN UP AND LOGIN page. It's important to note that this will act as your "Primary" login—where users land when they first login. You likely want to have buttons or links to the other products somewhere within your navigation—for example, a button that the user can click to access your Circle community.
- Finally, the very first time you login you'll be asked to authenticate into the products you setup OAuth clients for—this establishes your login credentials with those providers. All subsequent logins will happen automatically and won't require entering credentials again, allowing users to move seamlessly between the products and sites you've setup SSO for.
Set up a hosted Profile page using OpenID Connect
Some third party sites have the ability for you to specify a "My Account" URL that they will display to users. You can use our hosted profile page at https://your-site.outseta.com/profile for this purpose, and have users seamlessly authenticated by creating an additional OAuth Client entry for it:
1. Go to SETTINGS > INTEGRATIONS > OAUTH and create an OAuth Client record for your hosted profile page.
- Name: Hosted Profile page
- Callback URL: https://your-site.outseta.com/profile
- Logout Redirect URL: https://www.your-site.com (where the user will be sent when they logout)
If you need any help setting up Single Sign On (SSO) via OpenID Connect, please email us at support(at)outseta.com.