Outseta's Webflow App allows you to add lead capture forms onto the page or map a native Webflow form to a lead capture form that you configure in Outseta. These forms serve a wide range of use cases—they can be used for anything from "Contact Us" forms to "Demo Request" forms or for delivering digital downloads.
When a lead capture form is submitted, a Person record is created or updated in Outseta. You also have the option of using the form to automatically create a Deal in a sales pipeline.
1. Start in Outseta by going to EMAIL > LEAD CAPTURE FORMS to create a lead capture form. You then have two options:
Insert form embed—Allows you to insert one of Outseta's lead capture forms as a pop-up or by embedding the form directly on a page.
Map to a Webflow form—This option allows you to map a native Webflow form to a lead capture form in Outseta.
- You must add the Webflow form to the page and publish you site in order for the extension to recognize the Webflow form.
- If you have setup reCaptcha in Outseta, you must also add Webflow's reCaptcha element to your Webflow form.
2. In order to trigger an email automation when someone submits a lead capture form, go to CRM > SEGMENTS to create a segment.
There are two common segments conditions that you might use in this scenario:
- Person Lead Form Submission = Form Name (this segment would include anyone that's submitted your lead capture form)
- Deal Pipeline Stage = Stage Name (use this option if your lead capture form is configured to create a Deal in Outseta and assign the Deal to a specific pipeline stage)
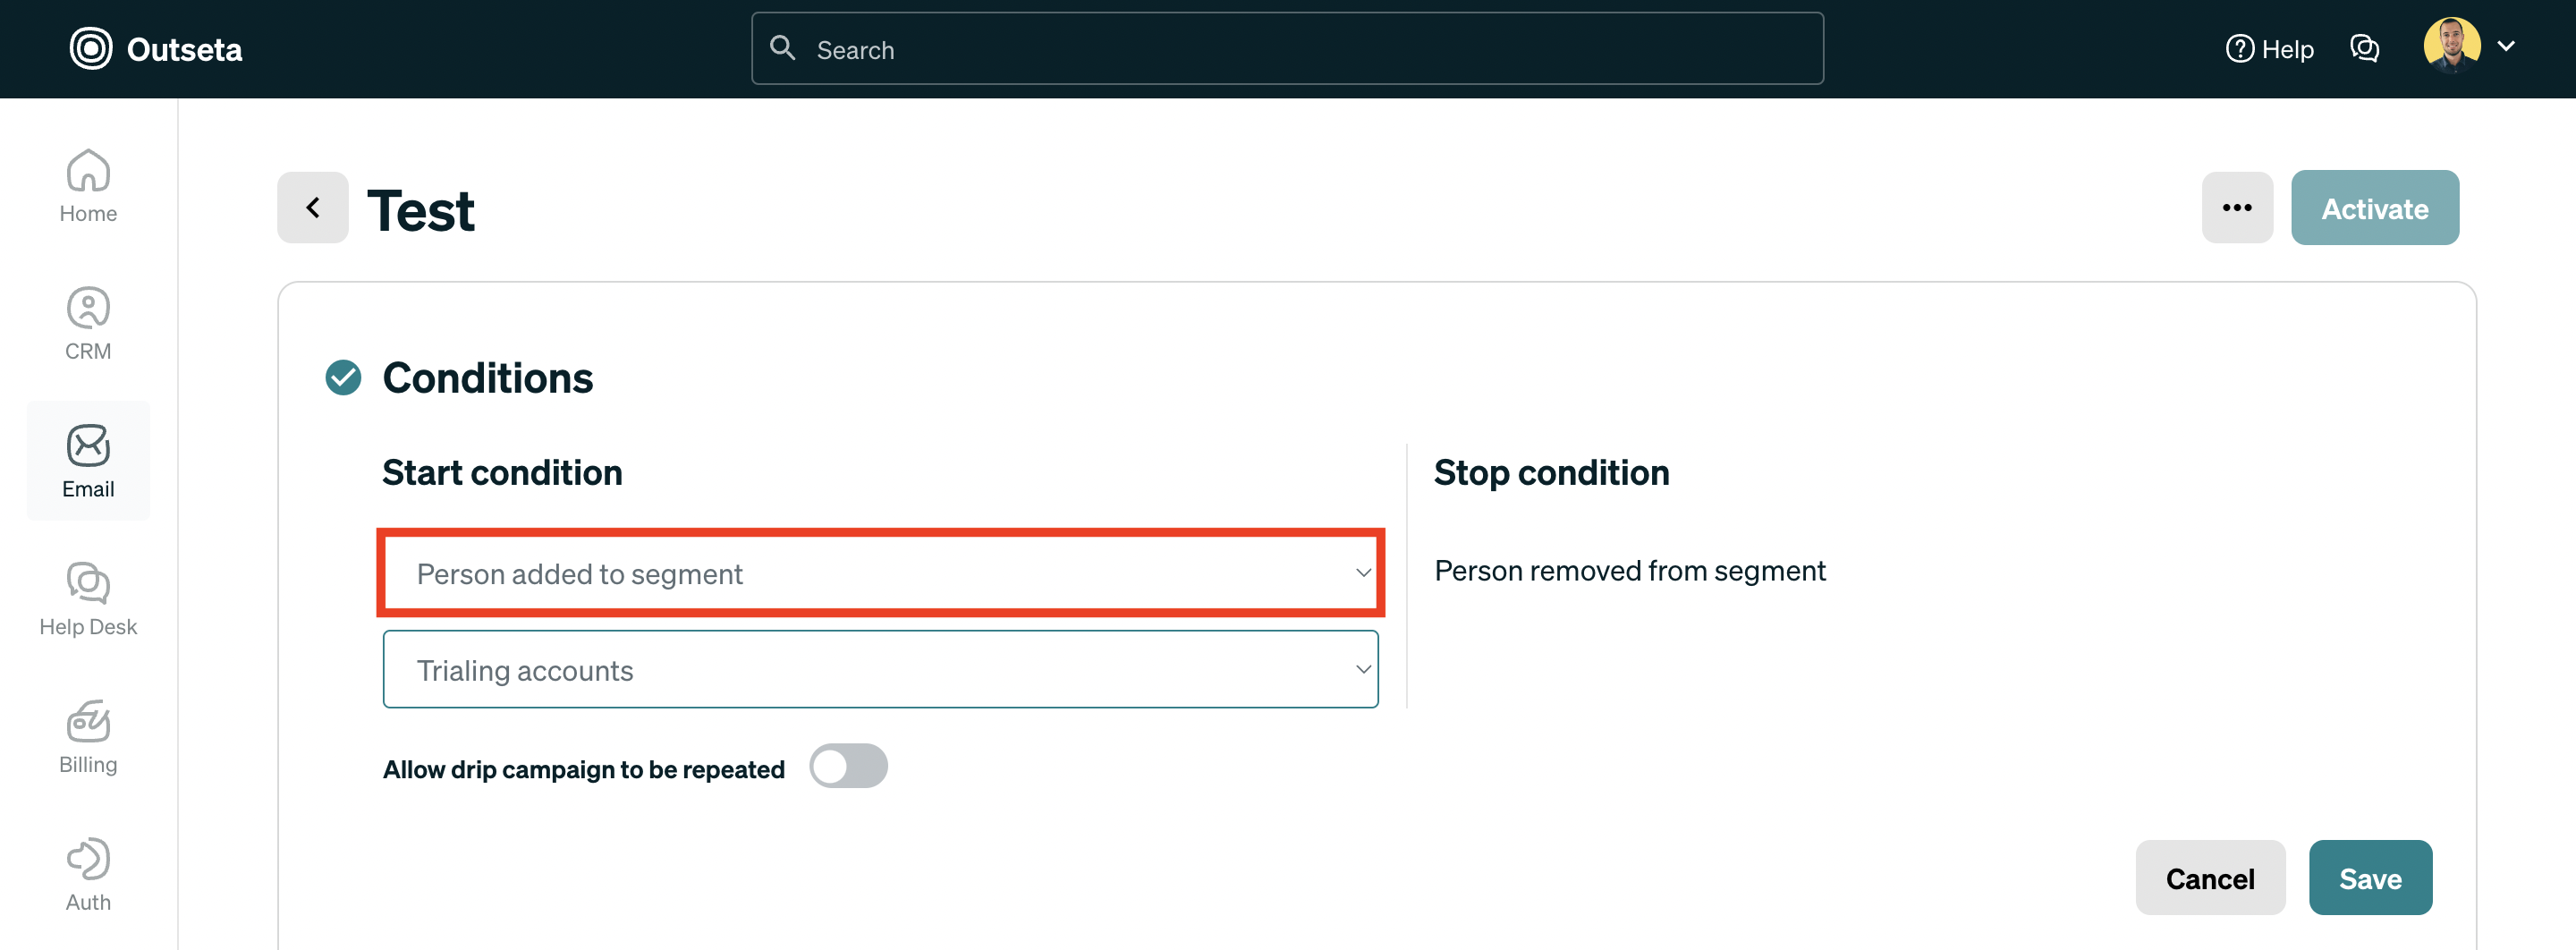
3. Once your segment is created, go to EMAIL > DRIP CAMPAIGNS to create a drip campaign. Choose Person added to segment to trigger your email automation.