Outseta's Webflow App gives you access to payments, authentication, protected content, CRM, email, and help desk tools—all directly accessible from within Webflow.
This article will guide you through installing the app.
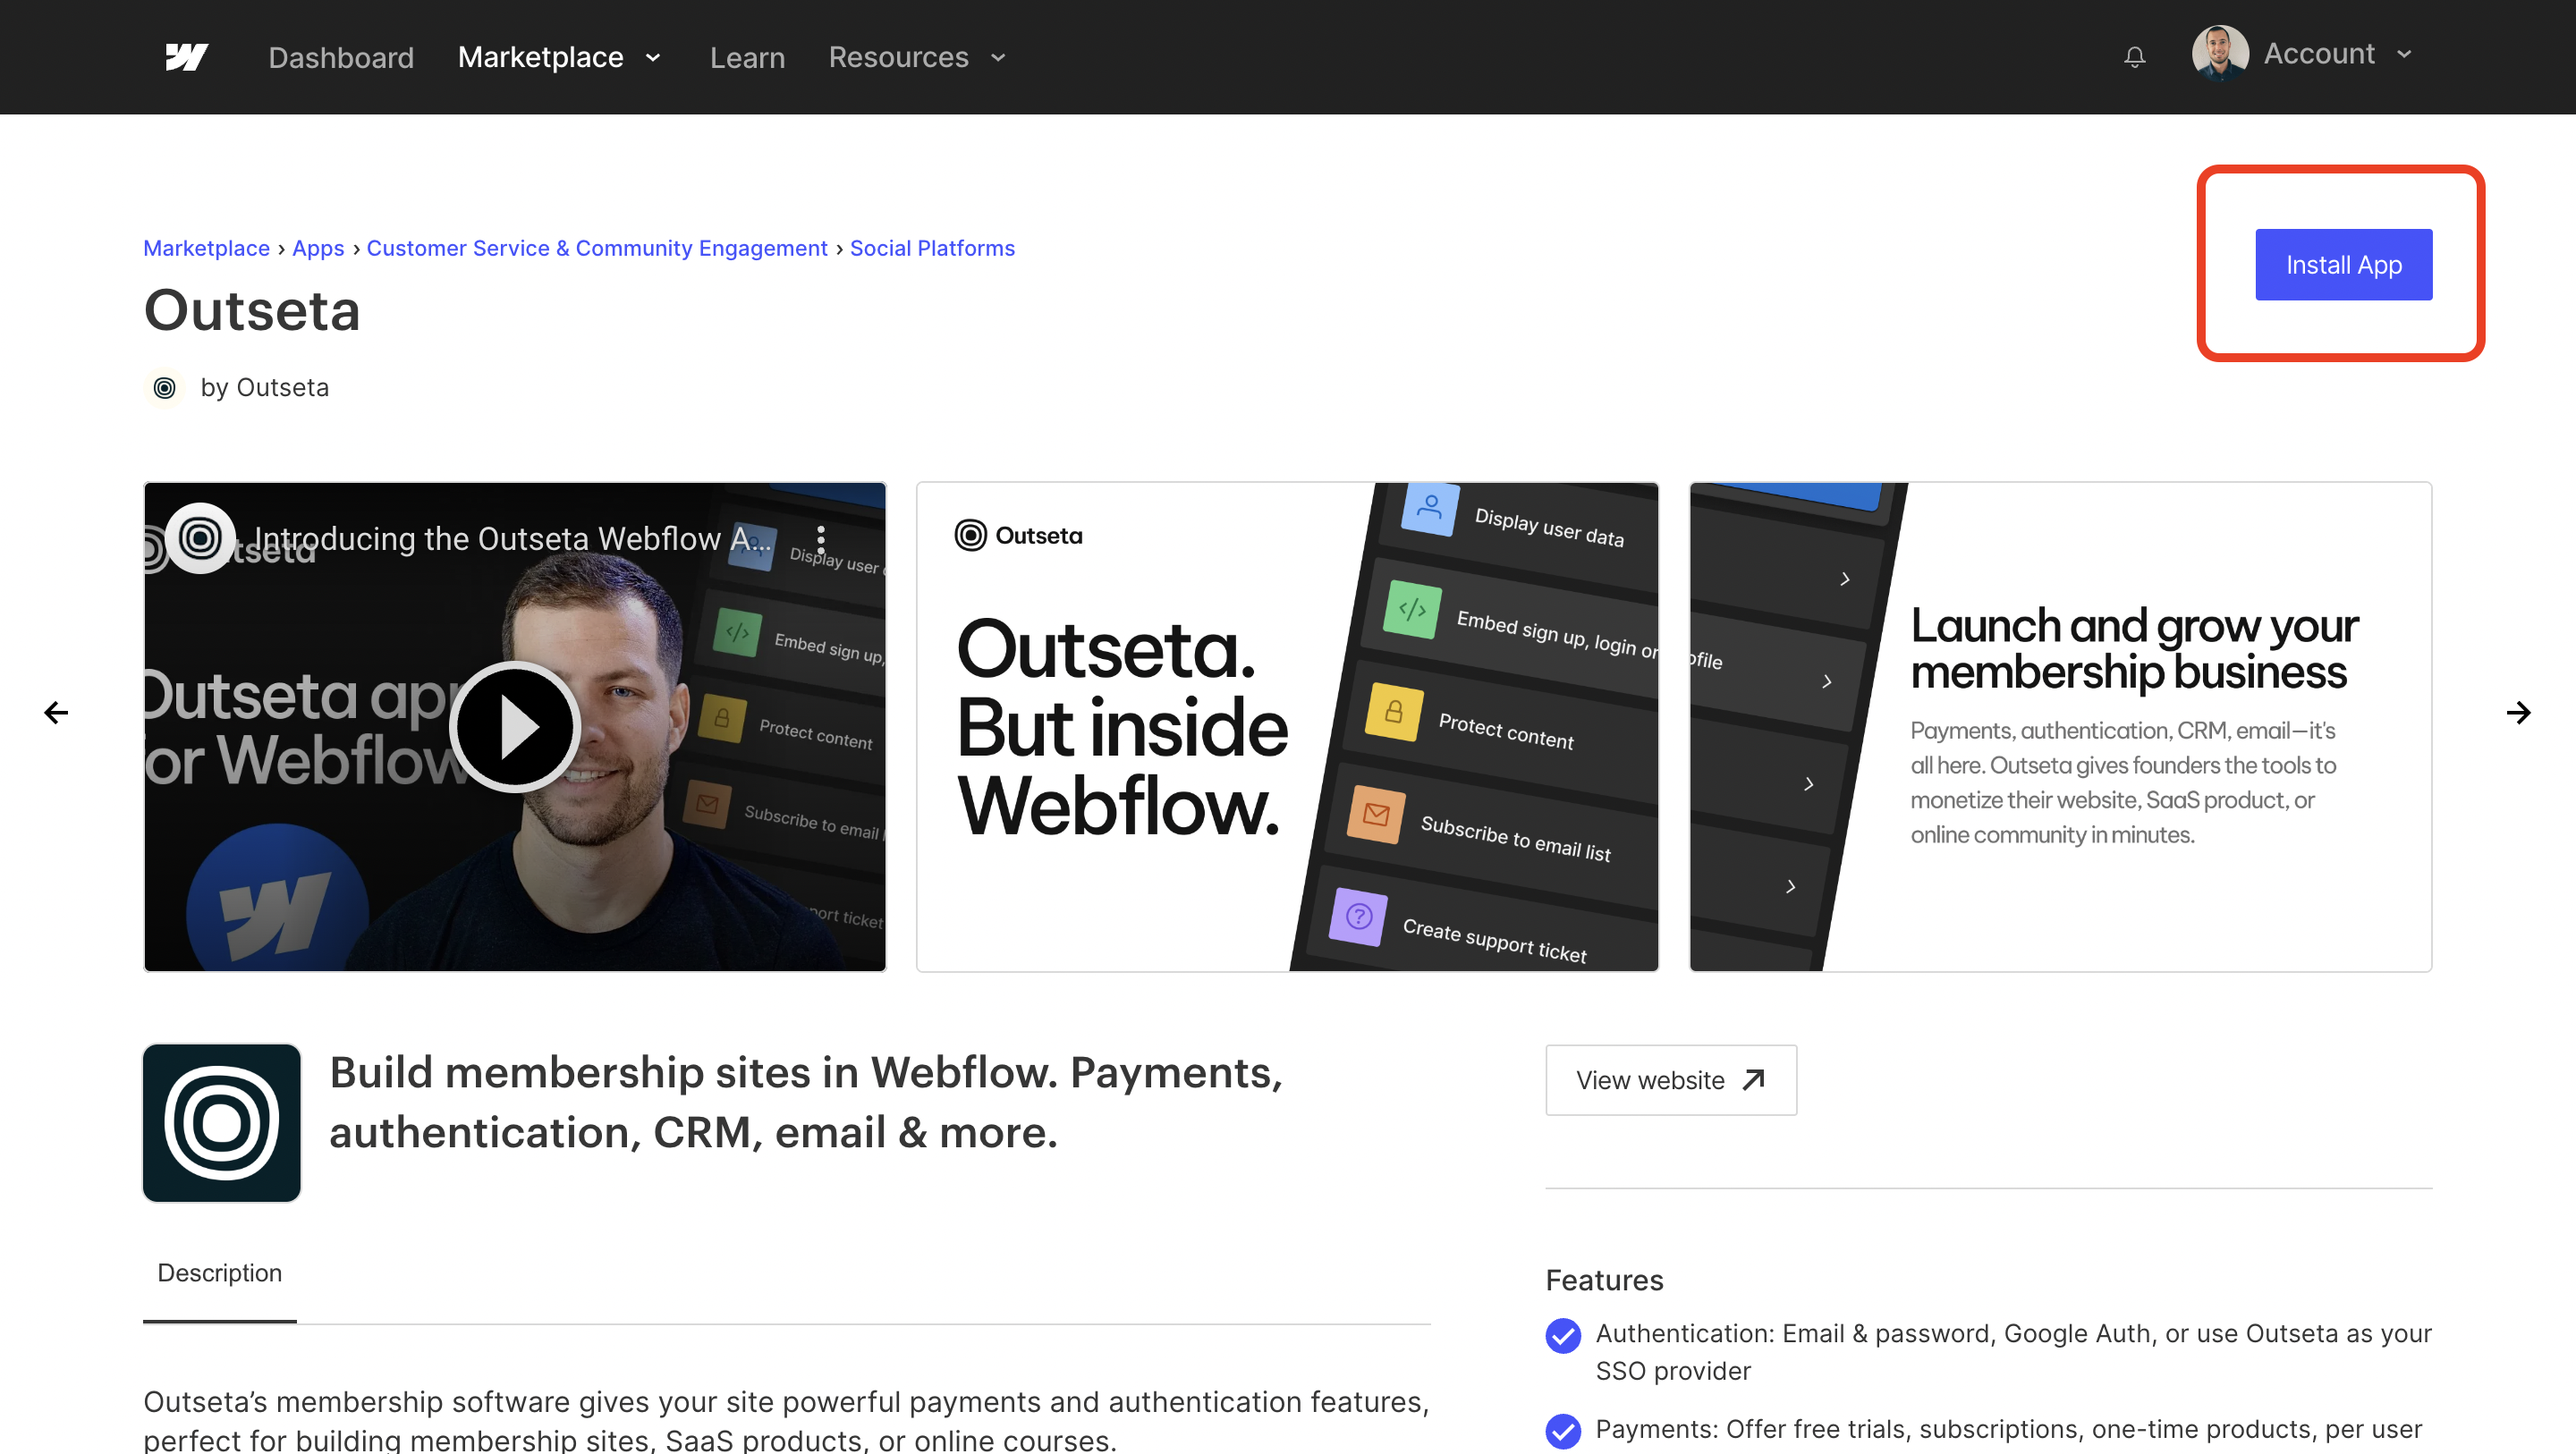
1. Find the app in the Webflow Apps Marketplace, then click INSTALL APP.
2. If you are not already logged into your Outseta account, you'll be prompted to login. If you are, you'll immediately land on a page where you can select your site and click AUTHORIZE APP.

3. Next, you'll see a confirmation message that the app was installed—it is now accessible you within the designer.

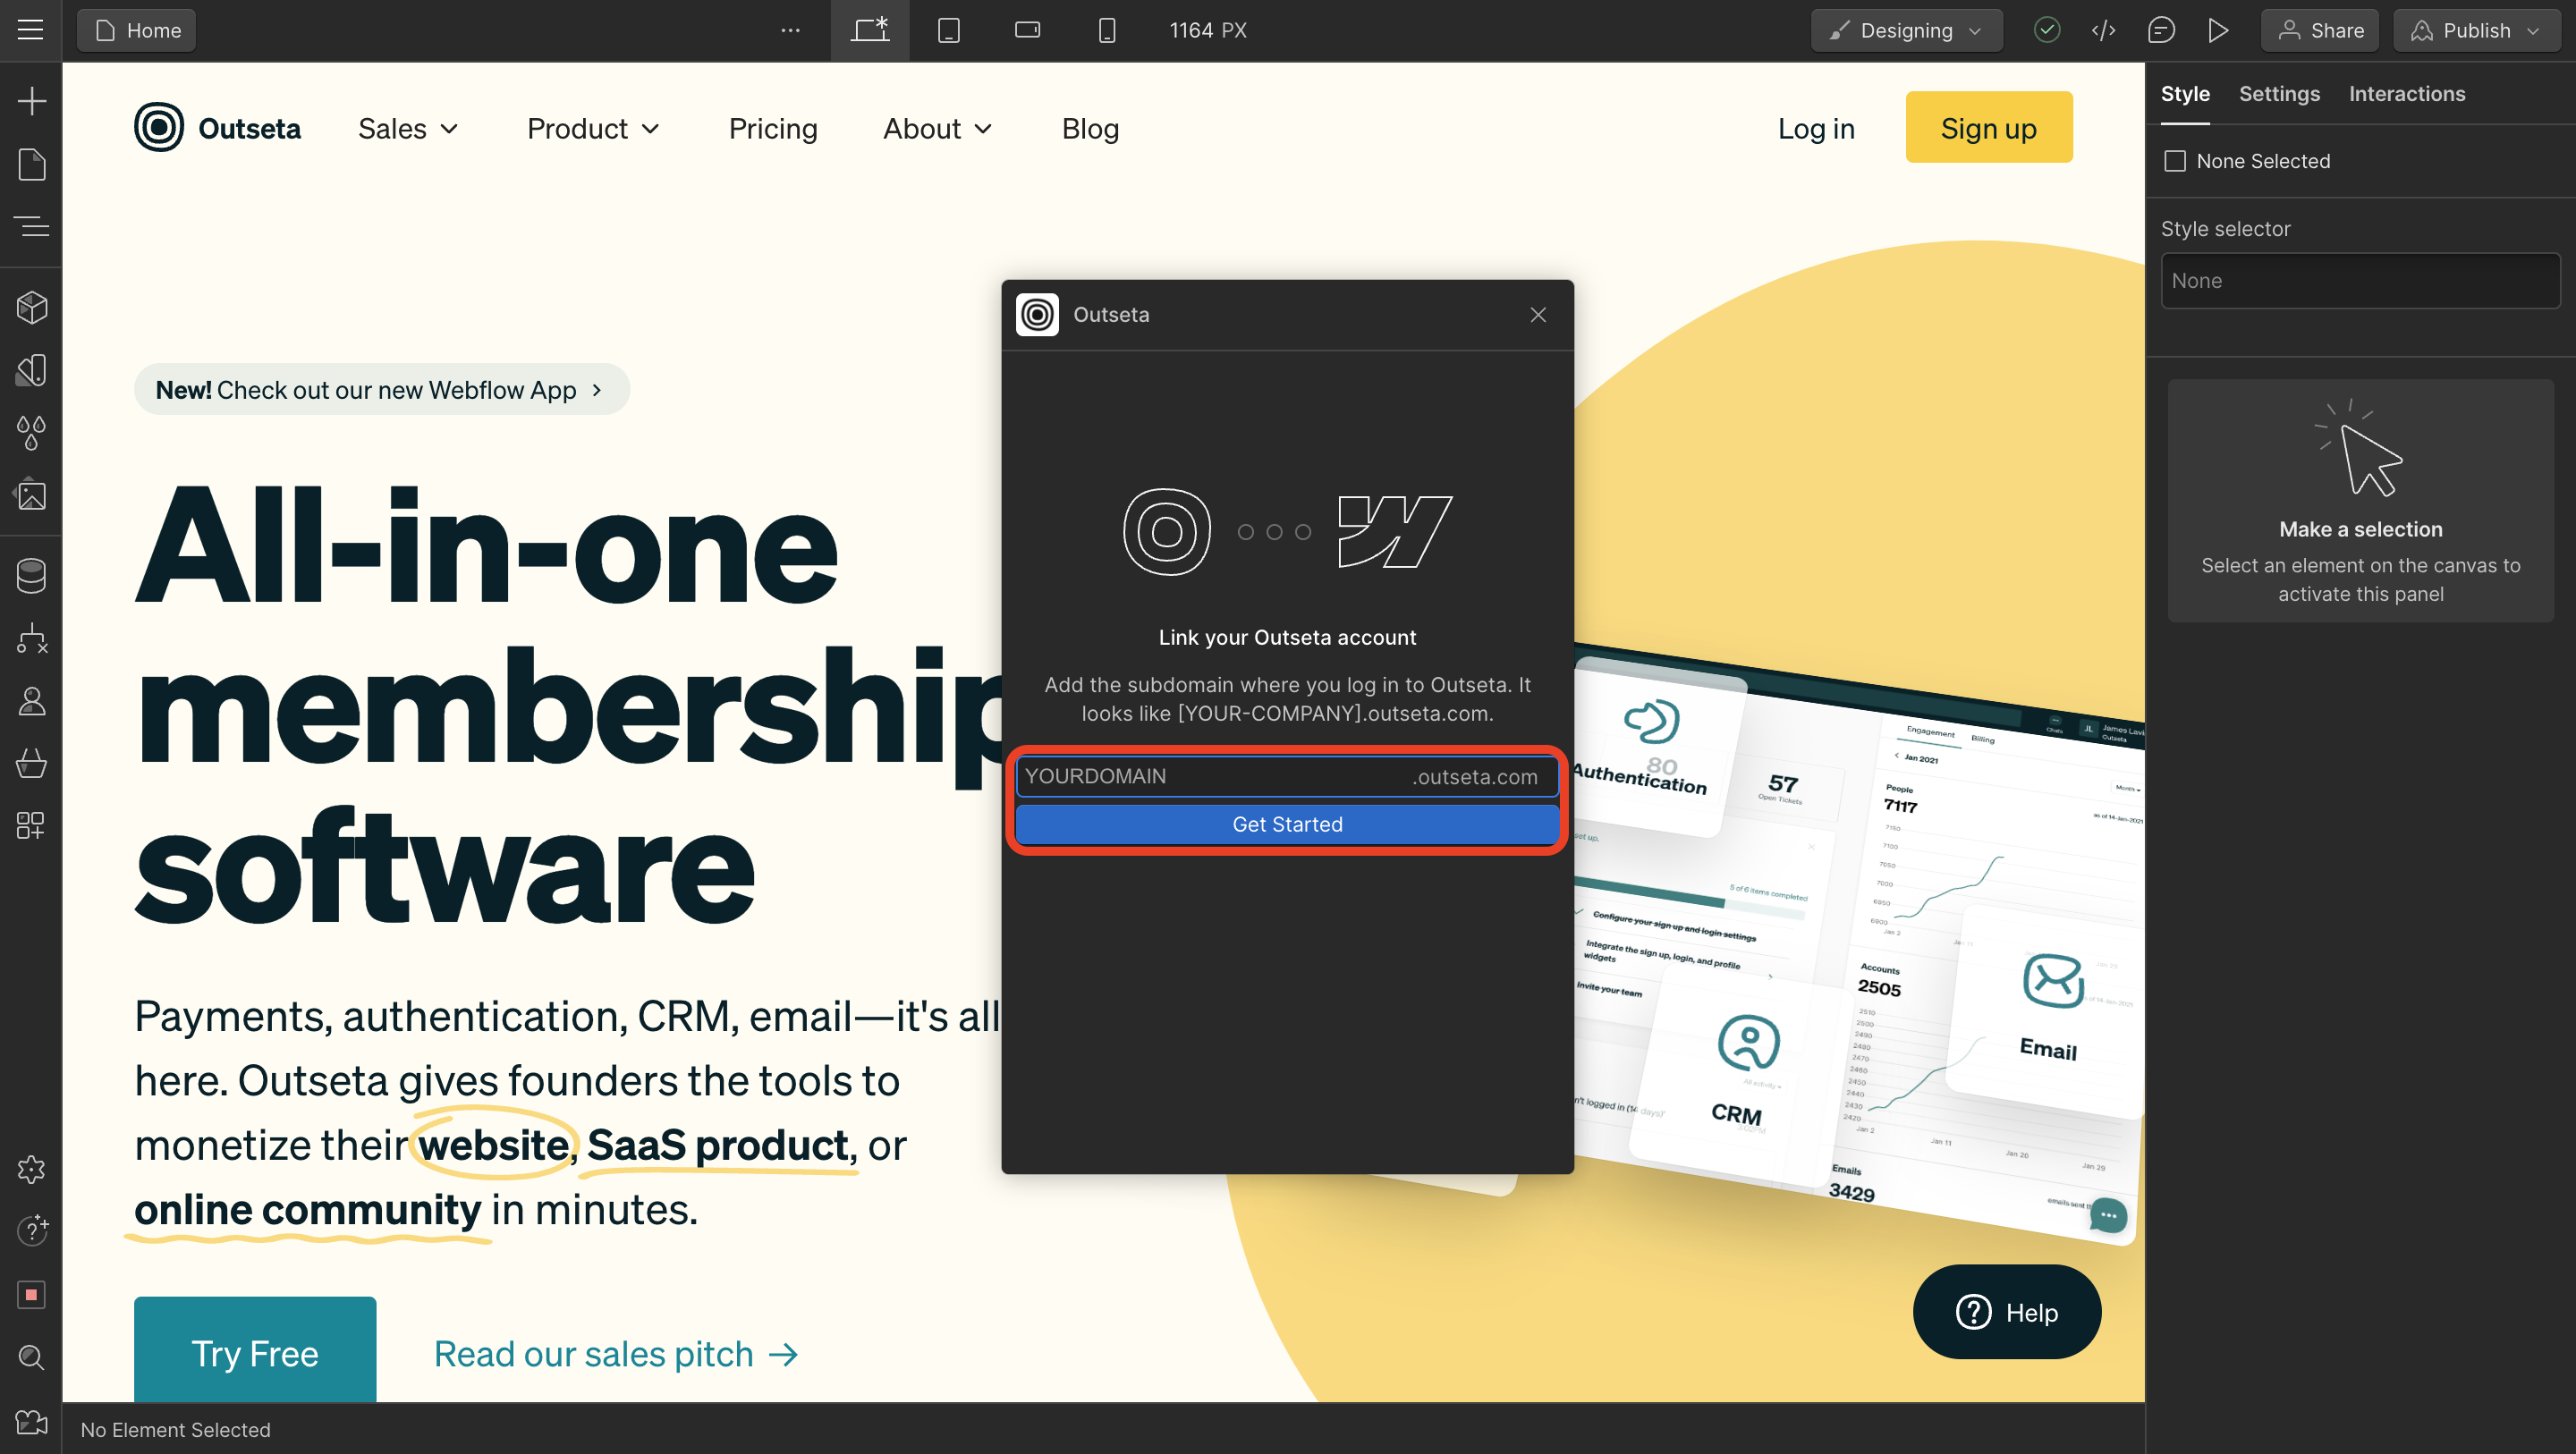
Back in Webflow, refresh the page and the Outseta app will now be available to you. Click LAUNCH.

4. Enter the URL of your Outseta account—this will be in the format of yourdomain.outseta.com. Click GET STARTED.
4. Once connected, you'll want to make sure that the required header script referenced at the top of the app is included in the header of your site—this script enables the features of the app.
Click SHOW HEAD SCRIPT to copy this script.
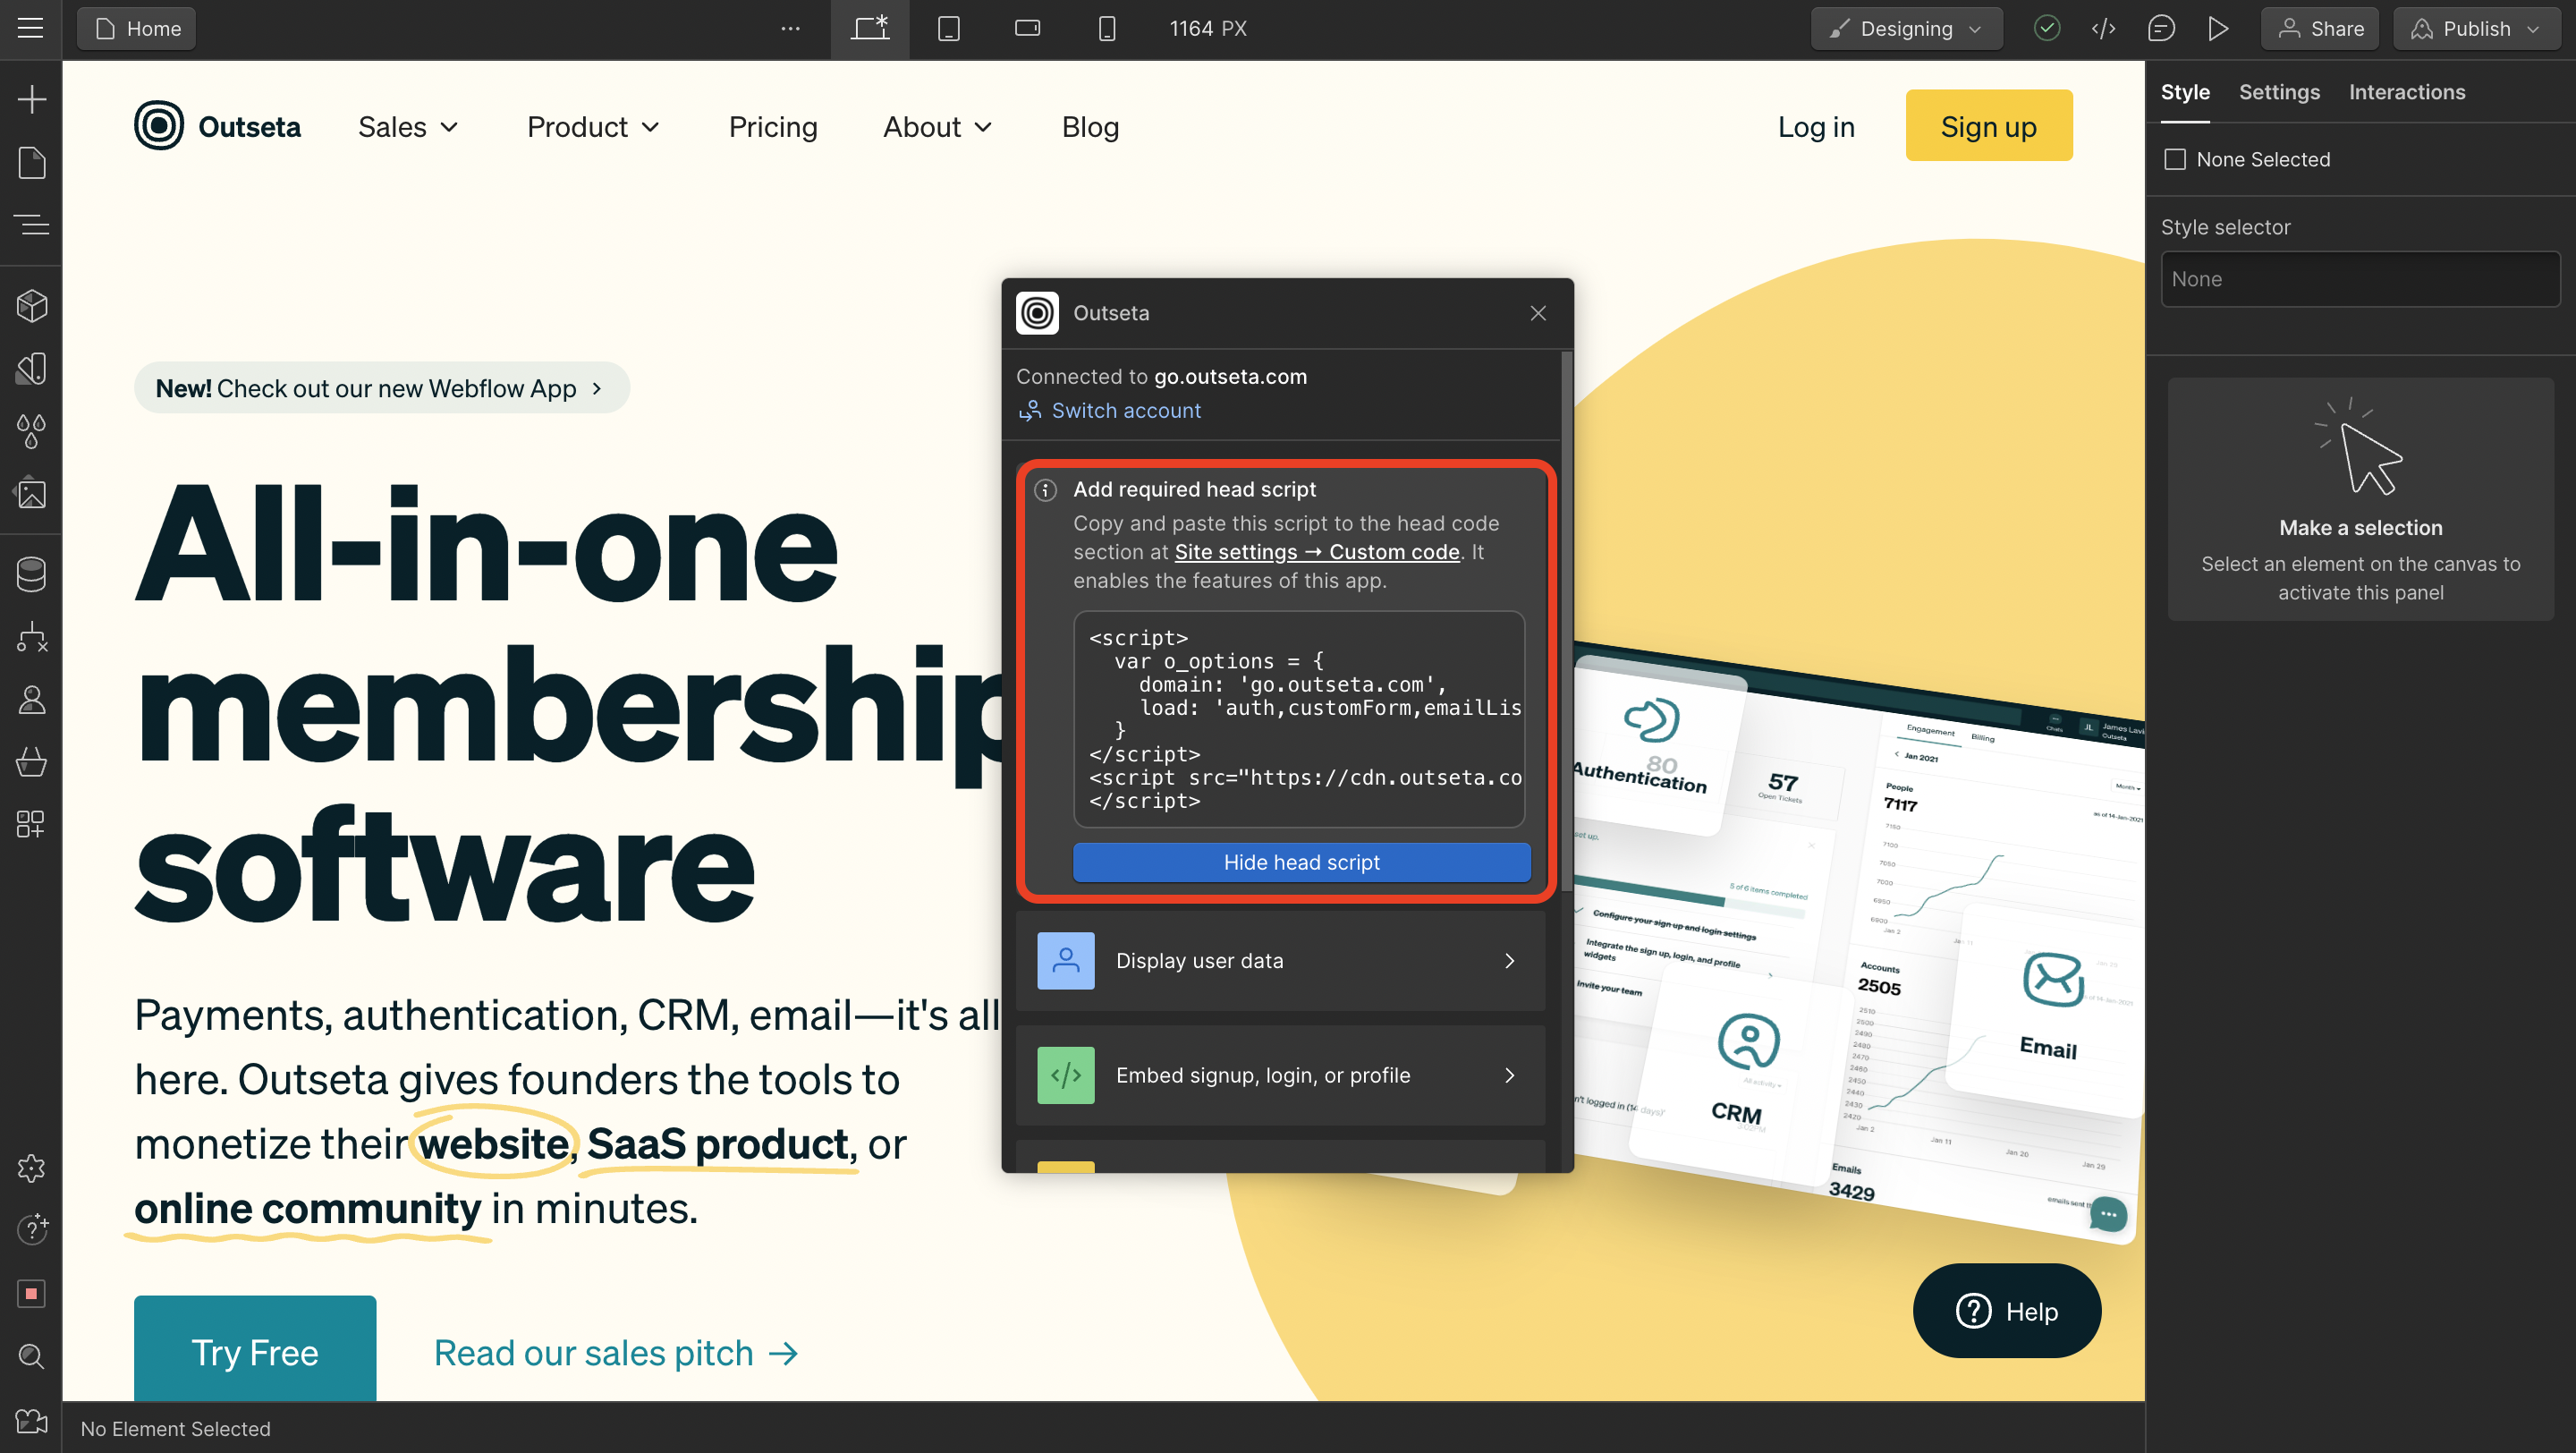
This script will be in the format you see below, using the domain of your Outseta account.
<script>
  var o_options = {
    domain: 'yourdomain.outseta.com',
    load: 'auth,customForm,emailList,leadCapture,nocode,profile,support',
  };
</script>
<script src="https://cdn.outseta.com/outseta.min.js">
</script>
5. Add the script to the header of your site by going to SITE SETTINGS > CUSTOM CODE within Webflow.
With the Outseta App installed and the header script in place, you're ready to start working with the App in Webflow.