The Outseta Framer plugin handles configuration automatically. However, you may want manual control if you need configuration options not exposed in the plugin UI, or if you prefer to manage the embed script yourself.
If you're just getting started, use the plugin method described in Integrate Outseta with Framer.
Important: If you are moving from using the Outseta plugin, go to the Custom Code tab and toggle off Enable Outseta. This prevents duplicate scripts from running.
Prerequisites
Before you begin, you'll need:
- A Framer site — you can use one of their pre-existing templates or start building from a blank page
- An Outseta account with at least one plan configured:
- Go to Billing > Plans and add at least one plan (can be a free plan to start)
- Go to Auth > Sign Up and Login, and configure your sign-up and login settings
If you'll be accepting payments, remember to connect Outseta to Stripe in Billing > Settings before going live.
Add the Outseta script
In your Outseta account, go to Auth > Embeds and copy the Quick Start embed code.

Paste it into Site Settings > General > Custom Code > Start of <head> tag in Framer.
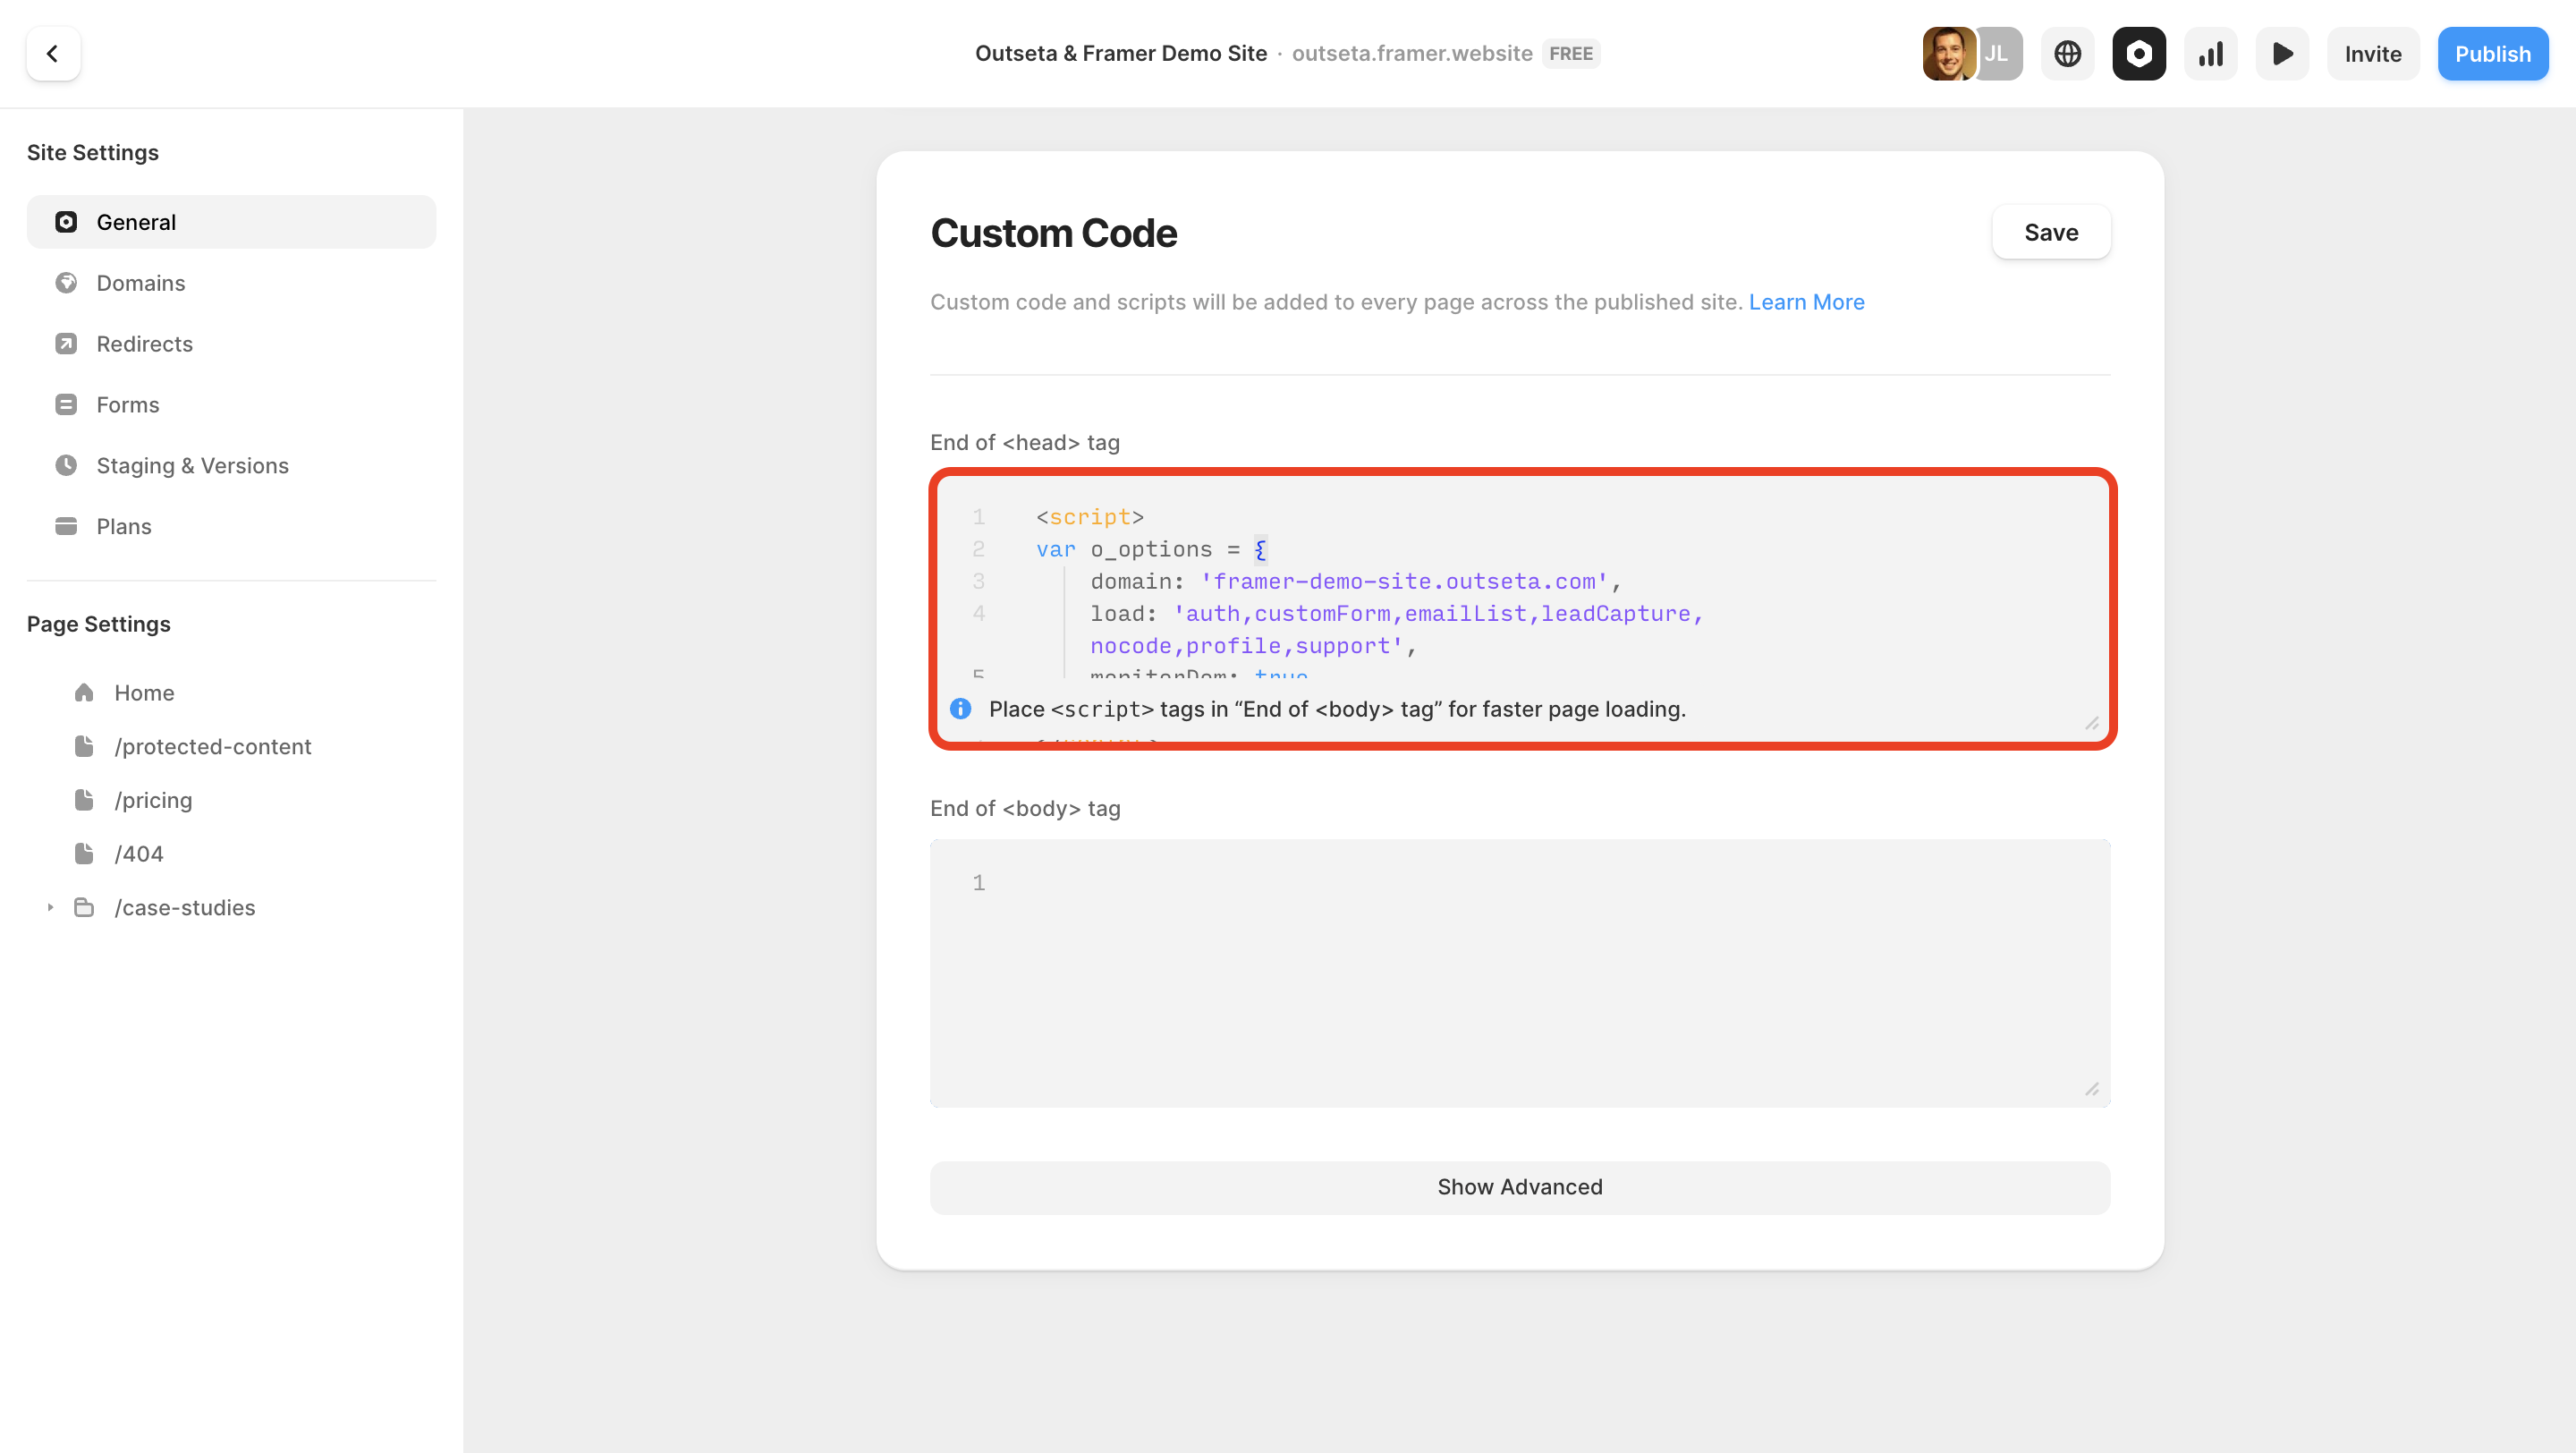
Modify the script to include monitorDom: true (required for Framer) and the other recommended options as configured below:
<script>
  var o_options = {
    domain: 'your-domain.outseta.com',
    load: 'auth,profile,nocode,leadCapture,support,emailList',
    monitorDom: true,
    tokenStorage: 'local',
    nocode: {
      clearQuerystring: true,
      rewriteProtectedLinks: true
    }
  };
</script>
<script src="https://cdn.outseta.com/outseta.min.js" data-options="o_options"></script>
| Option | Description |
|---|---|
monitorDom |
Required for Framer's client-side rendering |
tokenStorage |
'local' (stay logged in after closing the browser), 'session' (log out when tab closes), or 'cookie' (stay logged in across subdomains) |
nocode.clearQuerystring |
Remove access token from URL after login |
nocode.rewriteProtectedLinks |
Rewrite links to unauthorized content for enhanced gating |
For complete configuration options, see the JavaScript configuration guide.
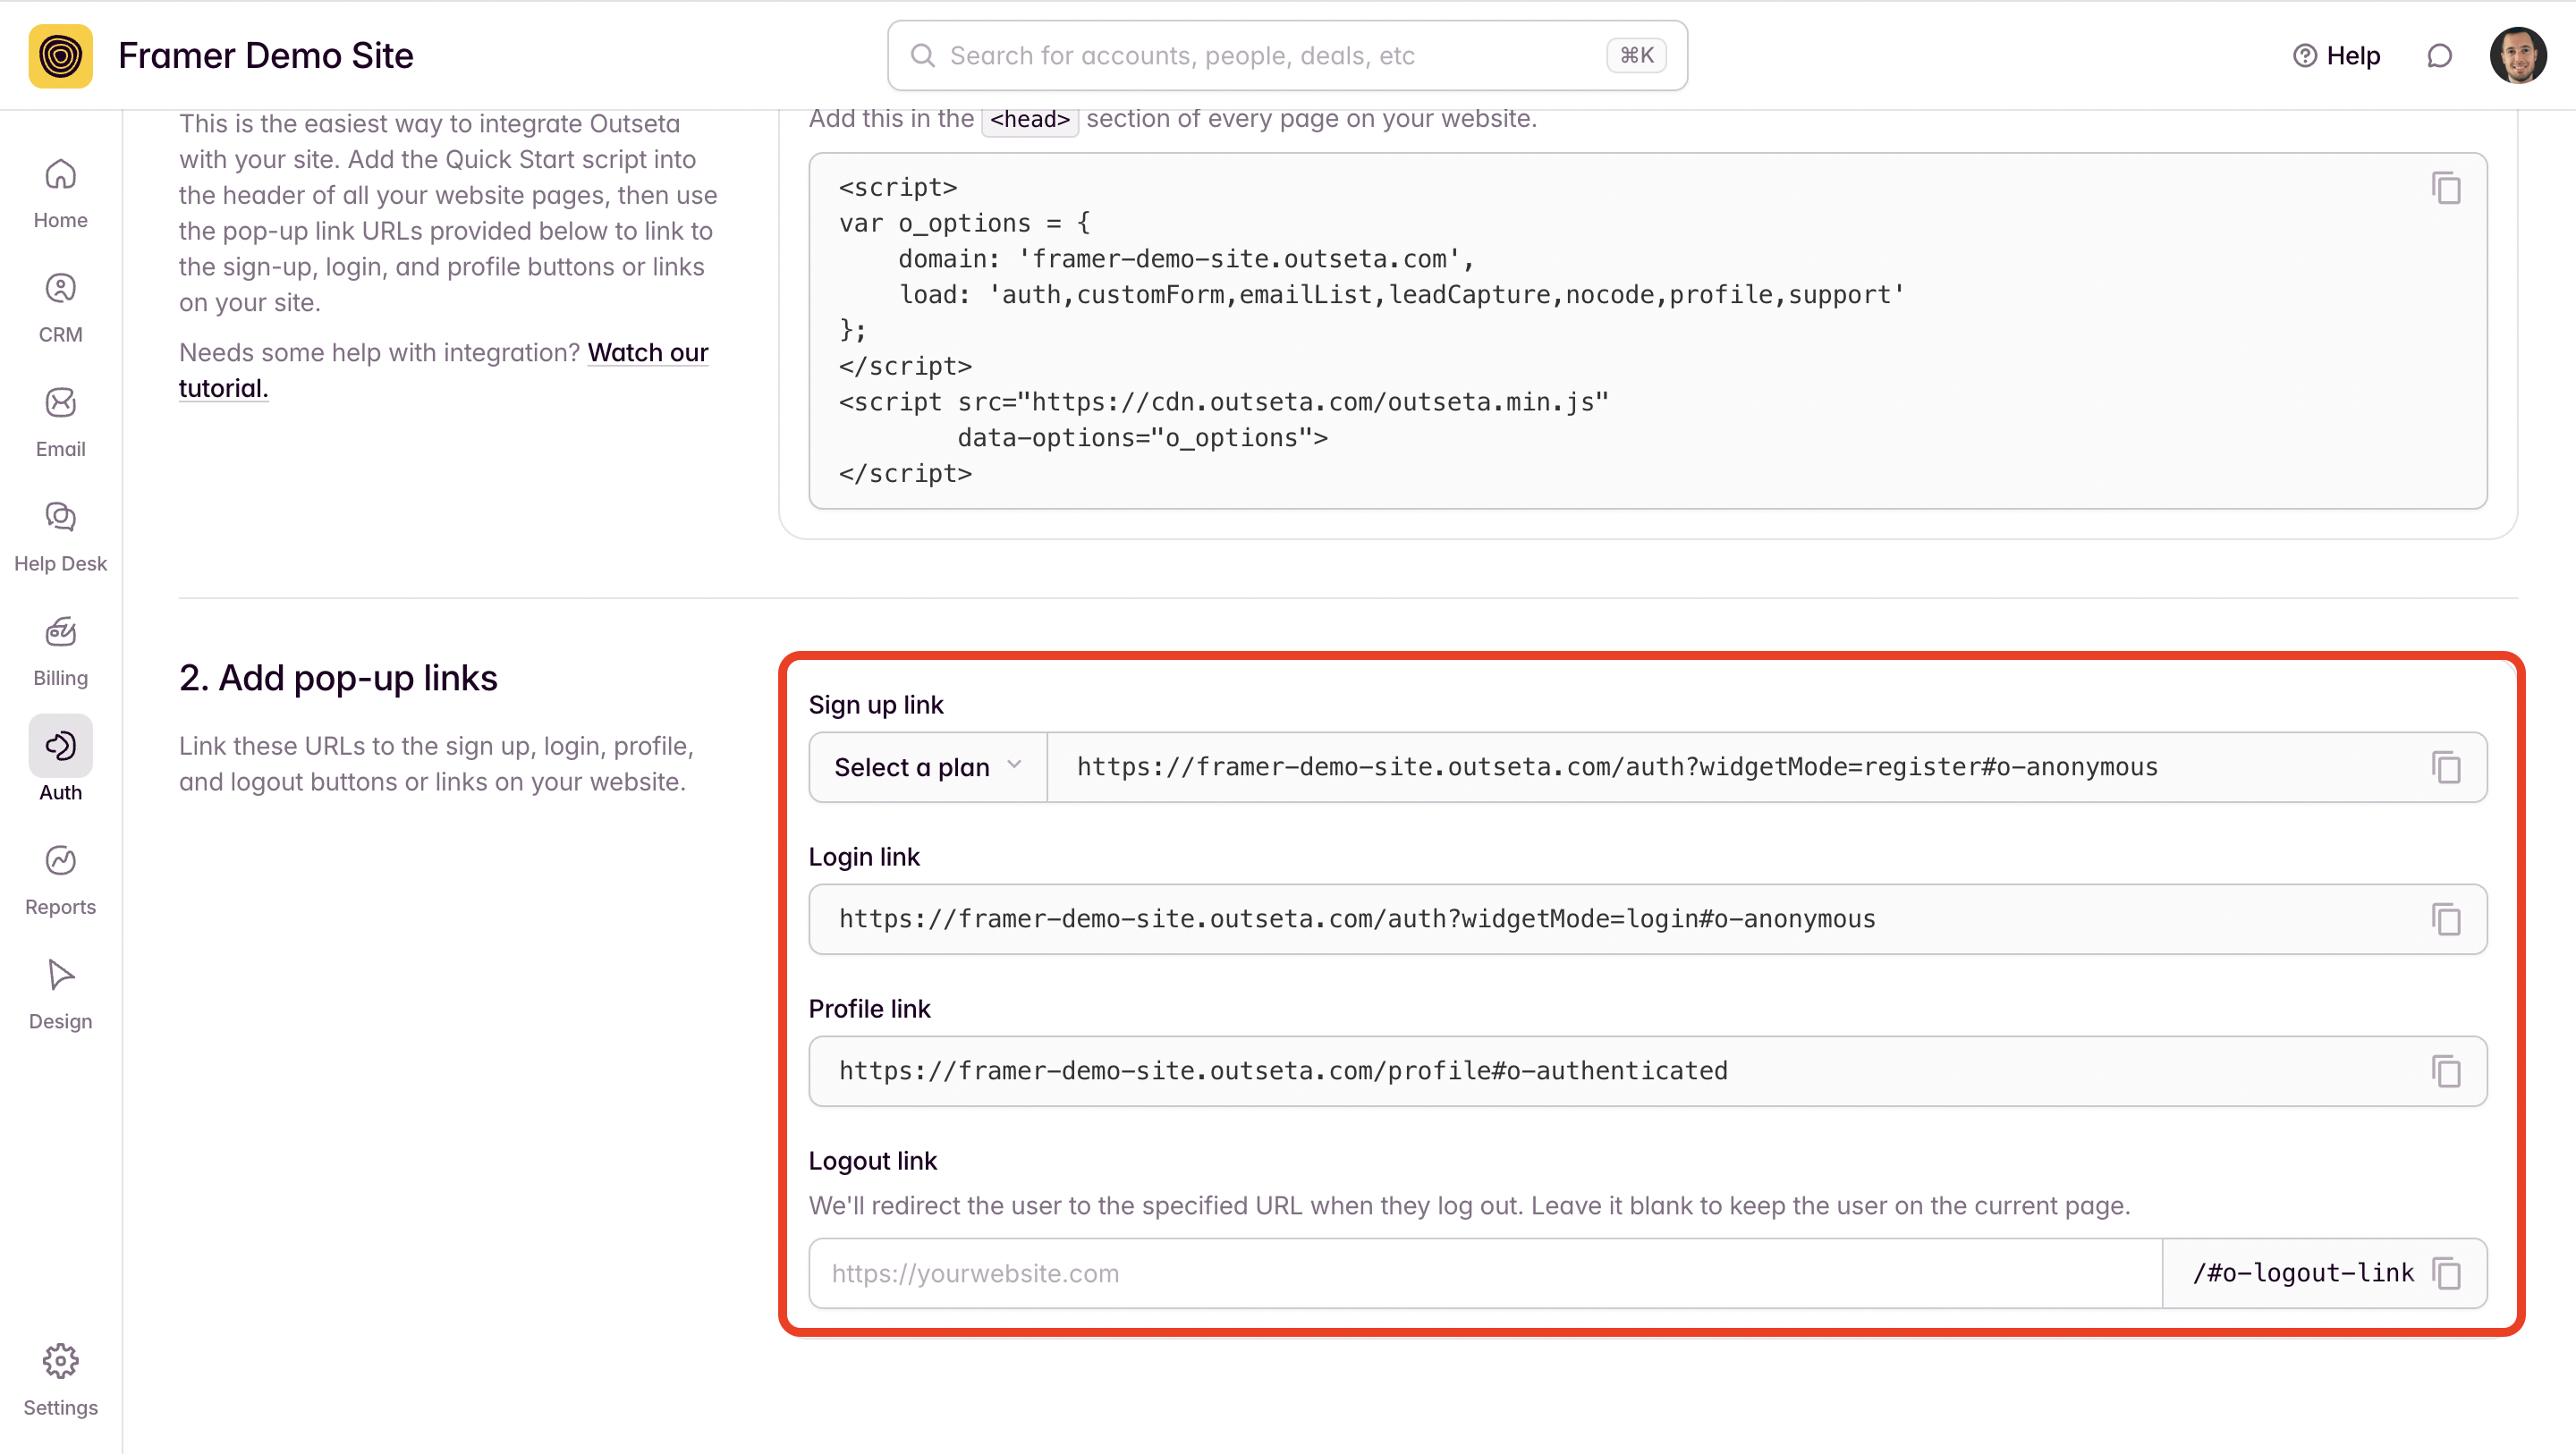
Add auth (popup) embeds
You can place your sign-up, login, logout, and profile buttons anywhere on your site, but they typically go in the header.
- Add buttons to your Framer site
- In Outseta, go to Auth > Embeds and copy the pop-up trigger links for each embed
- Add these as the link destinations on your buttons
Next Steps
Now that authentication is set up, explore these Outseta features:
- Restrict access to pages — Set up protected content to gate pages based on subscription plans
- Welcome new members — Send automated onboarding emails when someone signs up
- Communicate with members — Create a drip email campaign or send one-time broadcasts
- Provide support — Set up your support ticketing inbox so members can submit tickets
Troubleshooting
Embeds not loading
Check that monitorDom: true is present.
Users are getting logged out unexpectedly
Add tokenStorage: 'local' for persistent sessions.
Duplicate scripts running
Make sure you've disabled the plugin's custom code as noted above.
Protected content is not working
Verify that 'nocode' is included in the load option.