Outseta can be integrated with your Wordpress website in matter of minutes. Whether you're building a membership website or selling other subscription services, Wordpress and Outseta are a powerful combination of tools that can be integrated even by non-technical users.
Outseta integrates with your website via our sign-up, login, and profile embeds. Here's a quick overview of each:
- Sign-up embed—Allows users to choose from your membership options, enter their credit card information, and sign-up for your product or service.
- Login embed—Allows users to login to your site with an email address/password or Google account.
- Profile embed—Allows users to manage their own account information, upgrade or downgrade their membership, maintain their payment information, and invite new team members.
These embeds can be implemented to open as pop-ups when a link or button is clicked on your site, or they can be directly embedded into any website page.
Prerequisites
Before beginning the integration process, you'll need to:
- Go to BILLING > SETTINGS and connect Outseta to Stripe.
- Go to BILLING > PLANS and add at least one pricing plan.
- Go to AUTH > SIGN UP AND LOGIN and configure your sign up and login settings.
With these steps completed, you're ready to integrate Outseta's sign-up, login, and profile embeds with your website.
Open the sign-up, login, and profile embeds as pop-ups
The easiest way to integrate Outseta with your Wordpress site is to open Outseta's sign-up, login, and profile embeds as pop-ups when a call-to-action button or link is clicked.
1. Start by adding sign up, login, and profile buttons or links to your site—you should also add a logout link.

NOTE: These buttons or links will automatically show or hide themselves when they are relevant. For example, the Profile and Logout buttons or links will only display for users who have logged in to your website once the site is published.
2. Within Outseta, go to AUTH > EMBEDS and copy the Quick Start Head Script.
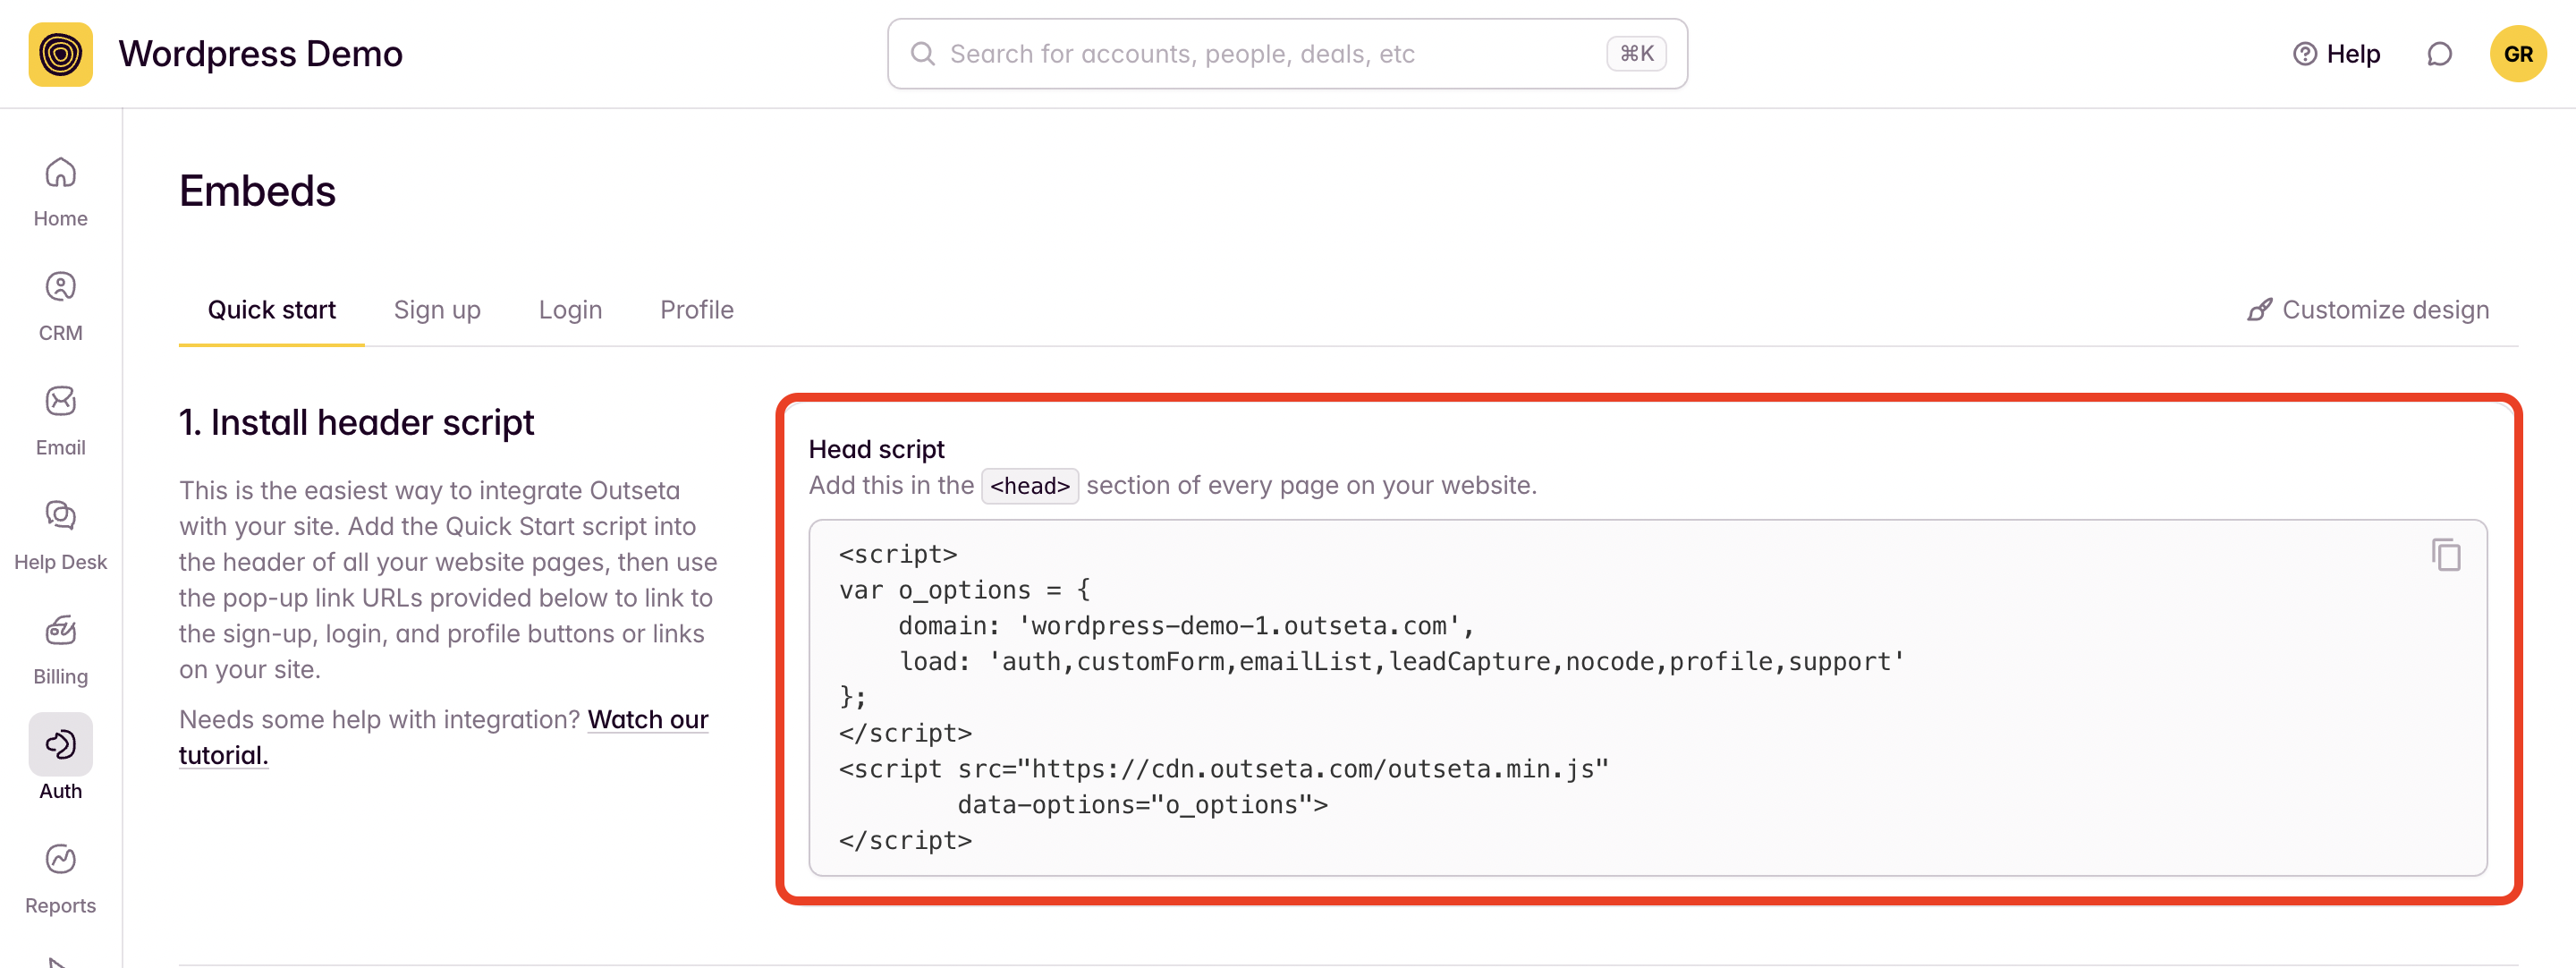
3. Paste the Quick Start Head Script into the header of all your website pages.
In order to do this, you'll need a Business subscription to Wordpress. Business subscriptions allow you to use plugins, and you can use any plugin that allows you to add embed scripts into the header of your Wordpress site.
For the sake of this demo, I'm using the Insert Header and Footers plugin by WPCode.
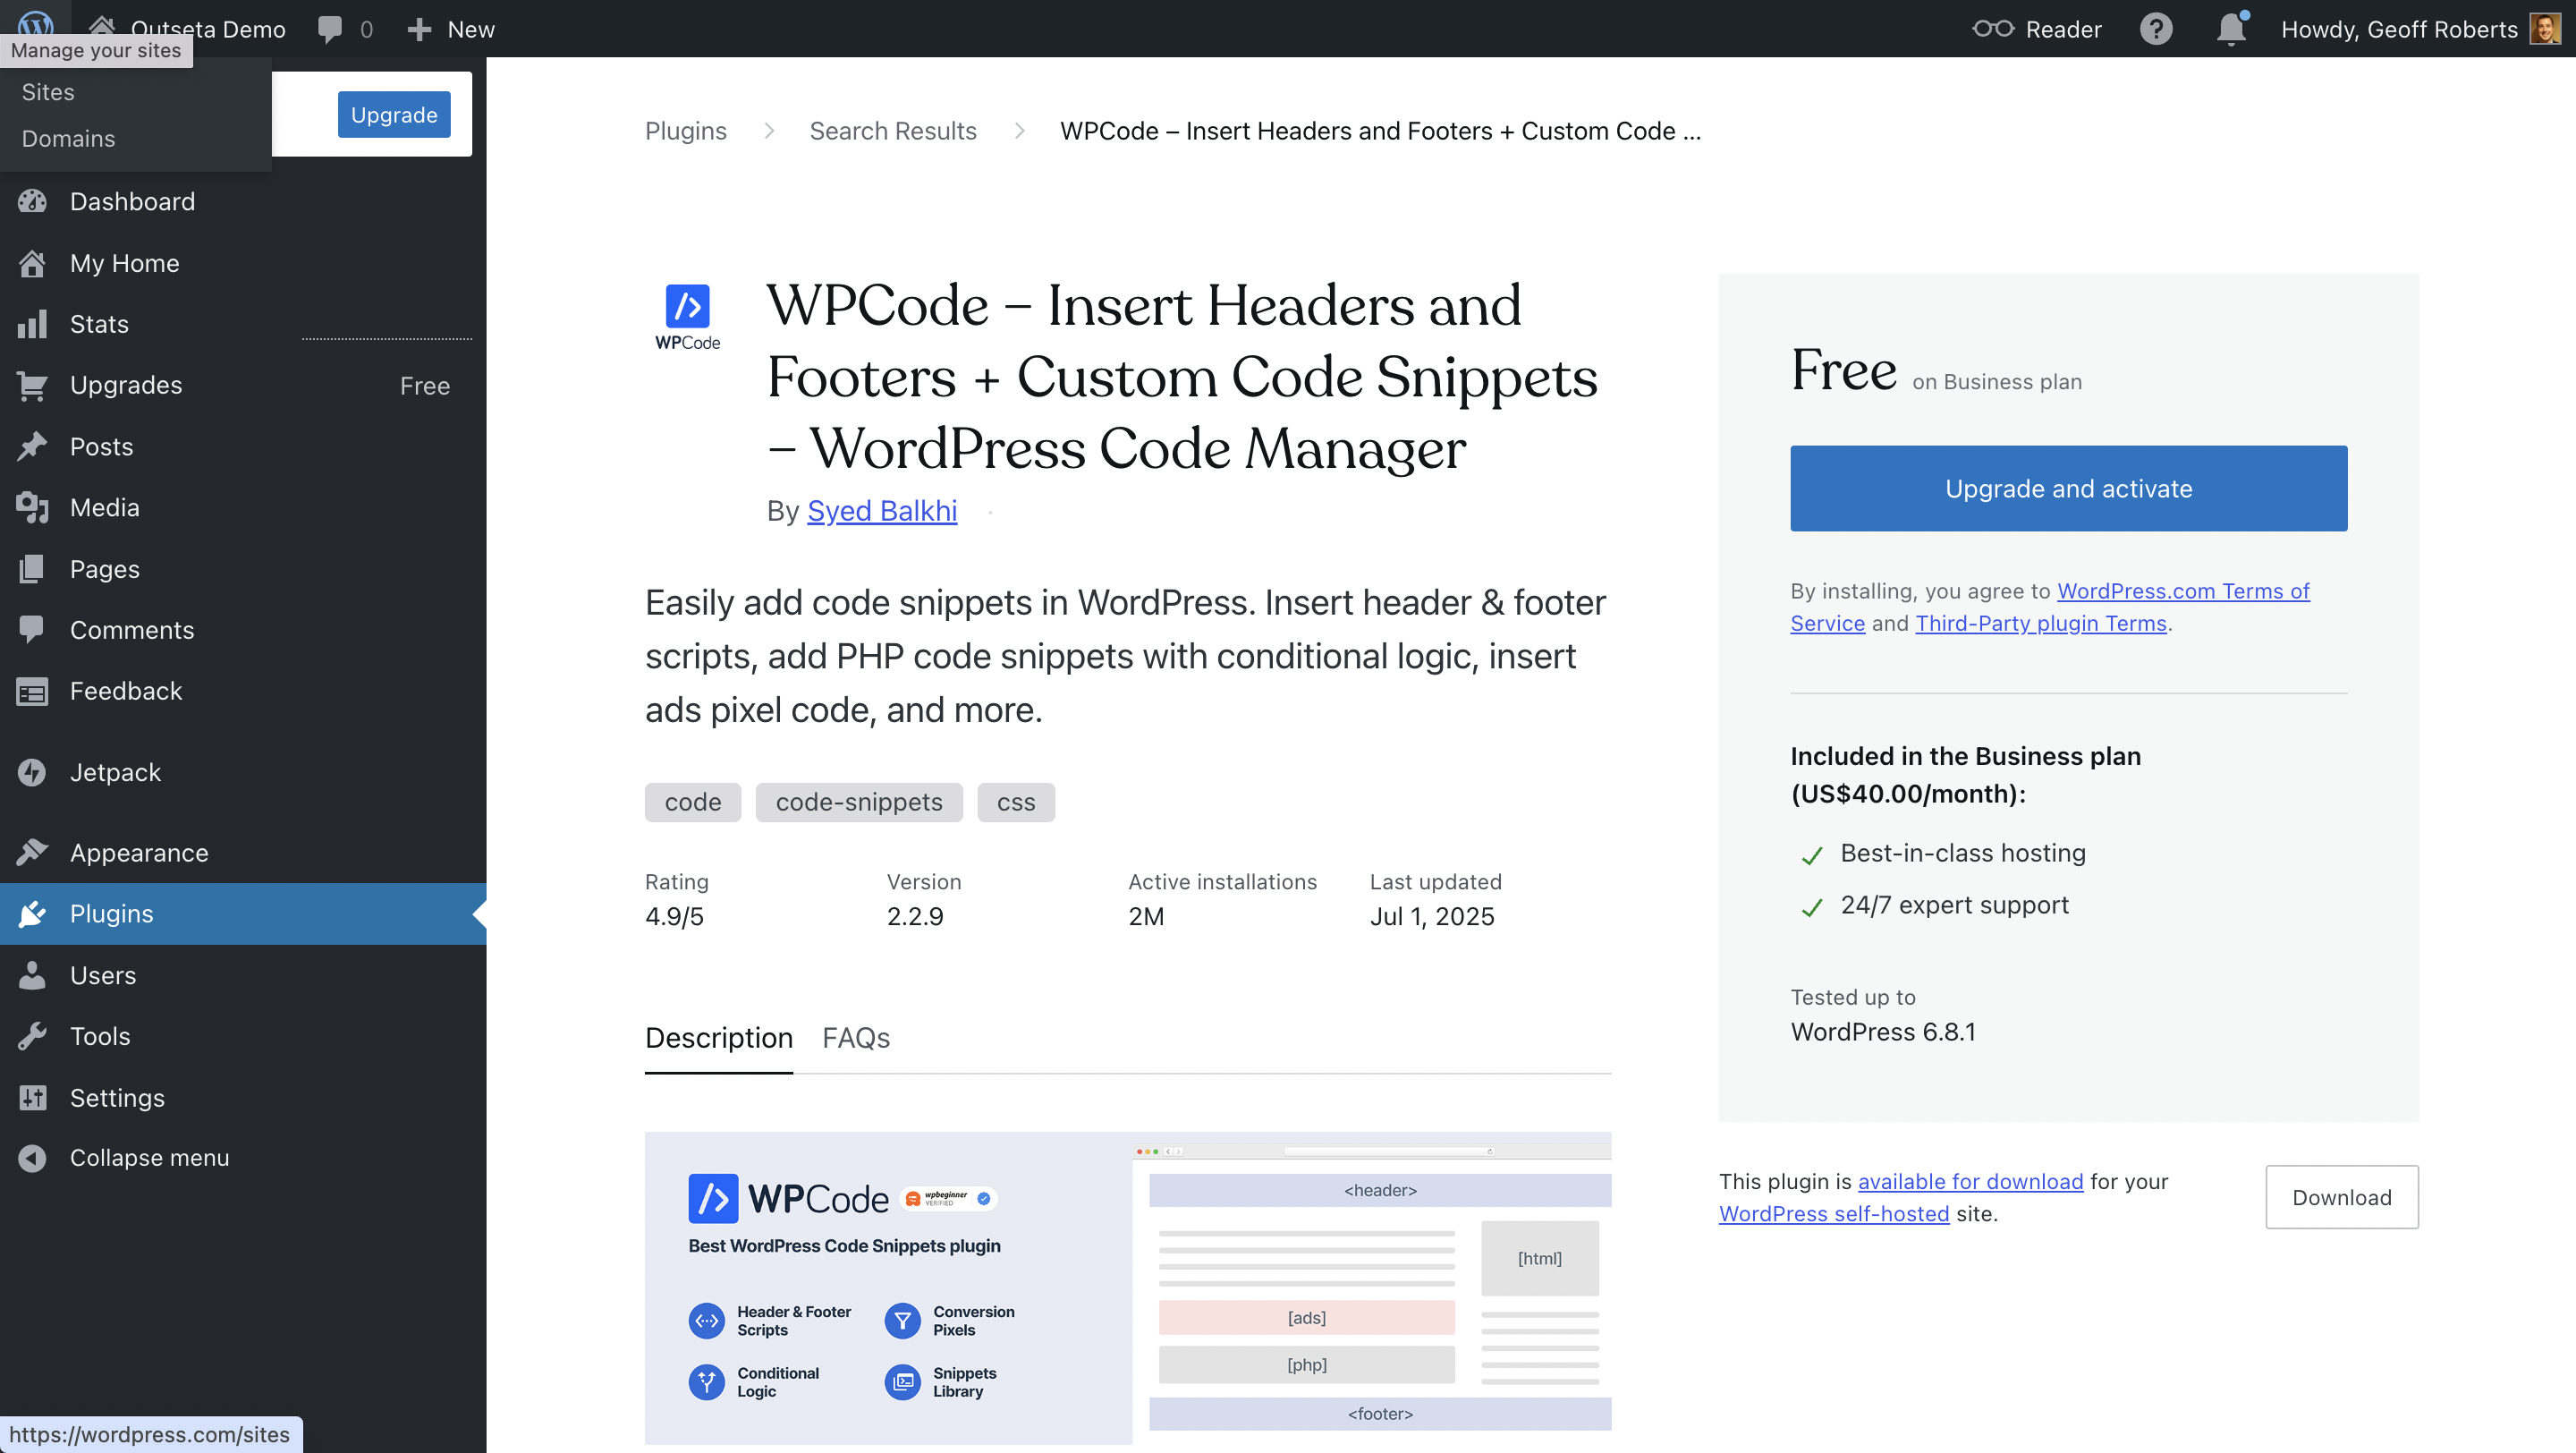
Once you've installed a similar plugin, just paste the Quick Start Head Script into the header of all your website pages and click SAVE.
4. In your Outseta account, go to AUTH > EMBEDS and copy the sign-up link you find under the Quick Start Header Script.
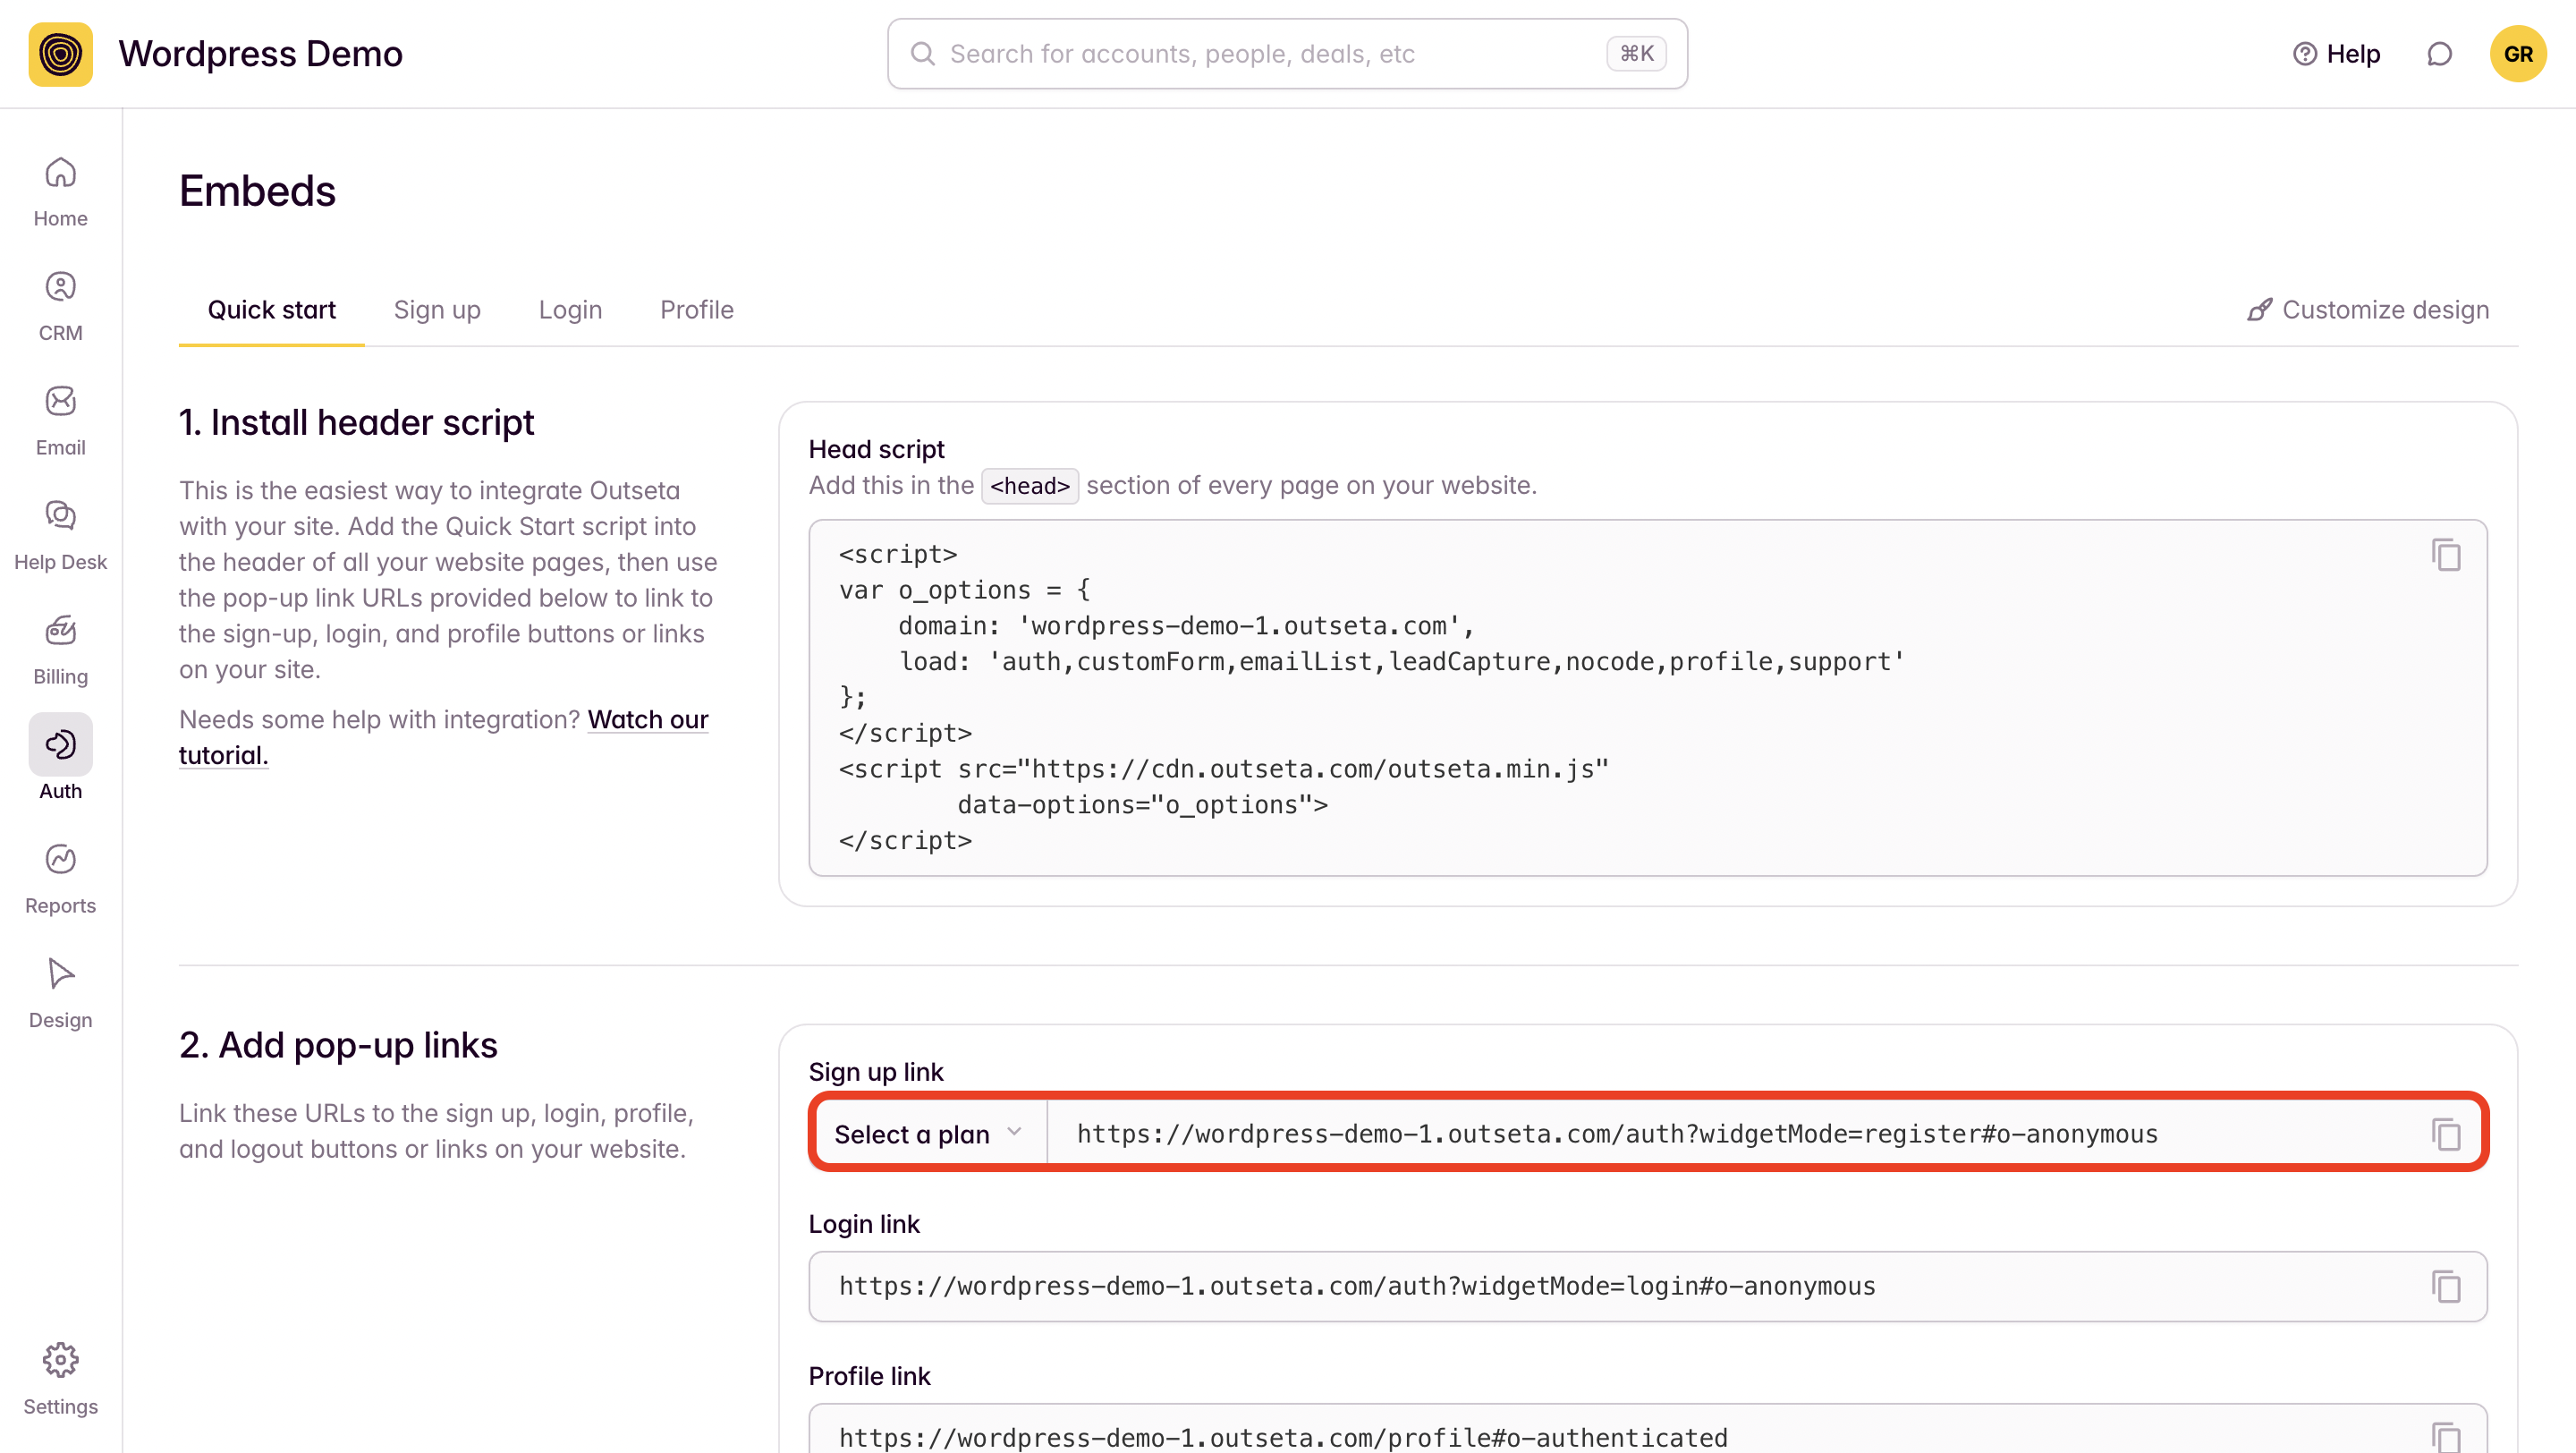
5. Back in your website editor, link your sign up button to the sign up link URL that you grabbed from within Outseta. When site visitors click on this button, Outseta's sign up embed will open as a pop-up.
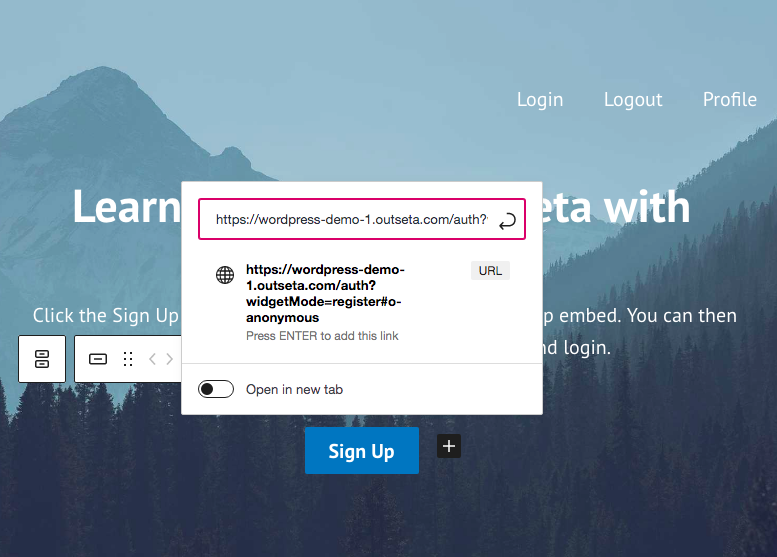
6. Repeat this same process for your login, profile, and logout buttons or links as well—linking the corresponding buttons or links on your site to the links provided within Outseta.
7. PUBLISH your changes—Outseta is now fully integrated with your site!
Embed the sign-up, login, and profile embeds on their own pages
Instead of using Outseta's Quick Start Head Script and opening the embeds as pop-ups, you can choose to add the embedded forms directly to your website pages.
If you choose to go this route:
- You do not need to add the Quick Start Header Script to your site.
- Consider adding dedicated /sign-up, /login, and /profile pages to your website before you start this process. You can also add these embeds directly within your existing website pages.
Follow the steps outlined below to add Outseta's embeds directly to your website pages.
1. With your Outseta account go to AUTH > EMBEDS. On this page you can select and work directly with the sign-up, login, or profile embeds.
In the screenshot below I've selected the sign-up embed. In the "Configure your embed" section you'll see I've selected the On a page option. You can also preselect the plans and payment terms you'd like to display—use these configuration options and you'll see the Live Preview on the right hand side of the screen that reflects the changes you've made to the sign up embed.
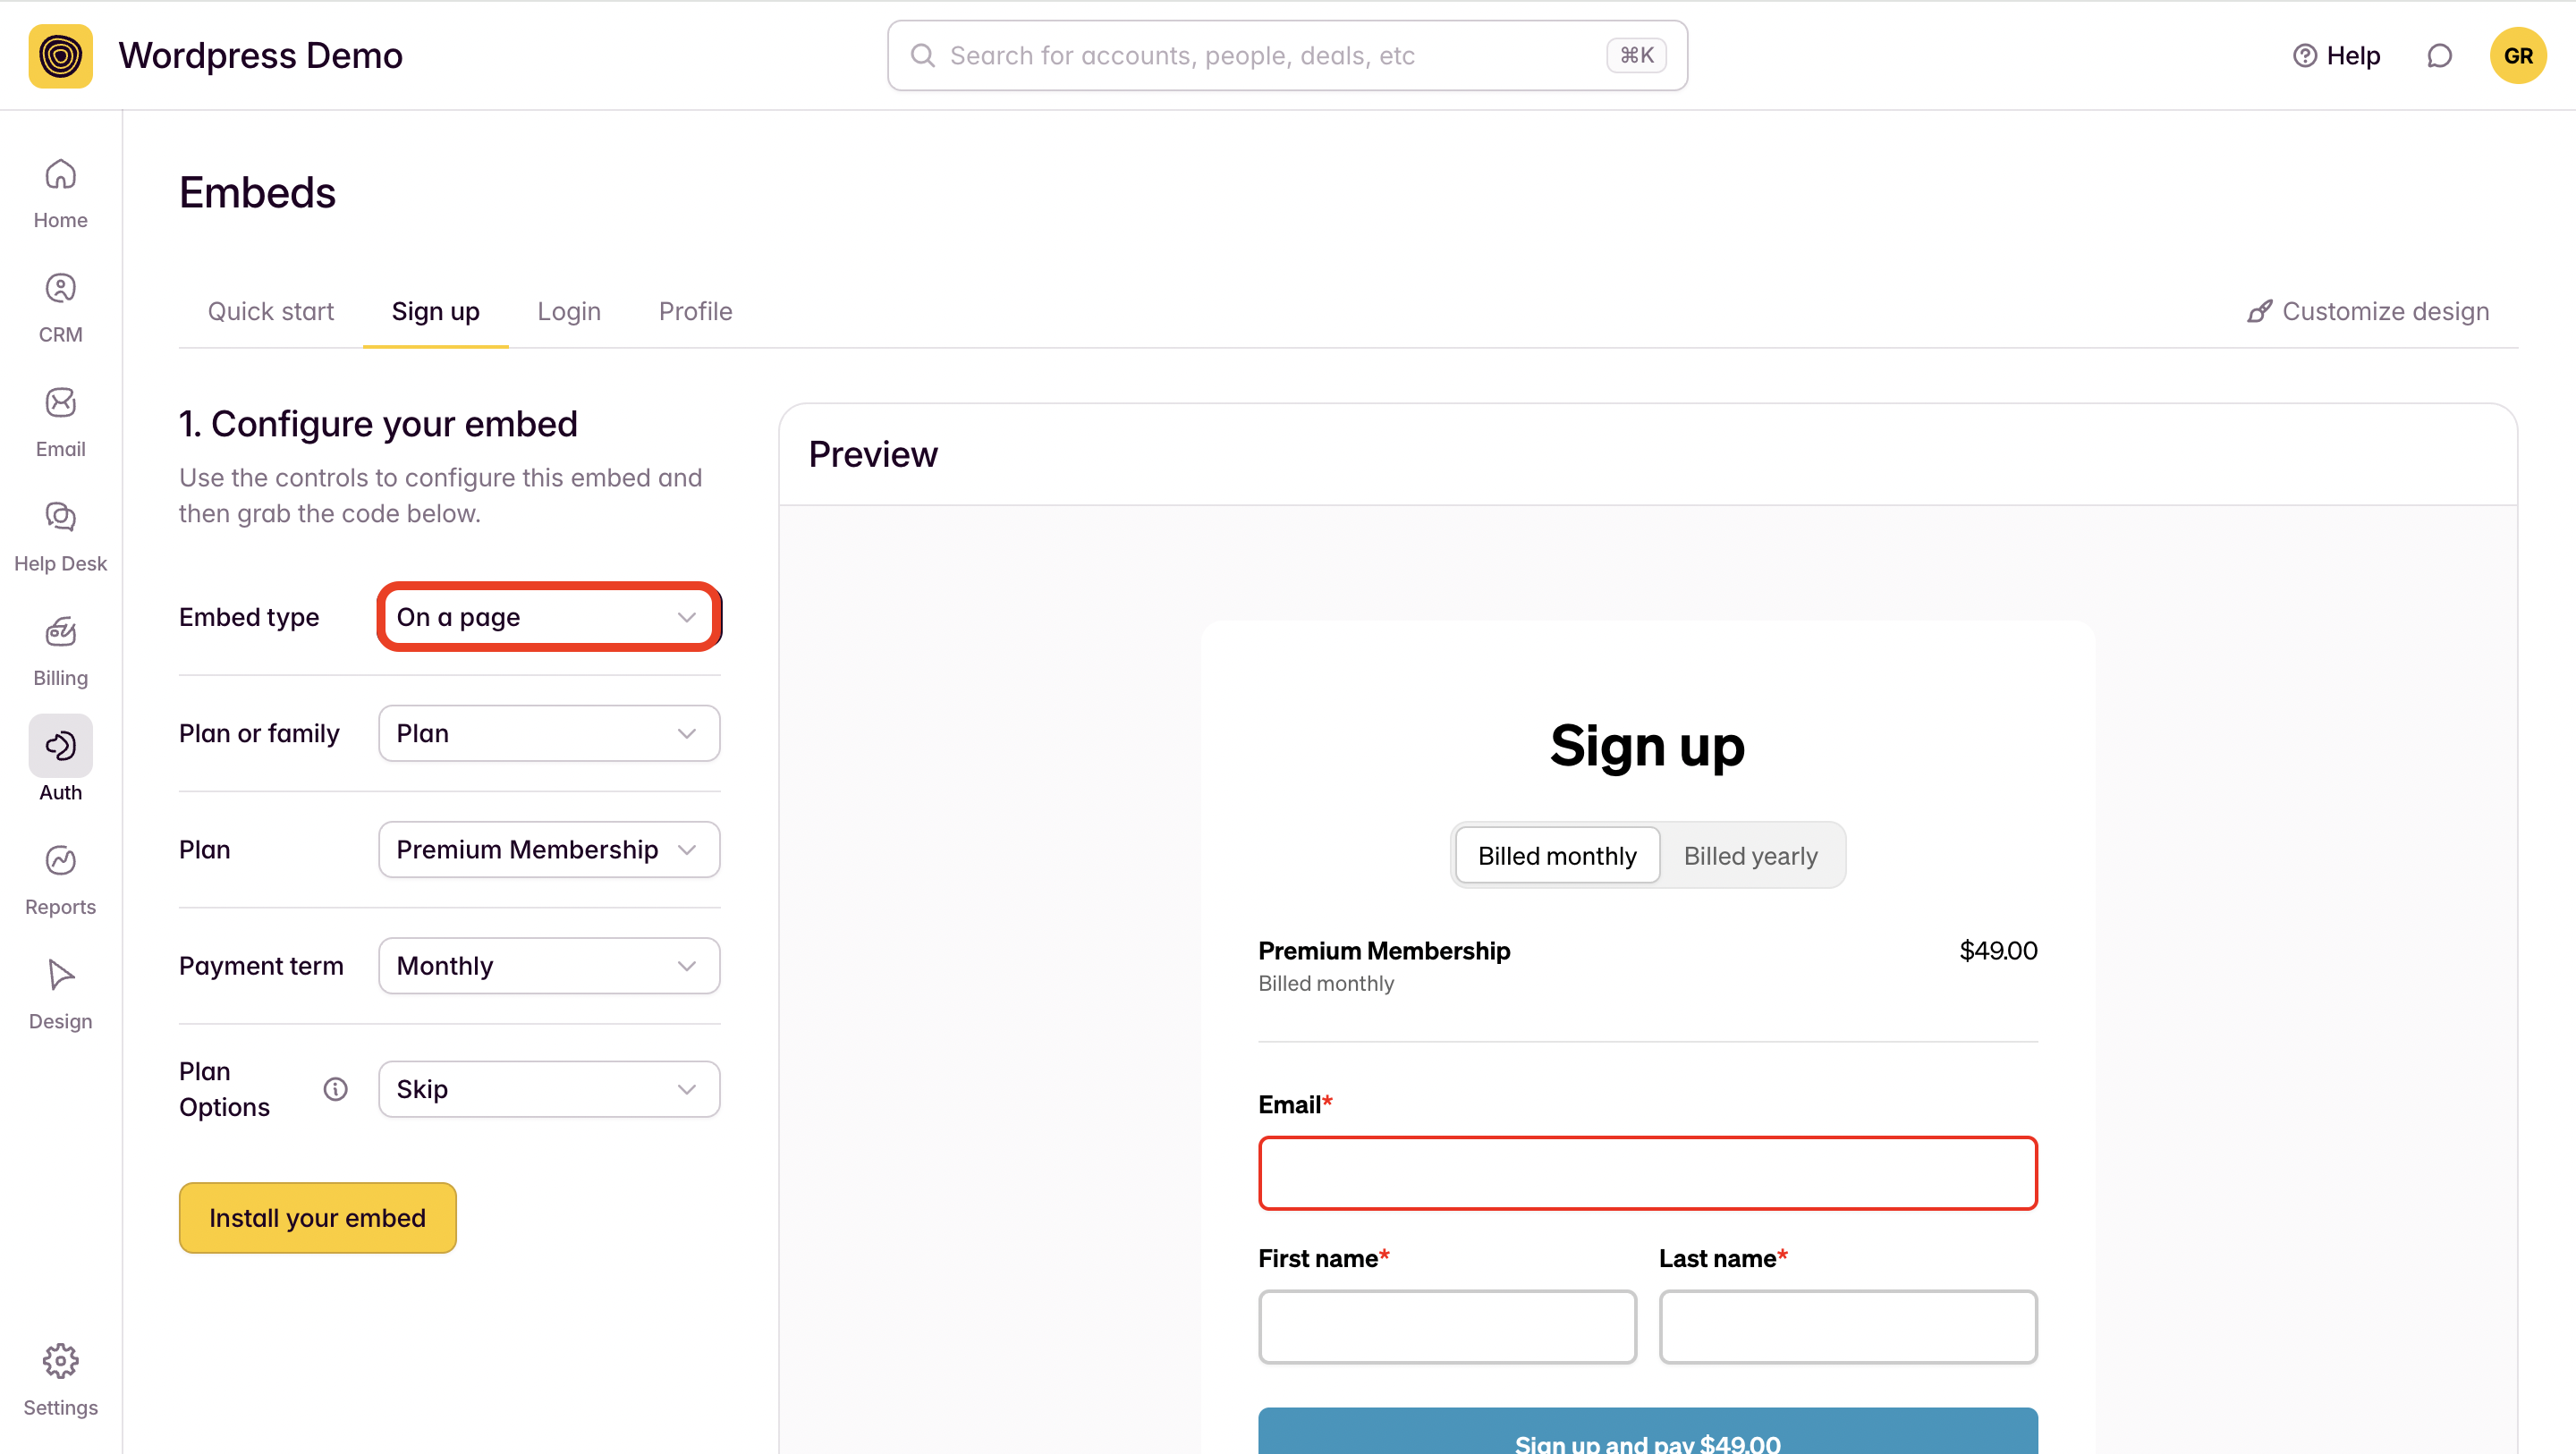
Once you've configured your embed script to your liking, click INSTALL YOUR EMBED.
2. Copy the page script that you'll need to drop into your website pages at the bottom of the page—embed this code directly into your website page.
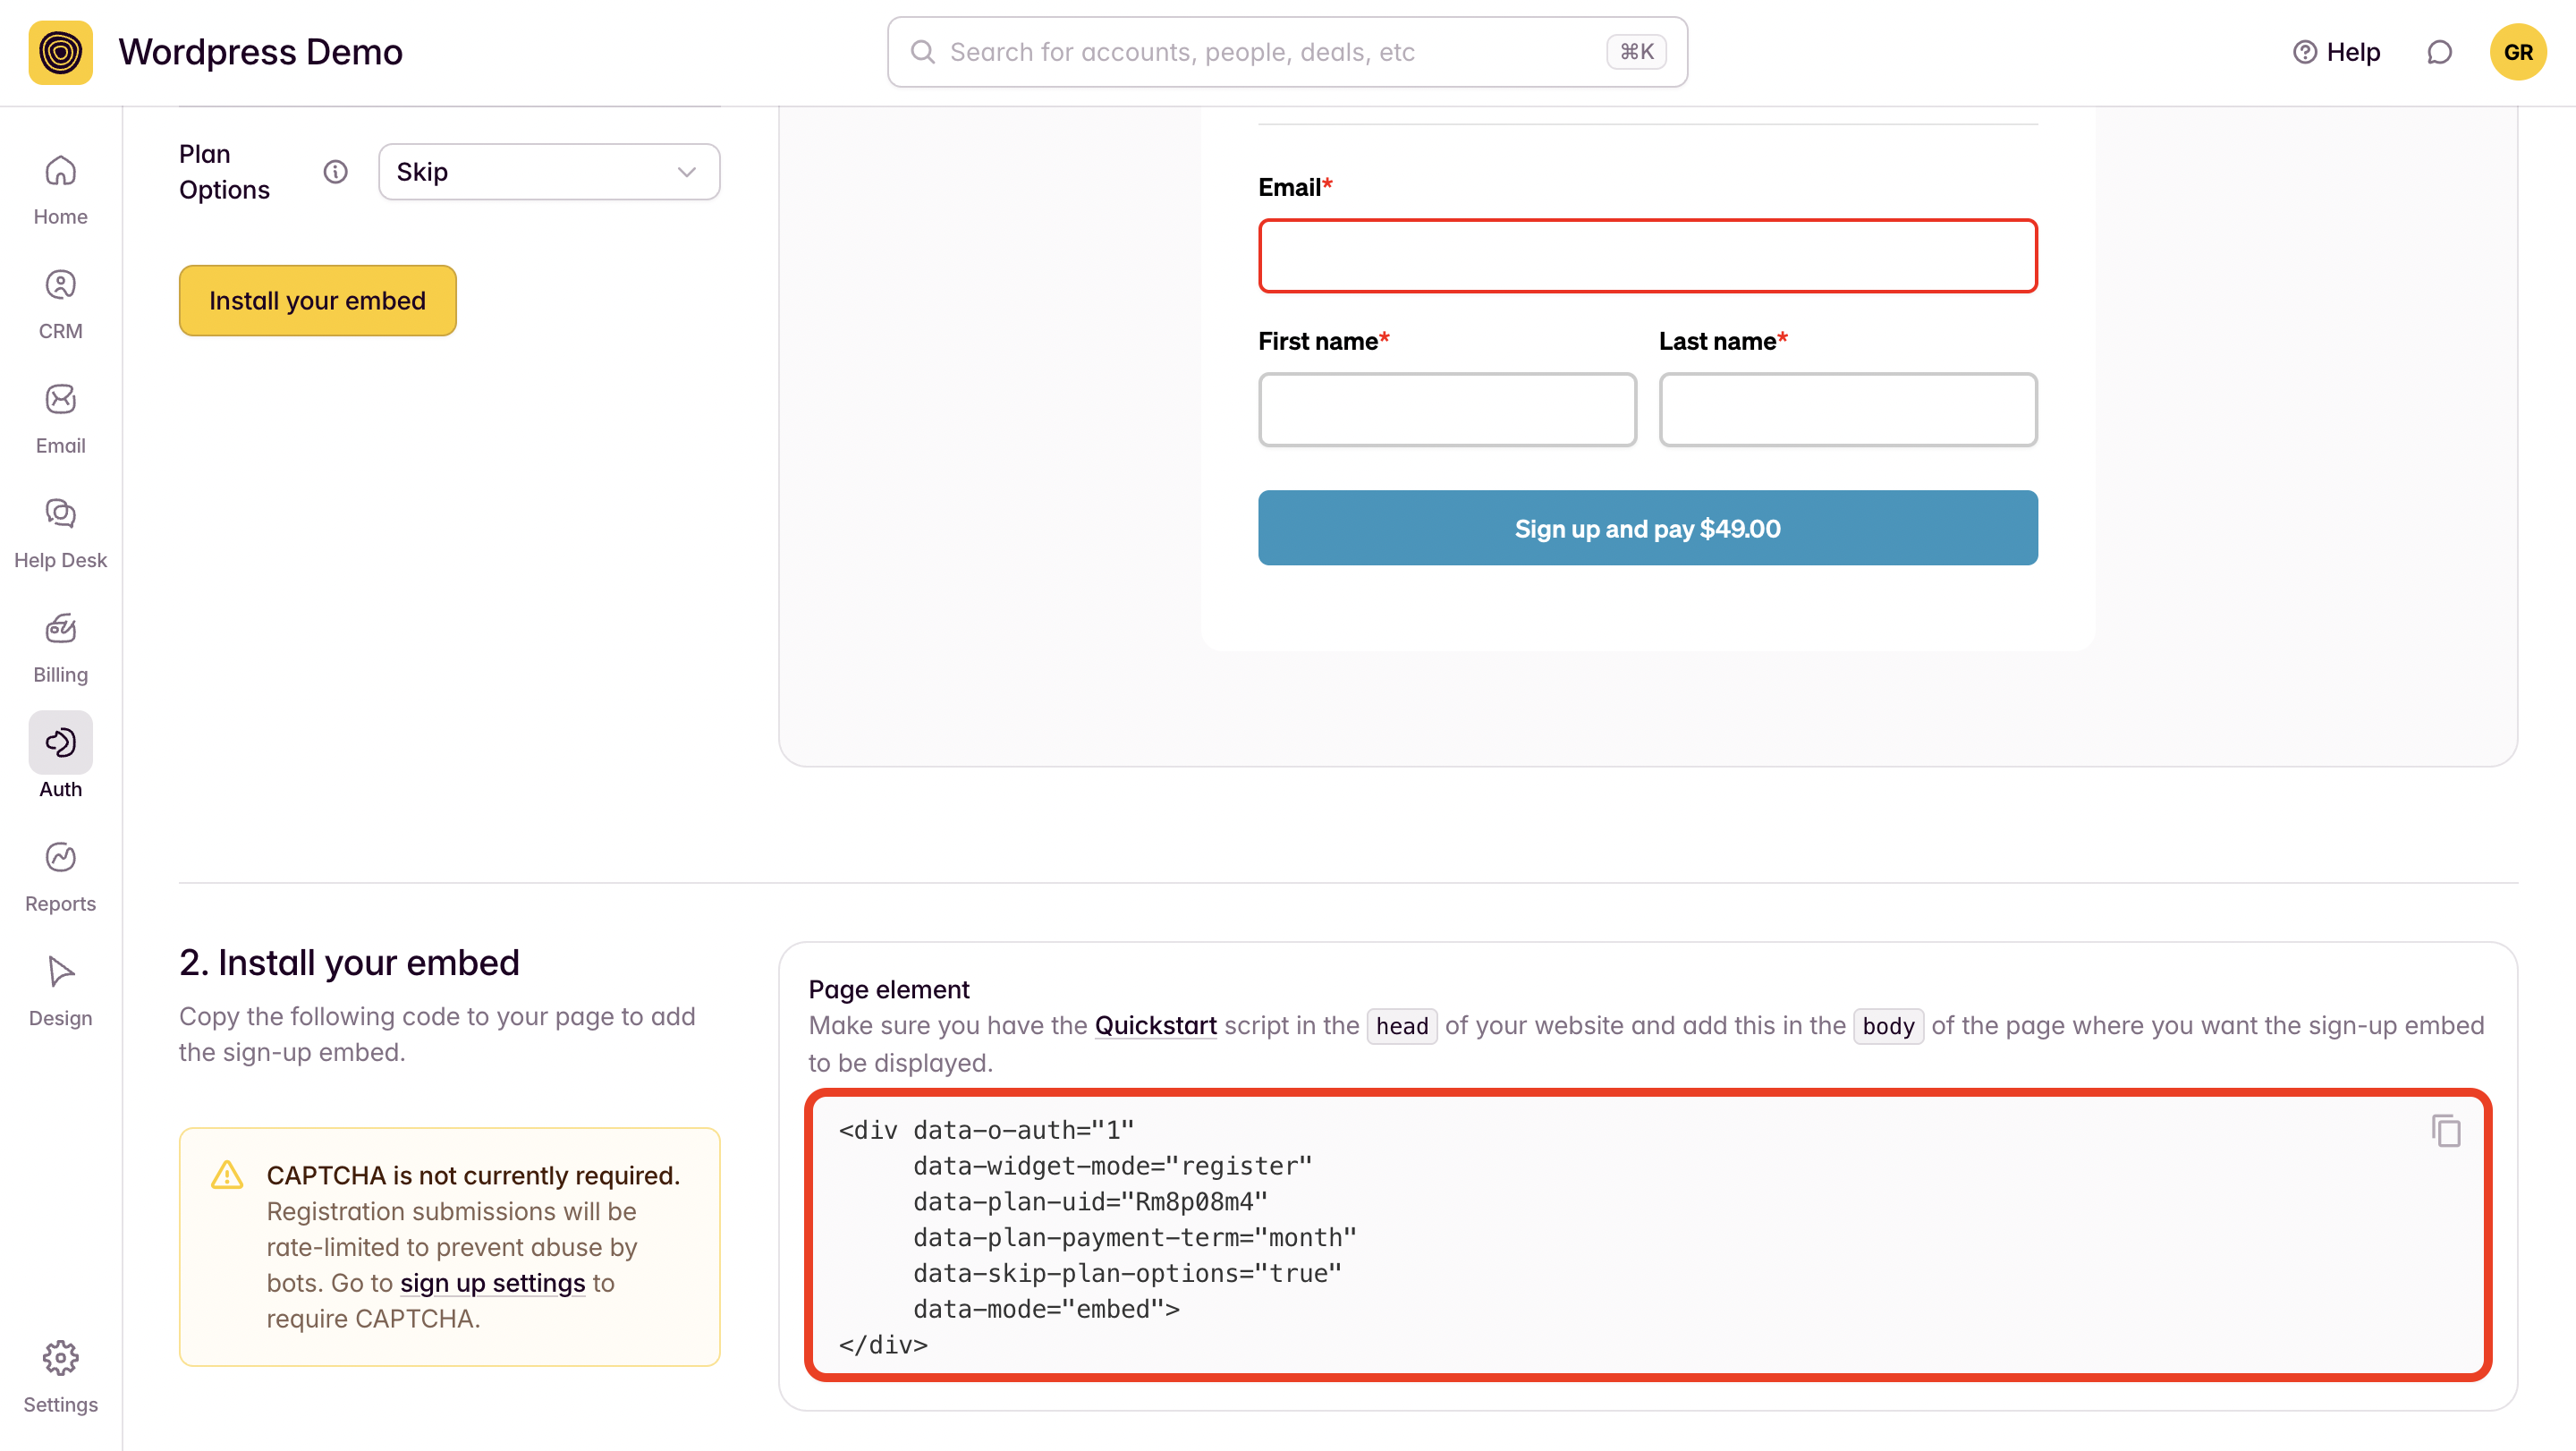
Repeat this process for your sign-up, login, and profile pages.
3. PUBLISH your site!
If you need any help with this process, we'd be happy to help! Please email us at support(at)outseta.com.