After you connect Outseta to your Stripe account, you'll want to configure the settings on the AUTH > SIGN UP AND LOGIN page.
Once completed, you'll be ready to integrate Outseta with your site.
Login Settings
There are two important settings in this section.
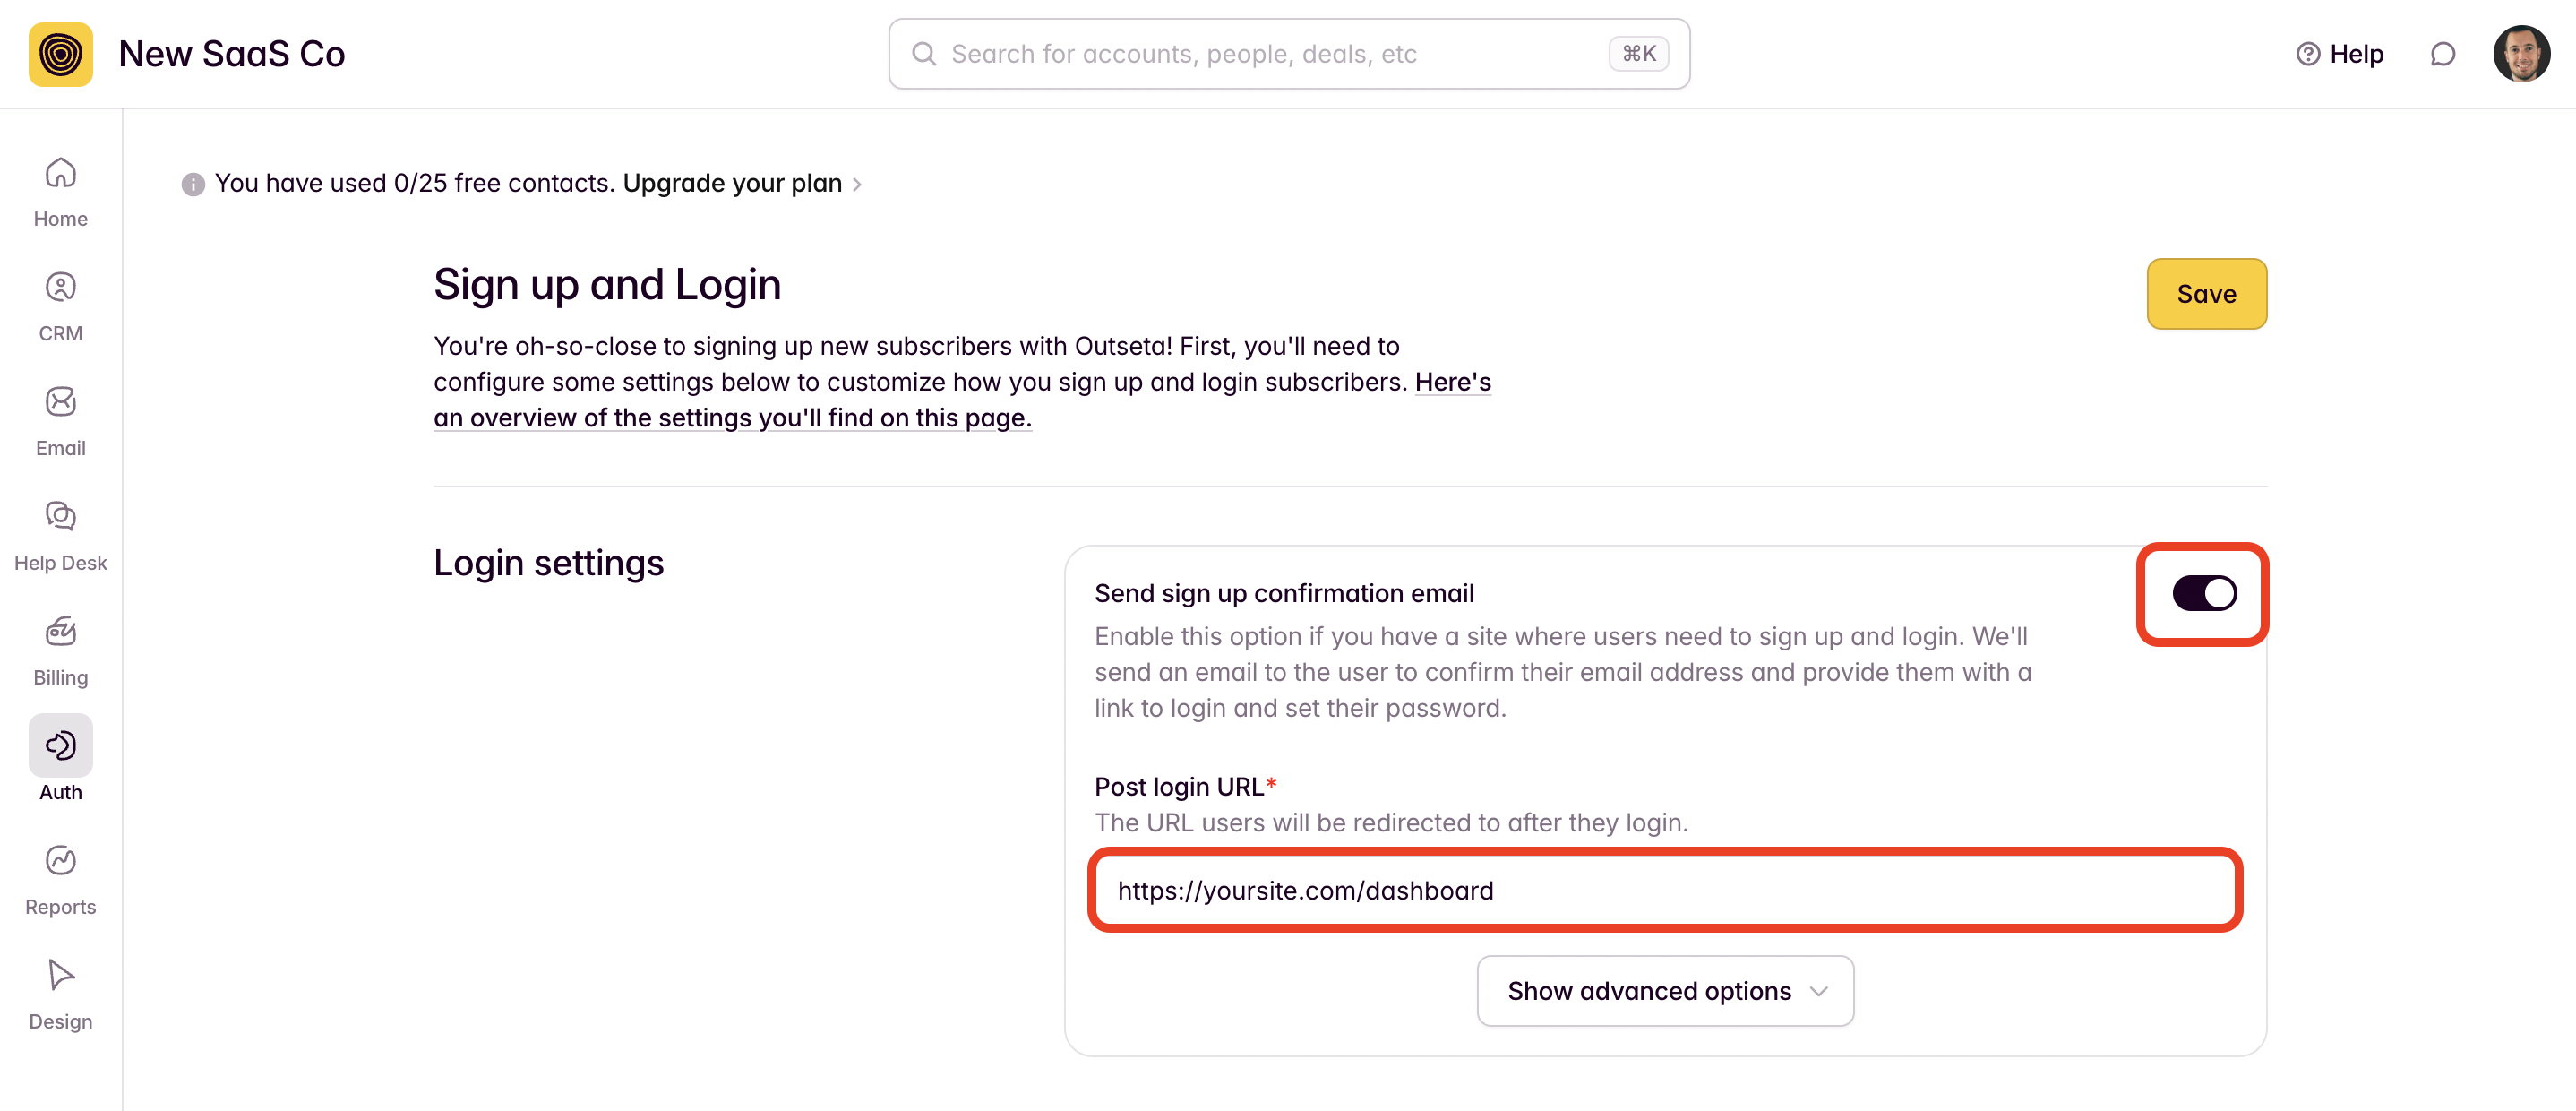
- Send sign up confirmation email—If you have any site that users need to login to, leave this toggle turned on. After a user signs up, this will send them a confirmation email that validates their email address and prompts them to set a password.
- Post Login URL—This is the most important setting on this page—it's the URL that the user will be redirected to after they login successfully.
Sign Up Settings
Further down the page you'll find the sign up settings.
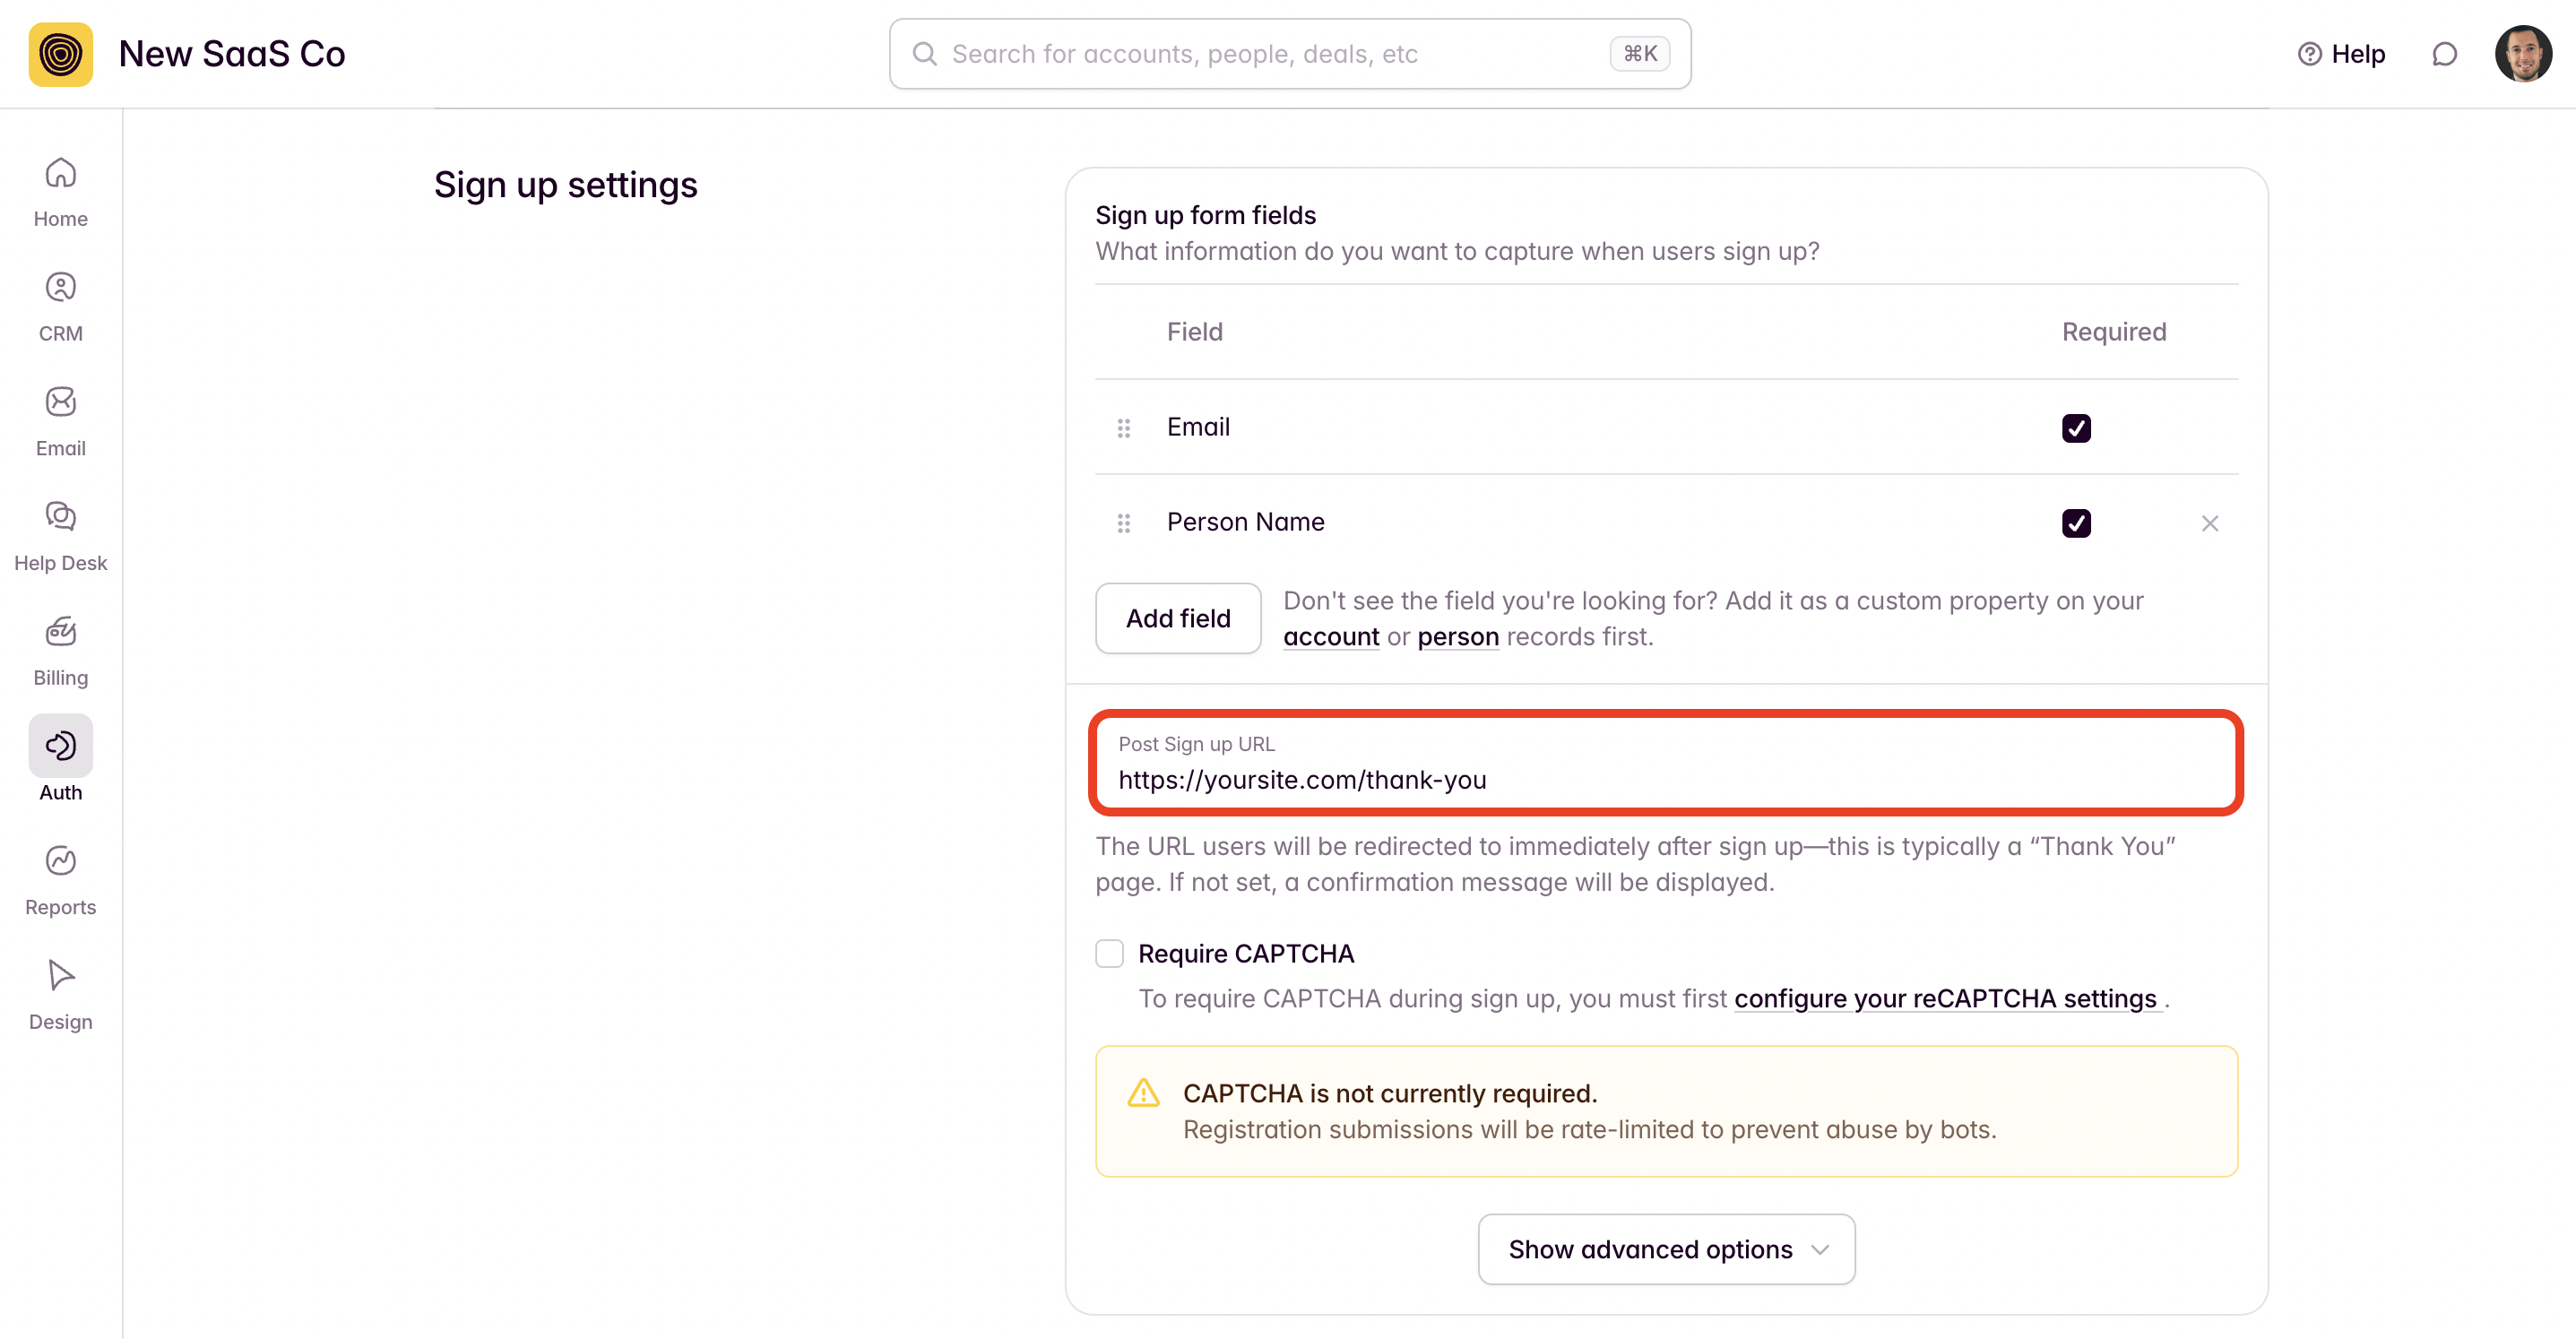
- Sign up form fields—These fields specify the information that you'll ask for at sign up. If you want to capture information not included in the picklist when you click ADD FIELD, you'll need to first add these fields as custom properties.
- Post Sign Up URL—This is the URL the user will be redirected to immediately after sign up—it's usually a thank you page. If you leave this field blank, the user will see a message confirming their sign up.
- Enable sign up and login with Google—You also optionally have the ability to allow users to sign up and login with their Google accounts. If you're just getting started, we recommend coming back to this later.
With these settings in order, click SAVE at the top or bottom of the page.