
In order to start accepting payments you'll need to:
- Connect Outseta to your Stripe account
- Create a product
Create a product
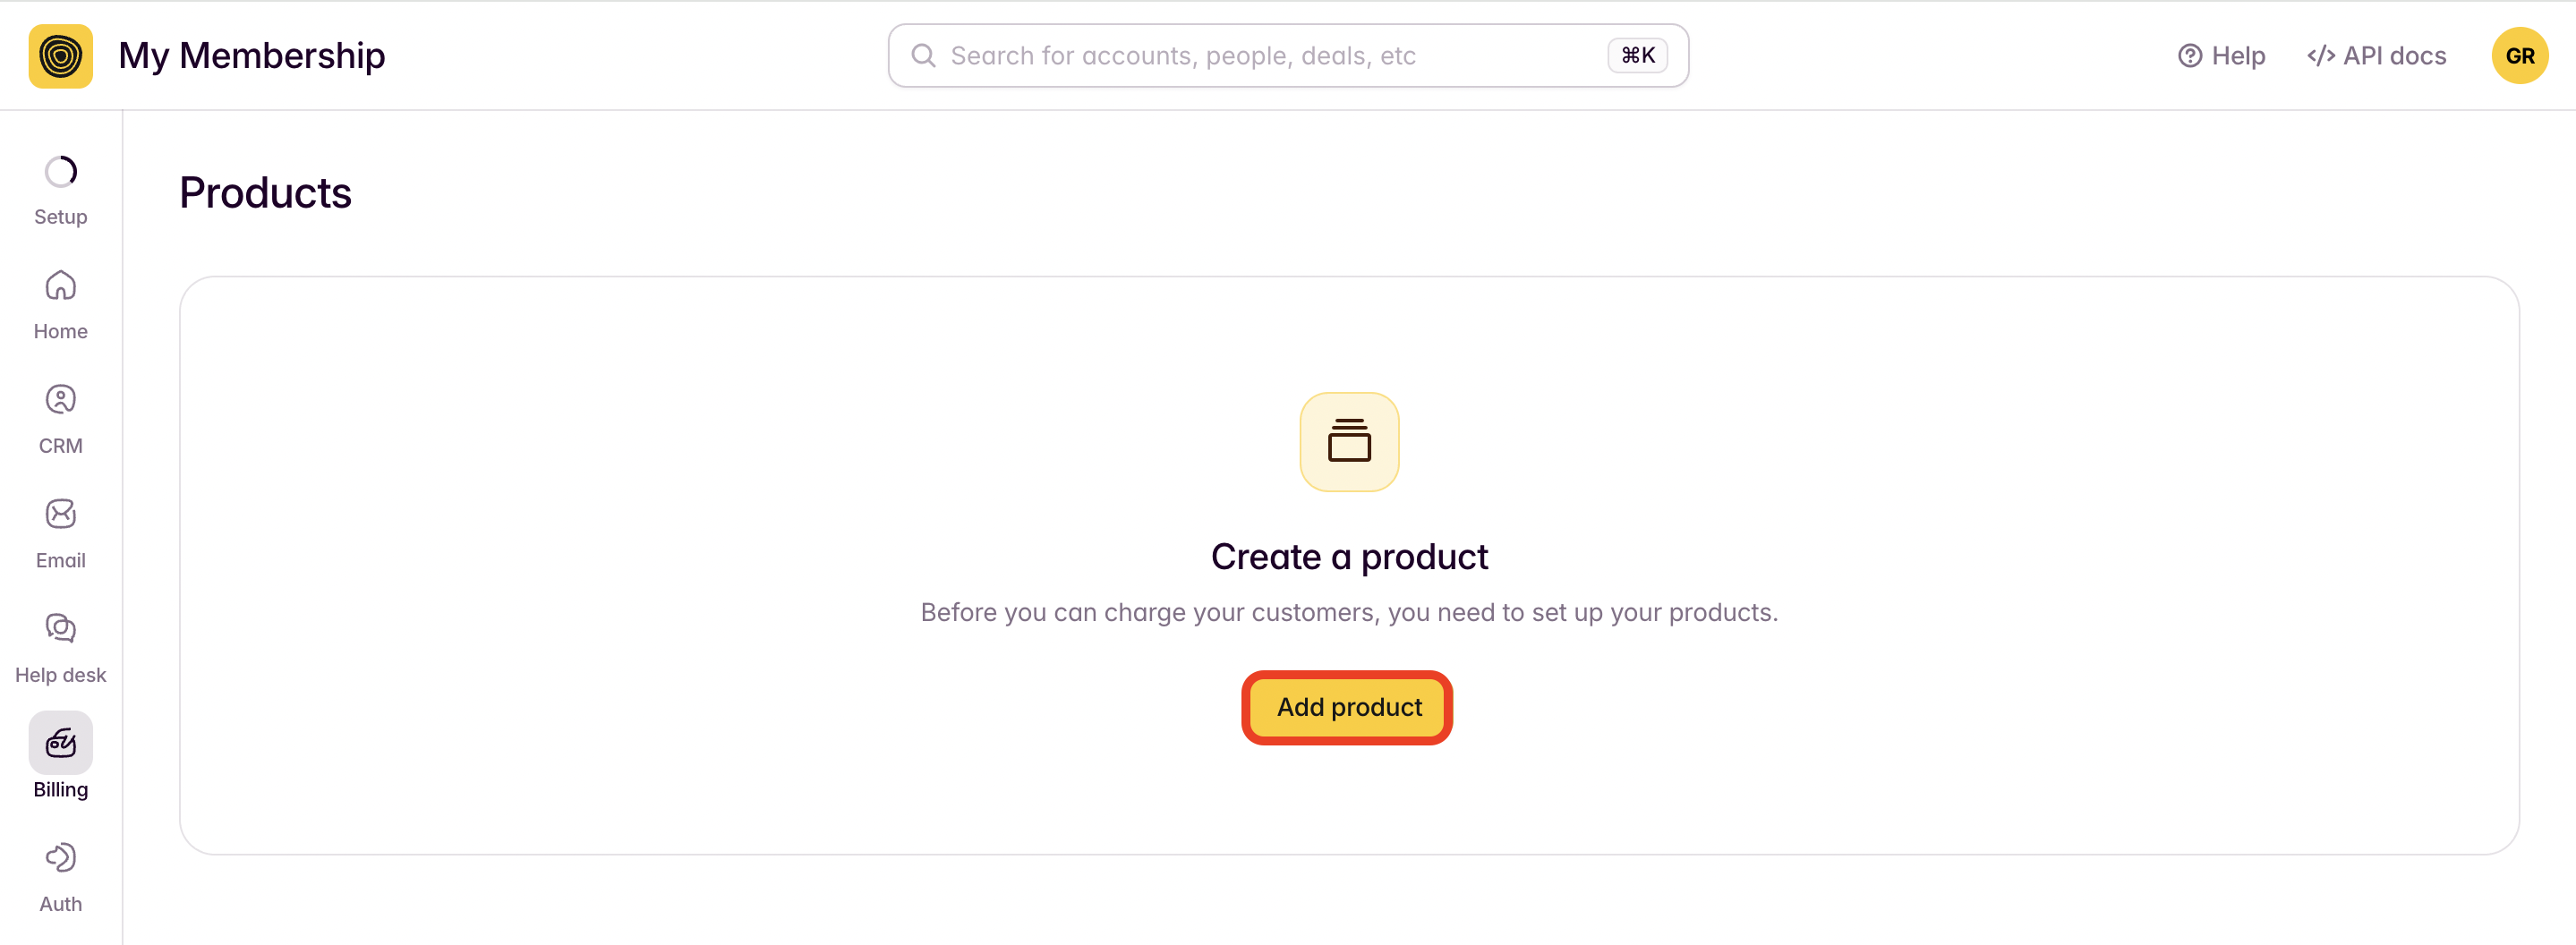
1. Login to your Outseta account. Click BILLING > PRODUCTS and select ADD PRODUCT.
2. In the GENERAL INFORMATION section, add a NAME for your product.
- A STATUS set to ACTIVE makes the product active and ready for sign ups.
- A DESCRIPTION further describes your product beyond its name.
- Assigning a product to a PRODUCT FAMILY is a way of grouping associated products together (think of a Basic, Pro, and Enterprise products).
Only a product NAME is required here, so don't get too hung up on the other options for now.
3. Choose a REGISTRATION mode.
- In INDIVIDUAL mode each person has their own account, while TEAM mode allows multiple people to share an account with individual login credentials.
4. Next, configure your product's PRICING.
Pricing models:
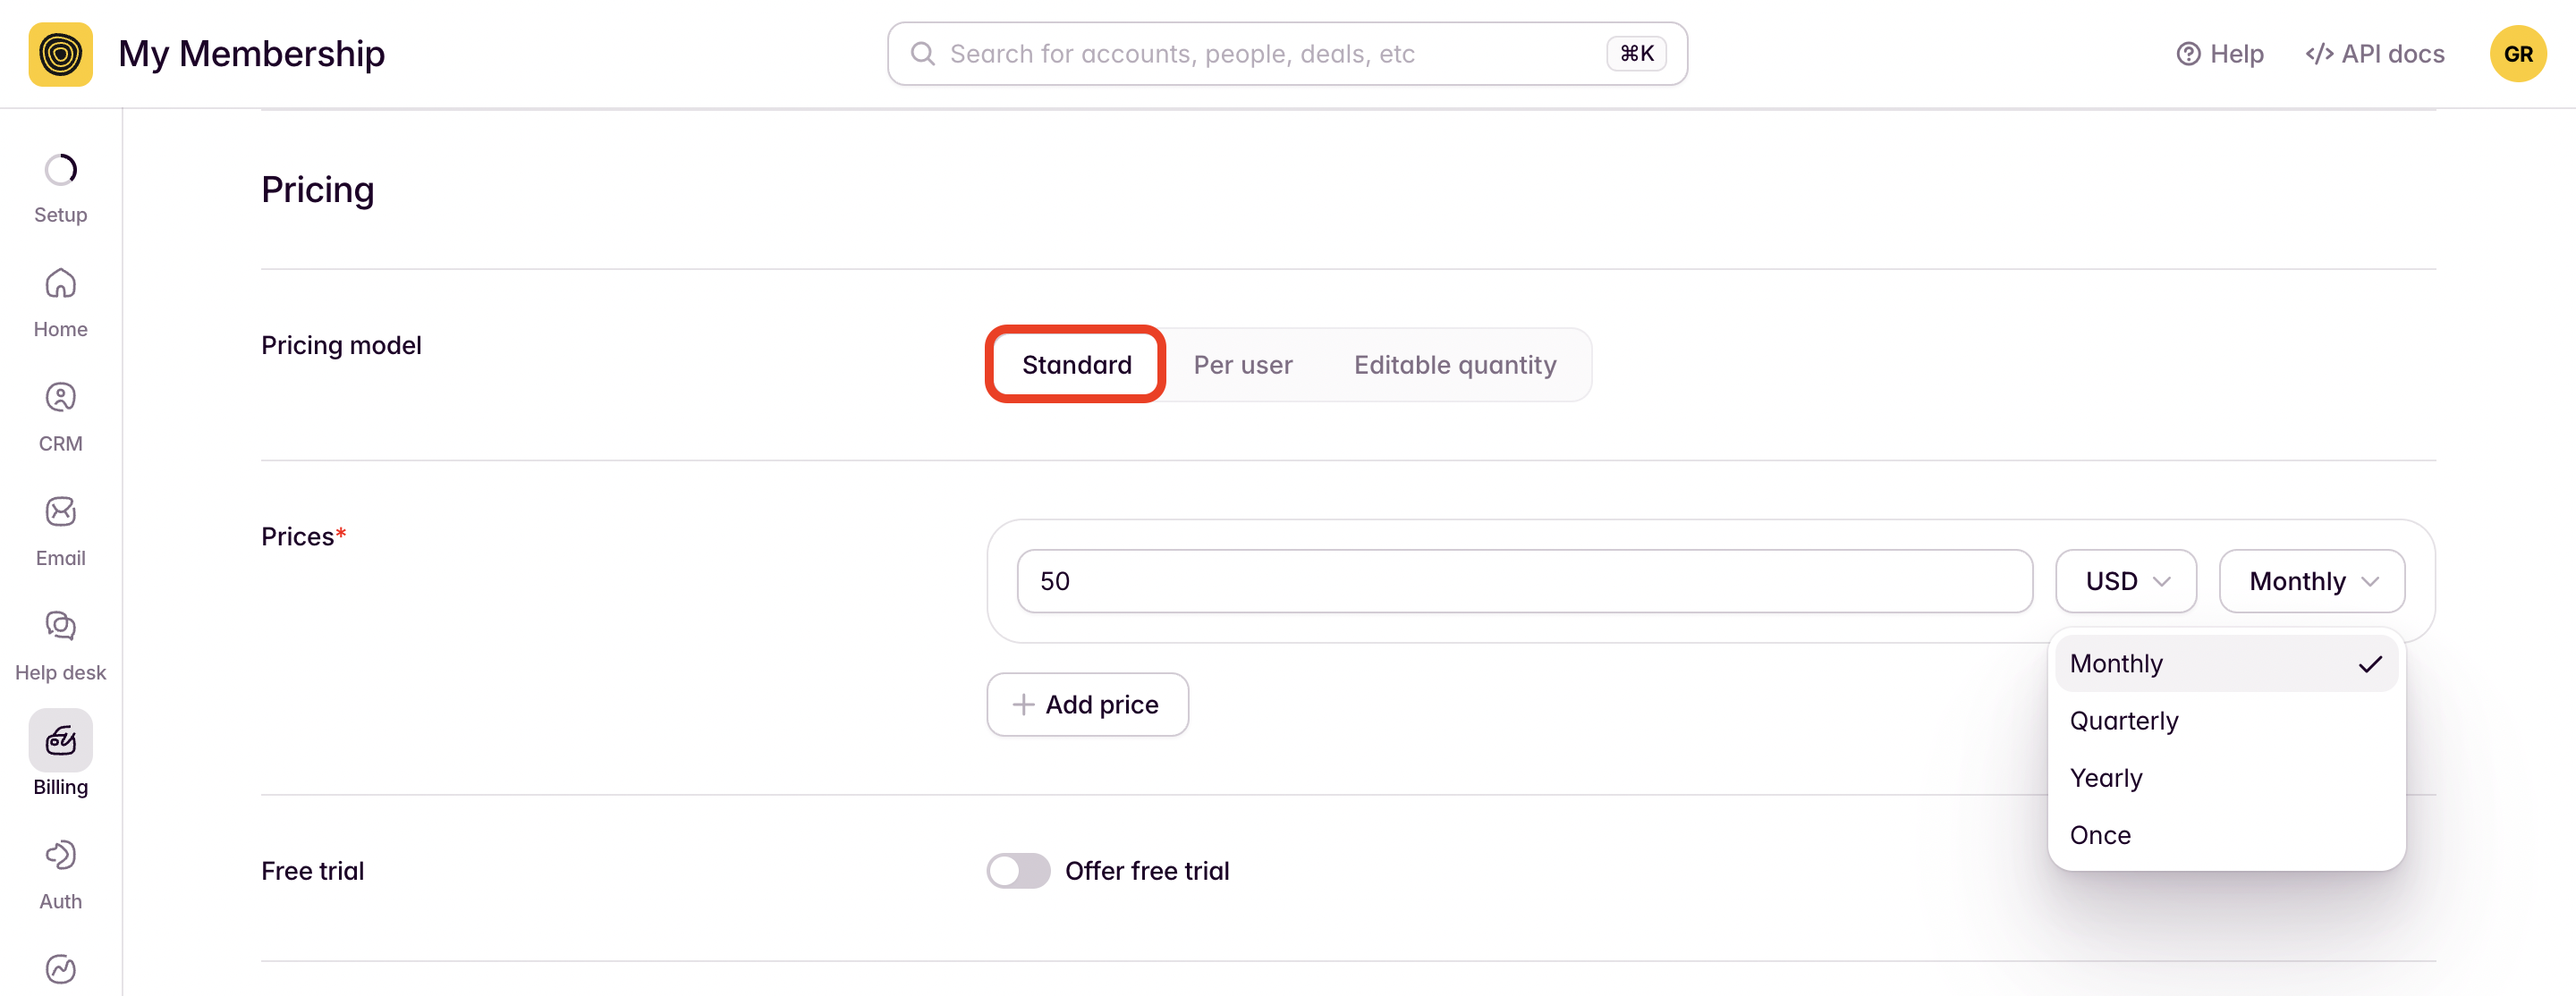
- Standard—Standard pricing is used for one-time fee products or monthly, quarterly, or annual subscriptions. If you want to offer a free subscription, choose the standard option and input a monthly fee of 0.
- Per User—Per User pricing allows you to charge a set fee per user based on the number of users that have access to an account. Per user fees can be charged monthly, quarterly, or annually.
- Editable Quantity—Editable quantity pricing presents the user with an input box, where they can input the number of something (units) they'd like to purchase.
In the example below, I've setup a STANDARD plan that's $50 USD per month.
If you want to offer a free trial, select the FREE TRIAL toggle. You can set up free trials of a specific duration (like 14 days), or a free trial that runs until a particular date.
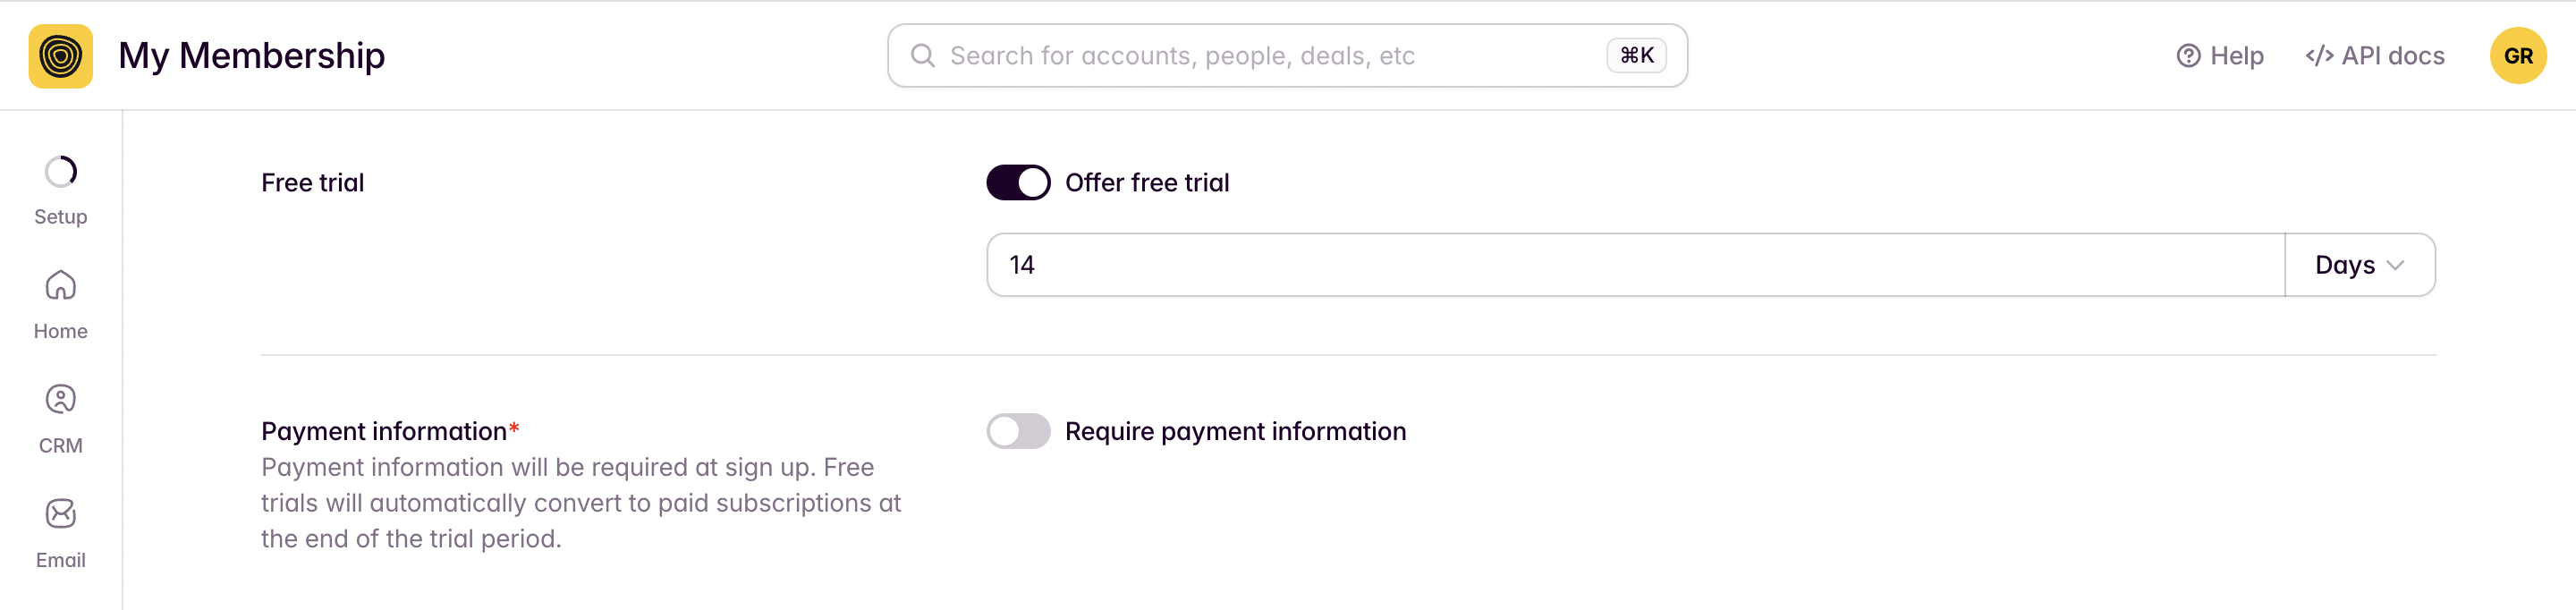
NOTE: Outseta's default behavior is to not ask for payment information when the user signs up for a free trial. The user will be prompted for payment if they try to login after their trial period has expired. If you select the REQUIRE PAYMENT INFORMATION toggle the user will be asked for payment information at sign up. In this case the user will be automatically charged at the end of the free trial period.
5. Finally, move on to the OTHER OPTIONS settings. These are generally more advanced options that are not required.
- Set an EXPIRATION DATE for the product. Otherwise all Outseta subscriptions auto-renew by default.
- Add a CUSTOM POST PURCHASE URL if you want to send people who purchase this product to a thank you page specific to this product after purchase.
- Add a CUSTOM POST LOGIN PATH if you want to redirect users who purchase this product to a specific page once they login.
- Add a CROSS-SELL if you want to offer users who purchase this product the option to buy another product on your checkout page.
Once you've configured these options to your liking, click ADD PRODUCT.
6. After you finish adding your products you can:
- Add a checkout experience to your website by integrating Outseta's sign-up embed.
- Finally, you can test payments and your sign-up flow by following these best practices.
If you have any questions please don't hesitate to contact us at support(at)outseta.com.