Outseta allows you to set up protected content—content that's only accessible to specific members based on their subscription plan or other add-on products that they've purchased.
Outseta supports three types of protected content:
- Content groups—The most common type of protected content, content groups allow you to protect pages or entire folders of content based on a member's subscription plan or add-on products. This post focuses on setting up content groups.
- Show or hide page elements—Using custom attributes, you can choose to show or hide any individual element on a page based on whether a user has logged in, their subscription plan, or the add-on products they've purchased.
- Account specific pages—Account specific pages are protected pages that only members of a specific account can access. These are most commonly used for creating unique dashboards or landing pages for each of your members.
Outseta nocode script enables content protection
If you've already added Outseta's Quick Start Head Script (found on the AUTH > EMBEDS page) to the header of your website pages, Outseta's content protection features will work for you immediately.
If you have not, it's Outseta's no-code script that enables the content protection features. Edit the code below so that the bolded word domain reflects your Outseta login URL, then add it to the header of all your website pages.
<script>
var o_options = {
  domain: 'domain.outseta.com',
  load: 'nocode'
};
</script>
<script src="https://cdn.outseta.com/outseta.min.js"
        data-options="o_options"/>
</script>
With either to Quick Start Head Script or the nocode script added to the header of your website pages, you're ready to start setting up your protected content.
Setting up Content Groups
Follow the steps outlined below to set up your protected content.
1. Click AUTH > PROTECTED CONTENT from the left hand side bar.
2. Click ADD PROTECTED CONTENT to begin setting up you content restrictions.
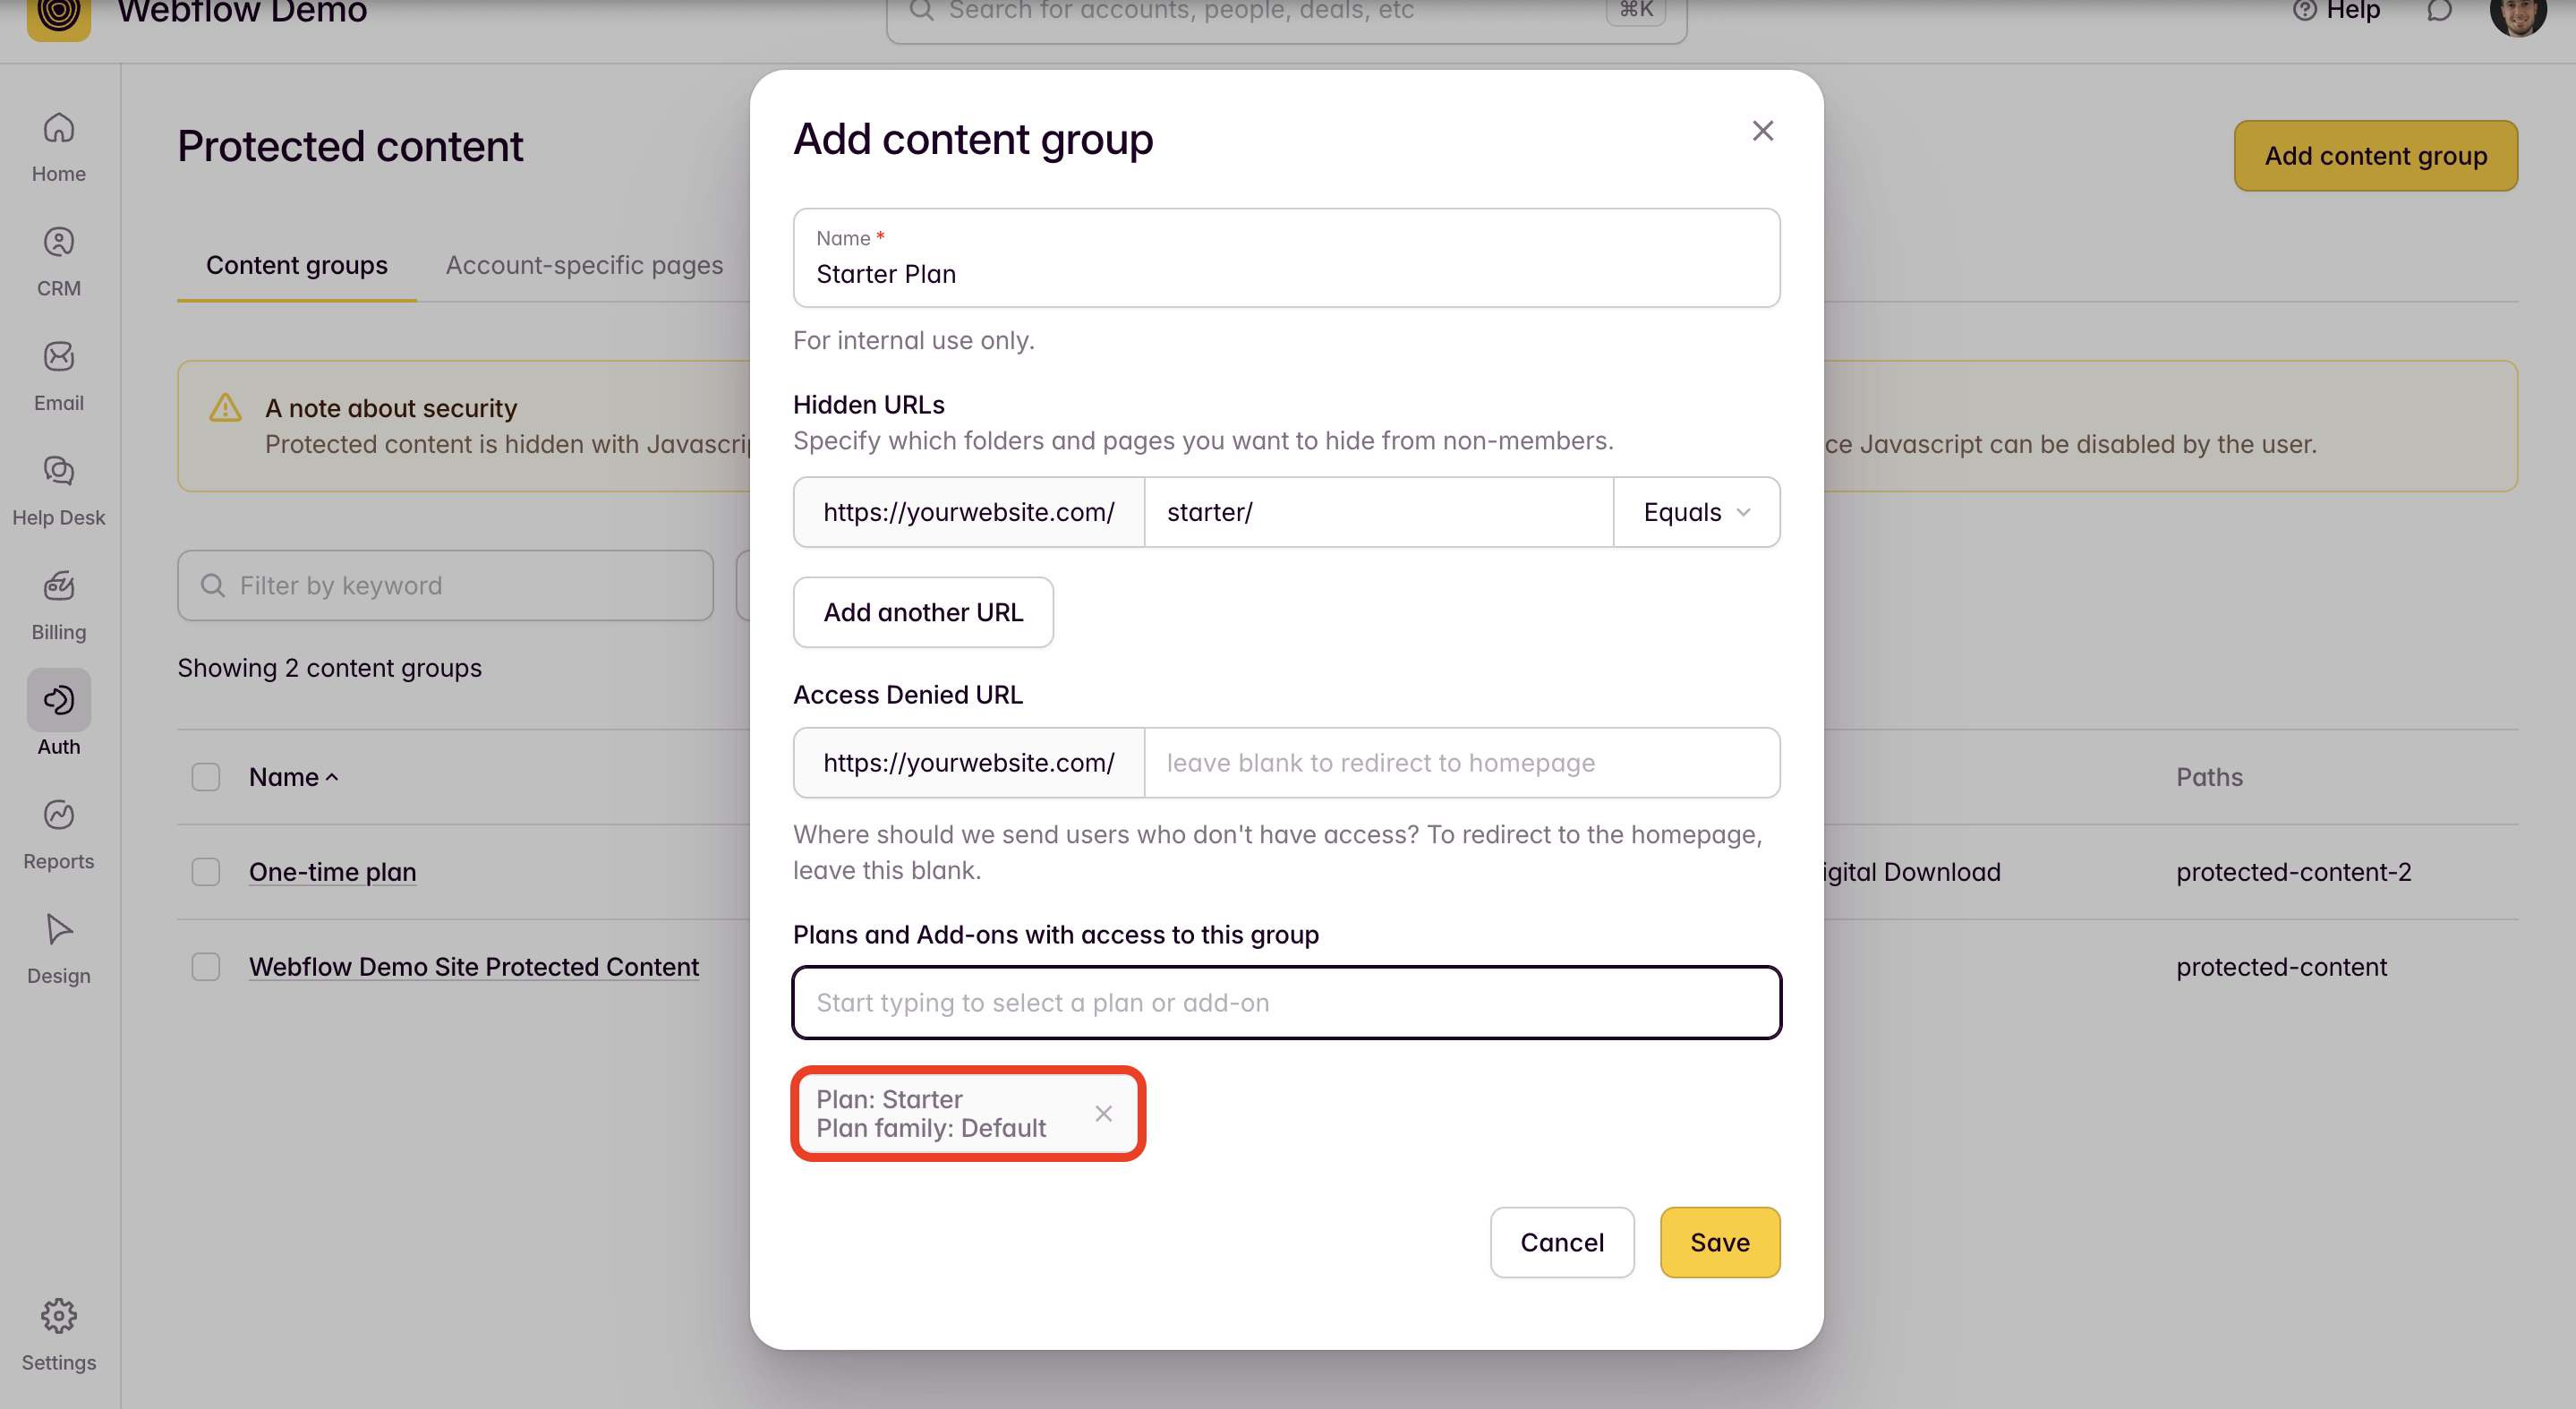
3. Add a Name that describes the content and who will have access to it.
4. Add Hidden URLs—these are the pages or folders of content that will be protected. Choose the Starts with option to protect an entire folder of content or Equals to protect a specific page of content.
IMPORTANT: You don't need to enter the full URL of the page that you want to protect—Outseta already recognizes the root of your website URL. For example, instead of entering https://www.outseta.com/starter, just enter starter.
5. You can also setup an Access Denied URL. This is where Outseta will redirect users who try to access protected content without an appropriate plan or if they haven't logged in.
6. In the Plans with access to this group start typing the names of the plans or add-ons that should have access to your protected content
In the example above, only members on the Starter plan will be able to access content in the /starter/ folder.
7. Click SAVE. Your content is now protected based on the subscription plan restrictions that you setup.
If you need any help setting up your content restrictions, please email us at support(at)outseta.com.