Outseta allows you to create account-specific pages for your website. This is a type of protected content—account-specific pages can only be accessed by members of a specific account.
This is a common feature for sites that want members to have their unique dashboard or landing page upon login. This article shows you how to manually create an account-specific page and link it to an account.
NOTE: Some website builders—like Webflow—allow you to create and publish account-specific pages automatically. If your website builder does not support programmatically creating and publishing pages, then follow the process outlined in this guide to create account-specific pages manually.
On your website
- Create a collection/folder/path to hold all your account-specific pages. In this guide, we'll use
dashboards, but you may name it whatever makes sense to your use case. - Create a page under the collection/folder/path for one of your existing accounts.
- Create a button or link to take your user to the account-specific page.
- When using a link, the link/href value should be
[data-o-account-page-link:1]:
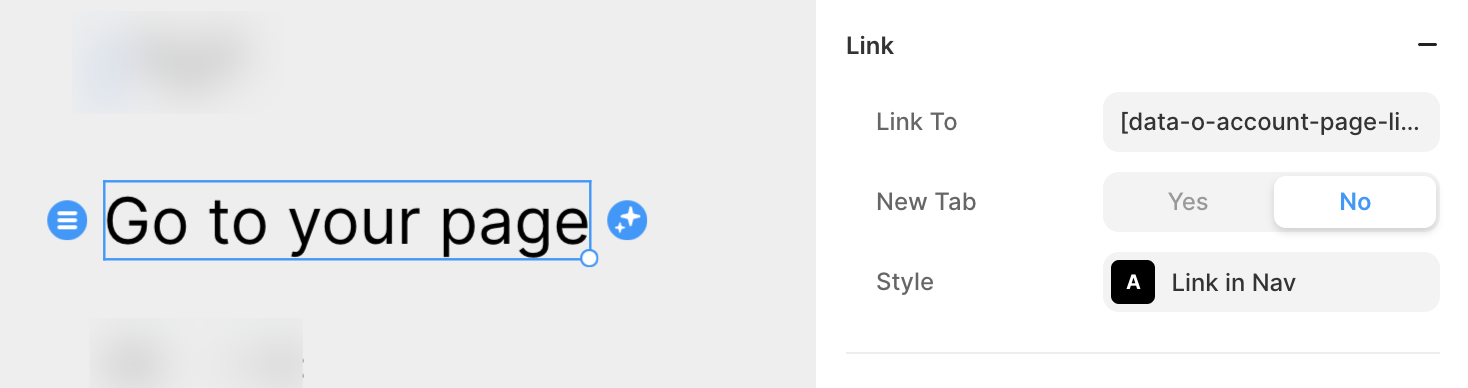
(Screenshot from Framer) - When using a button, add a data attribute named
data-o-account-page-linkwith its value set to1.
(Screenshot from Webflow)
- When using a link, the link/href value should be

In Outseta
- Use the slider to enable account-specific pages under Auth > Protected Content > Account-Specific Pages.

- Enter the name of the collection/folder/path you decided on in Step 1 of "On your site," ending with a trailing slash, ie.
dashboards/. - In the Access Denied URL field, specify where you would like to redirect users who try to access an account-specific page they should not have access to.
- Enable the Send users to their page on login option if you want to have users land on their account-specific page each time they log in. This is most often the case if you're building a membership site and are using account-specific pages as unique dashboards for each member. When manually creating account-specific pages, make sure you create a sensible "not found" page under the collection/folder/path so the user is not confused while waiting for their individual page.
- Navigate to the account you created a page for in Step 2 of "On your site."
- Select Account Info > Options > Edit account details
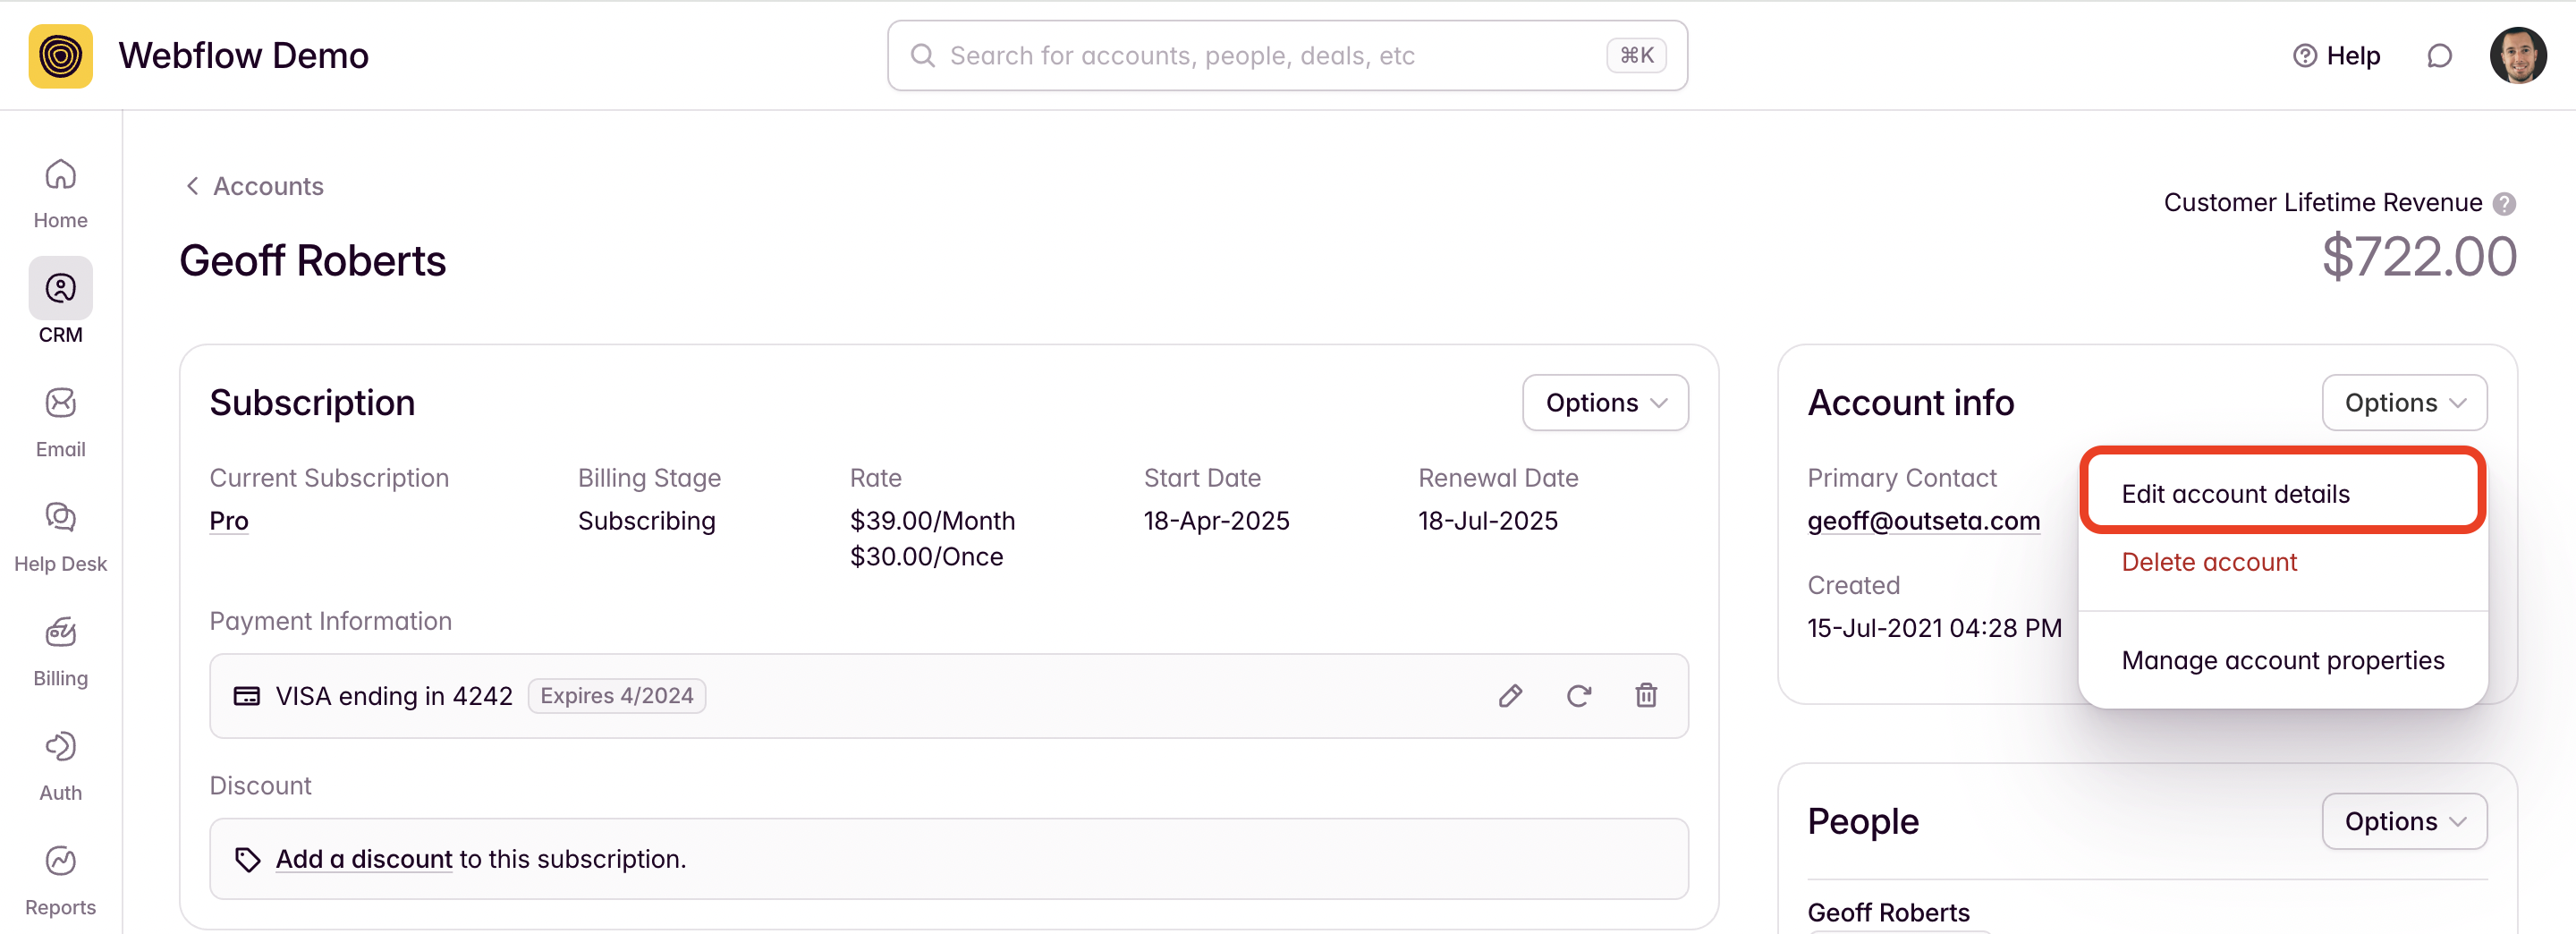
- Scroll down to the Account-specific pages section and enter the path to the page you created in Step 2 of "On your site."

- Select Account Info > Options > Edit account details
- Click SAVE. Your account specific page is now linked to this account.